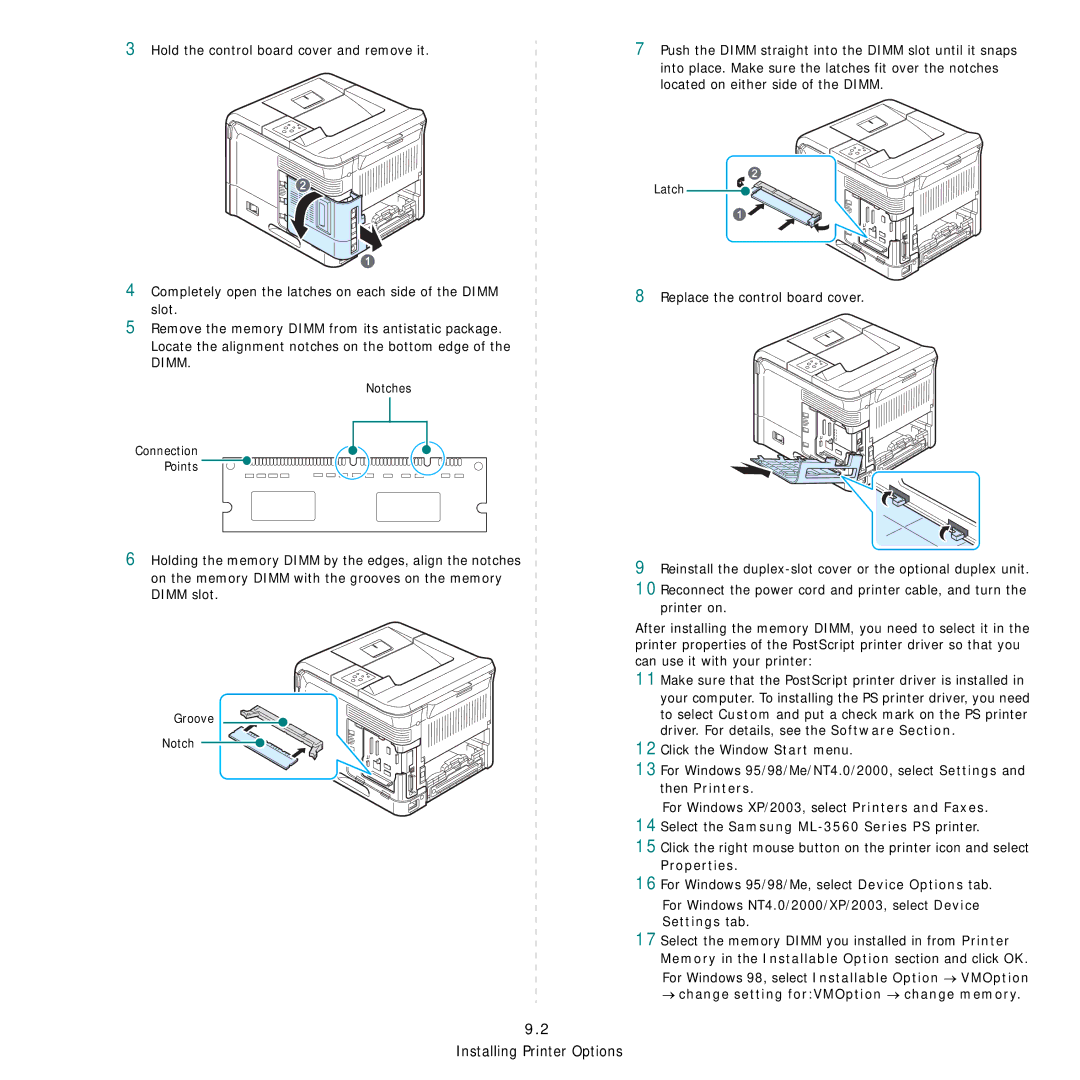
3 Hold the control board cover and remove it.
4Completely open the latches on each side of the DIMM slot.
5Remove the memory DIMM from its antistatic package.
Locate the alignment notches on the bottom edge of the
DIMM.
Notches
Connection
Points
6 Holding the memory DIMM by the edges, align the notches on the memory DIMM with the grooves on the memory DIMM slot.
Groove
Notch
9.2
Installing Printer Options
7Push the DIMM straight into the DIMM slot until it snaps into place. Make sure the latches fit over the notches located on either side of the DIMM.
Latch
8Replace the control board cover.
9Reinstall the
10Reconnect the power cord and printer cable, and turn the printer on.
After installing the memory DIMM, you need to select it in the printer properties of the PostScript printer driver so that you can use it with your printer:
11Make sure that the PostScript printer driver is installed in
your computer. To installing the PS printer driver, you need to select Custom and put a check mark on the PS printer driver. For details, see the Software Section.
12Click the Window Start menu.
13For Windows 95/98/Me/NT4.0/2000, select Settings and then Printers.
For Windows XP/2003, select Printers and Faxes.
14Select the Samsung ML-3560 Series PS printer.
15Click the right mouse button on the printer icon and select
Properties.
16For Windows 95/98/Me, select Device Options tab.
For Windows NT4.0/2000/XP/2003, select Device Settings tab.
17Select the memory DIMM you installed in from Printer
Memory in the Installable Option section and click OK. For Windows 98, select Installable Option → VMOption