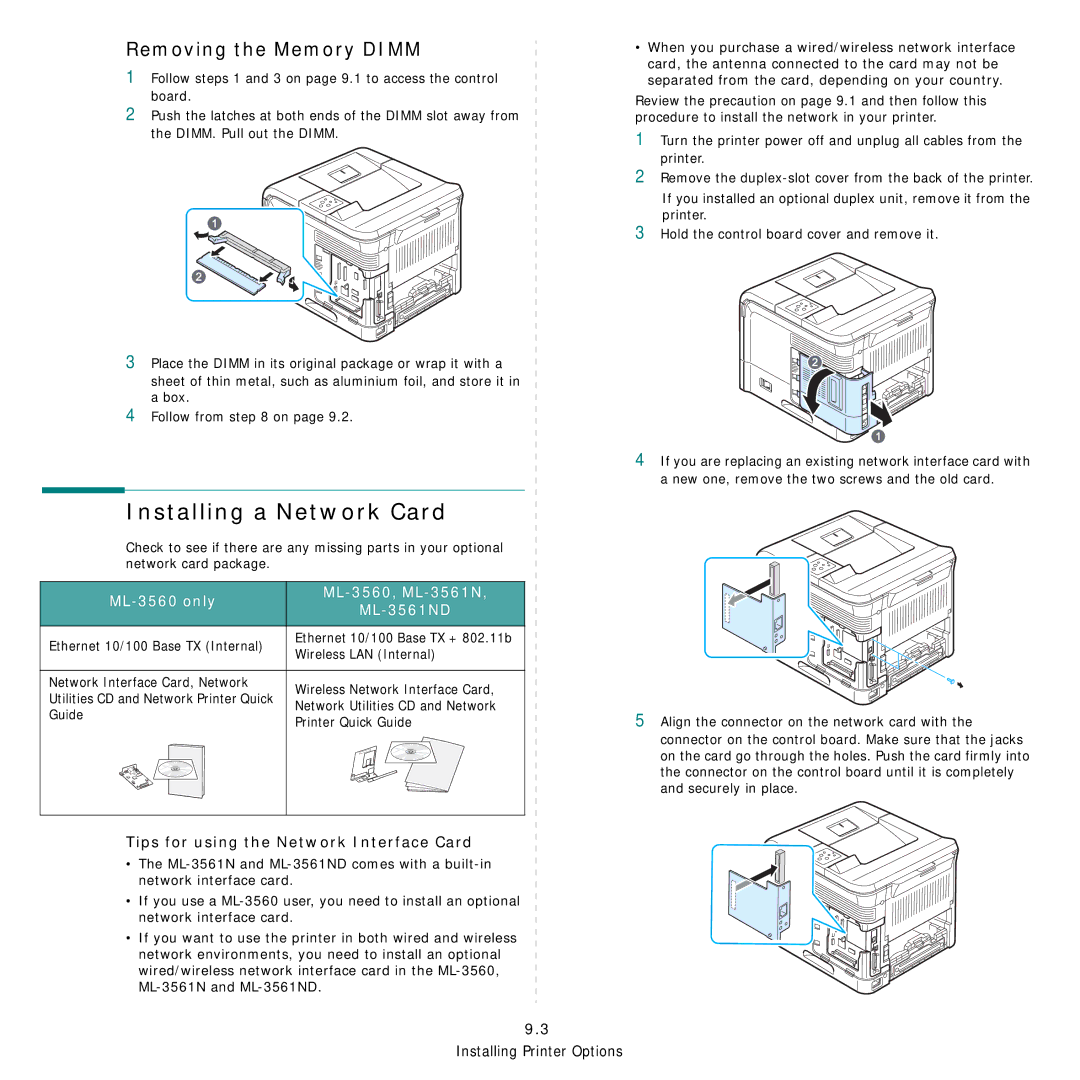
Removing the Memory DIMM
1Follow steps 1 and 3 on page 9.1 to access the control board.
2Push the latches at both ends of the DIMM slot away from the DIMM. Pull out the DIMM.
3Place the DIMM in its original package or wrap it with a
sheet of thin metal, such as aluminium foil, and store it in a box.
4Follow from step 8 on page 9.2.
Installing a Network Card
Check to see if there are any missing parts in your optional network card package.
|
| |
| ||
| ||
|
| |
Ethernet 10/100 Base TX (Internal) | Ethernet 10/100 Base TX + 802.11b | |
Wireless LAN (Internal) | ||
| ||
|
| |
Network Interface Card, Network | Wireless Network Interface Card, | |
Utilities CD and Network Printer Quick | ||
Network Utilities CD and Network | ||
Guide | ||
Printer Quick Guide | ||
| ||
|
|
•When you purchase a wired/wireless network interface card, the antenna connected to the card may not be separated from the card, depending on your country.
Review the precaution on page 9.1 and then follow this procedure to install the network in your printer.
1Turn the printer power off and unplug all cables from the printer.
2Remove the
If you installed an optional duplex unit, remove it from the printer.
3Hold the control board cover and remove it.
4If you are replacing an existing network interface card with a new one, remove the two screws and the old card.
5Align the connector on the network card with the
connector on the control board. Make sure that the jacks on the card go through the holes. Push the card firmly into the connector on the control board until it is completely and securely in place.
Tips for using the Network Interface Card
• The
•If you use a
•If you want to use the printer in both wired and wireless network environments, you need to install an optional
wired/wireless network interface card in the
9.3