Section 2: Installation
2.3 LOADING LABELS AND TAGS (CONT’D)
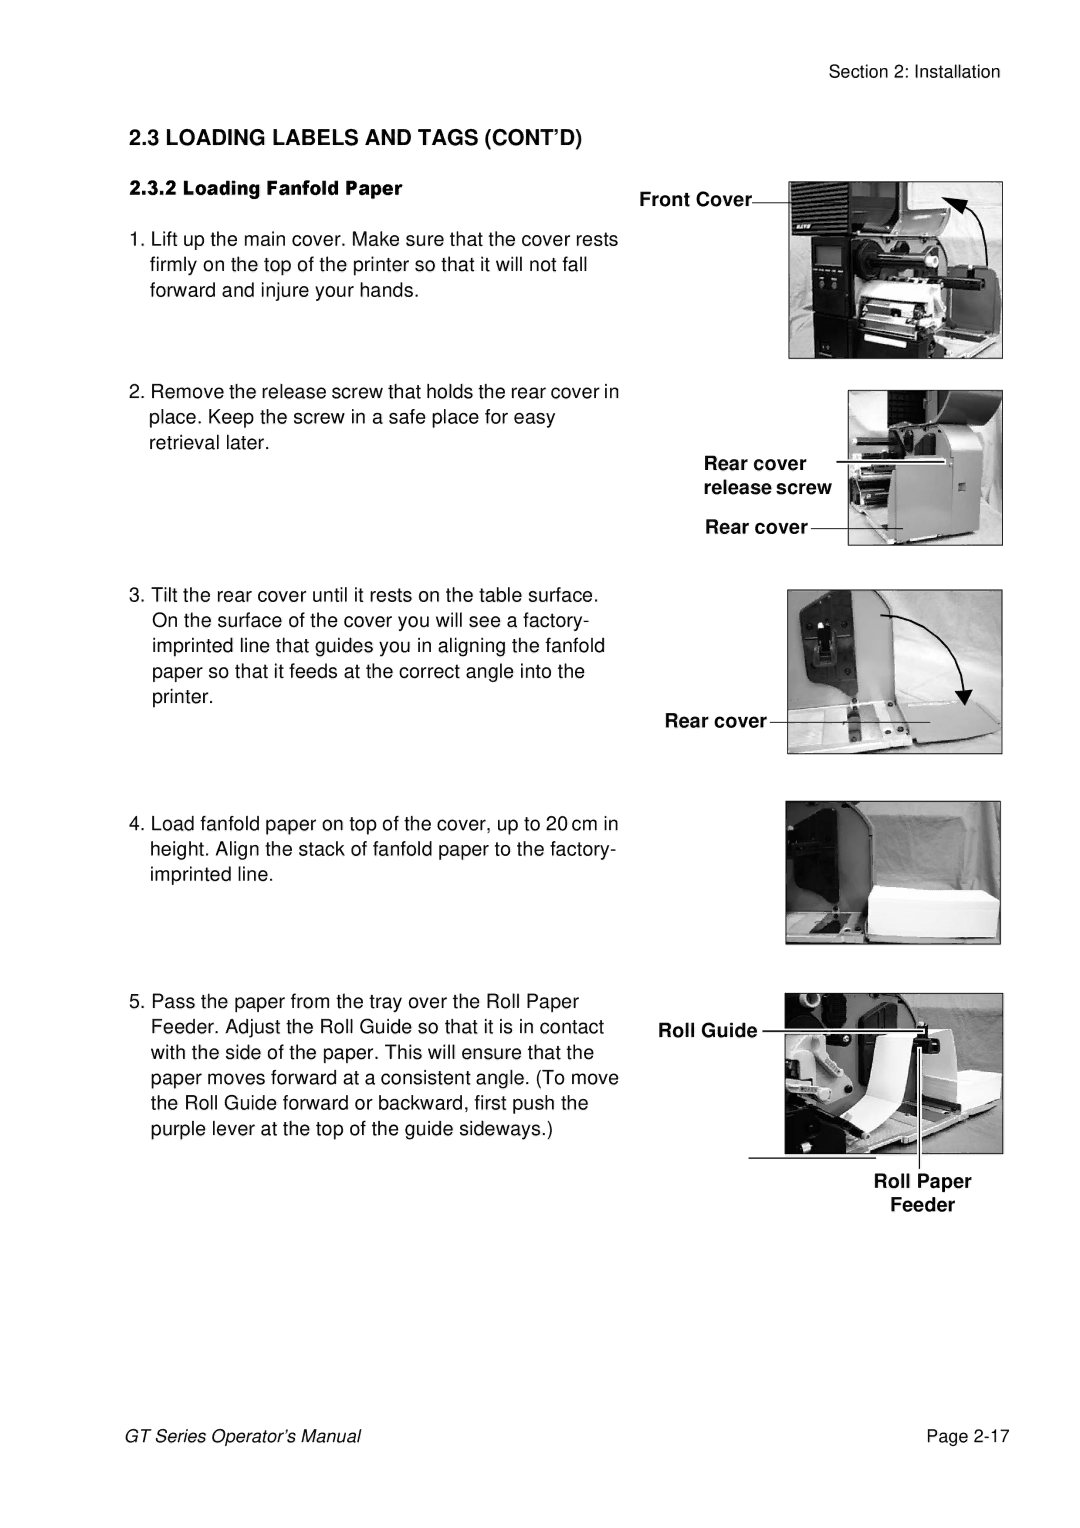
Front Cover
12.3Lift.2Loadingup the mainFanfoldcover.PaperMake sure that the cover rests firmly on the top of the printer so that it will not fall forward and injure your hands.
Remove the release screw that holds the rear cover in place. Keep the screw in safe place for easy retrieval later.
Rear cover 
 release screw
Rear cover
3Tilt the rear cover until it rests on the table surface. On the surface of the cover you will see a factory- imprinted line that guides you in aligning the fanfold
paper so that it feeds at the correct angle into the printer.
Rear cover
4. | Load fanfold paper on top of the cover, up to 20 cm in |
|
| height. Align the stack of fanfold paper to the factory- |
|
| imprinted line. |
|
5. Pass the paper from the tray over the Roll Paper |
| |
| Feeder. Adjust the Roll Guide so that it is in contact | Roll Guide |
| with the side of the paper. This will ensure that the |
|
| paper moves forward at a consistent angle. (To move |
|
| the Roll Guide forward or backward, first push the |
|
| purple lever at the top of the guide sideways.) |
|
Roll Paper
Feeder
GT Series Operator’s Manual | Page |