SECTION 2: INSTALLATION
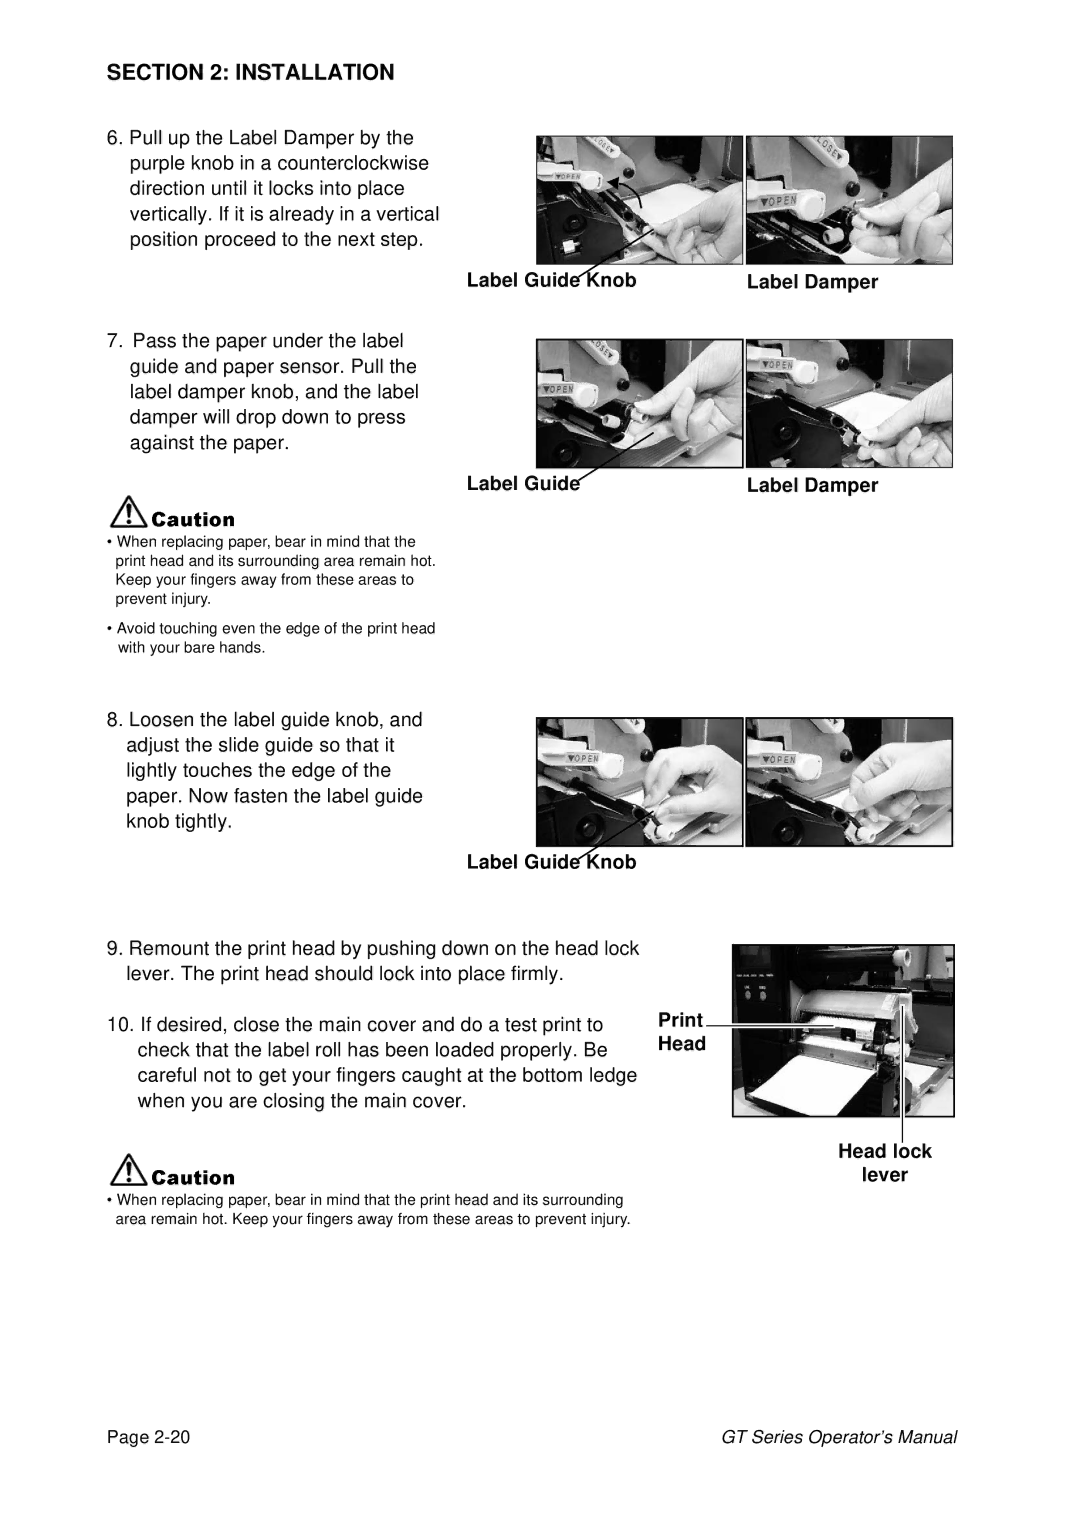
6.Pull up the Label Damper by the purple knob in a counterclockwise
direction until it locks into place vertically. If it is already in a vertical position proceed to the next step.
Label Guide Knob | Label Damper |
7.Pass the paper under the label guide and paper sensor. Pull the label damper knob, and the label damper will drop down to press against the paper.
Label Guide | Label Damper |
•WhenCautionreplacing paper, bear in mind that the print head and its surrounding area remain hot. Keep your fingers away from these areas to prevent injury.
•Avoid touching even the edge of the print head with your bare hands.
8.Loosen the label guide knob, and adjust the slide guide so that it lightly touches the edge of the paper. Now fasten the label guide knob tightly.
Label Guide Knob
9.Remount the print head by pushing down on the head lock lever. The print head should lock into place firmly.
10. If desired, close the main cover and do a test print to |
| |
| ||
check that the label roll has been loaded properly. Be | Head | |
|
| |
careful not to get your fingers caught at the bottom ledge |
|
|
when you are closing the main cover. |
|
|
•WhenCautionreplacing paper, bear in mind that the print head and its surrounding area remain hot. Keep your fingers away from these areas to prevent injury.
Head lock
lever
Page | GT Series Operator’s Manual |