Section 2: Installation
2.3 LOADING LABELS AND TAGS (CONT’D)
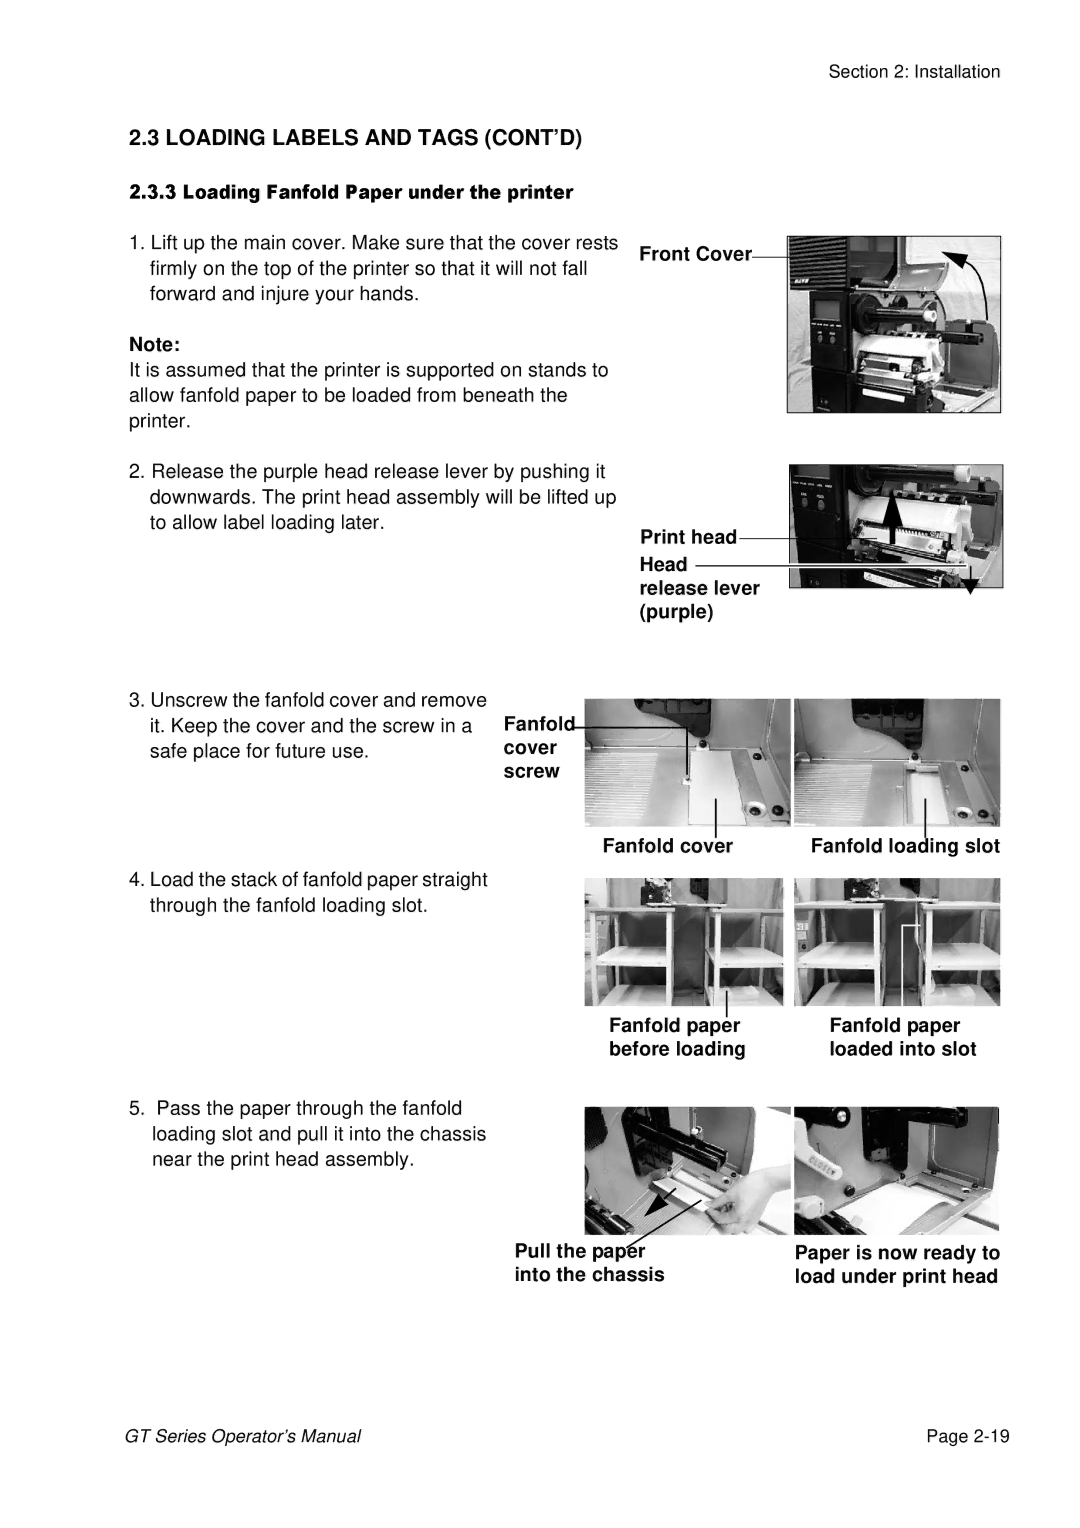
12.3Lift.3Loadingup the mainFanfoldcover.PaperMake sureunderthatthetheprintercover rests Front Cover![]()
![]() firmly on the top of the printer so that it will not fall
firmly on the top of the printer so that it will not fall![]()
forward and injure your hands.
Note:
It is assumed that the printer is supported on stands to allow fanfold paper to be loaded from beneath the printer.
Release the purple head release lever by pushing it downwards. The print head assembly will be lifted up to allow label loading later.
Print head Head ![]() release lever (purple)
release lever (purple)
3. Unscrew the fanfold cover and remove |
|
|
|
it. Keep the cover and the screw in a | Fanfold |
|
|
|
| ||
safe place for future use. | cover |
| |
| screw |
| |
|
| ||
Fanfold cover | Fanfold loading slot |
4.Load the stack of fanfold paper straight through the fanfold loading slot.
Fanfold paper | Fanfold paper |
before loading | loaded into slot |
5.Pass the paper through the fanfold loading slot and pull it into the chassis near the print head assembly.
Pull the paper | Paper is now ready to |
into the chassis | load under print head |
GT Series Operator’s Manual | Page |