Setting the Date and Time
Setting the Date and Time
The date and time appear in the display and are printed at the top of every page you fax.
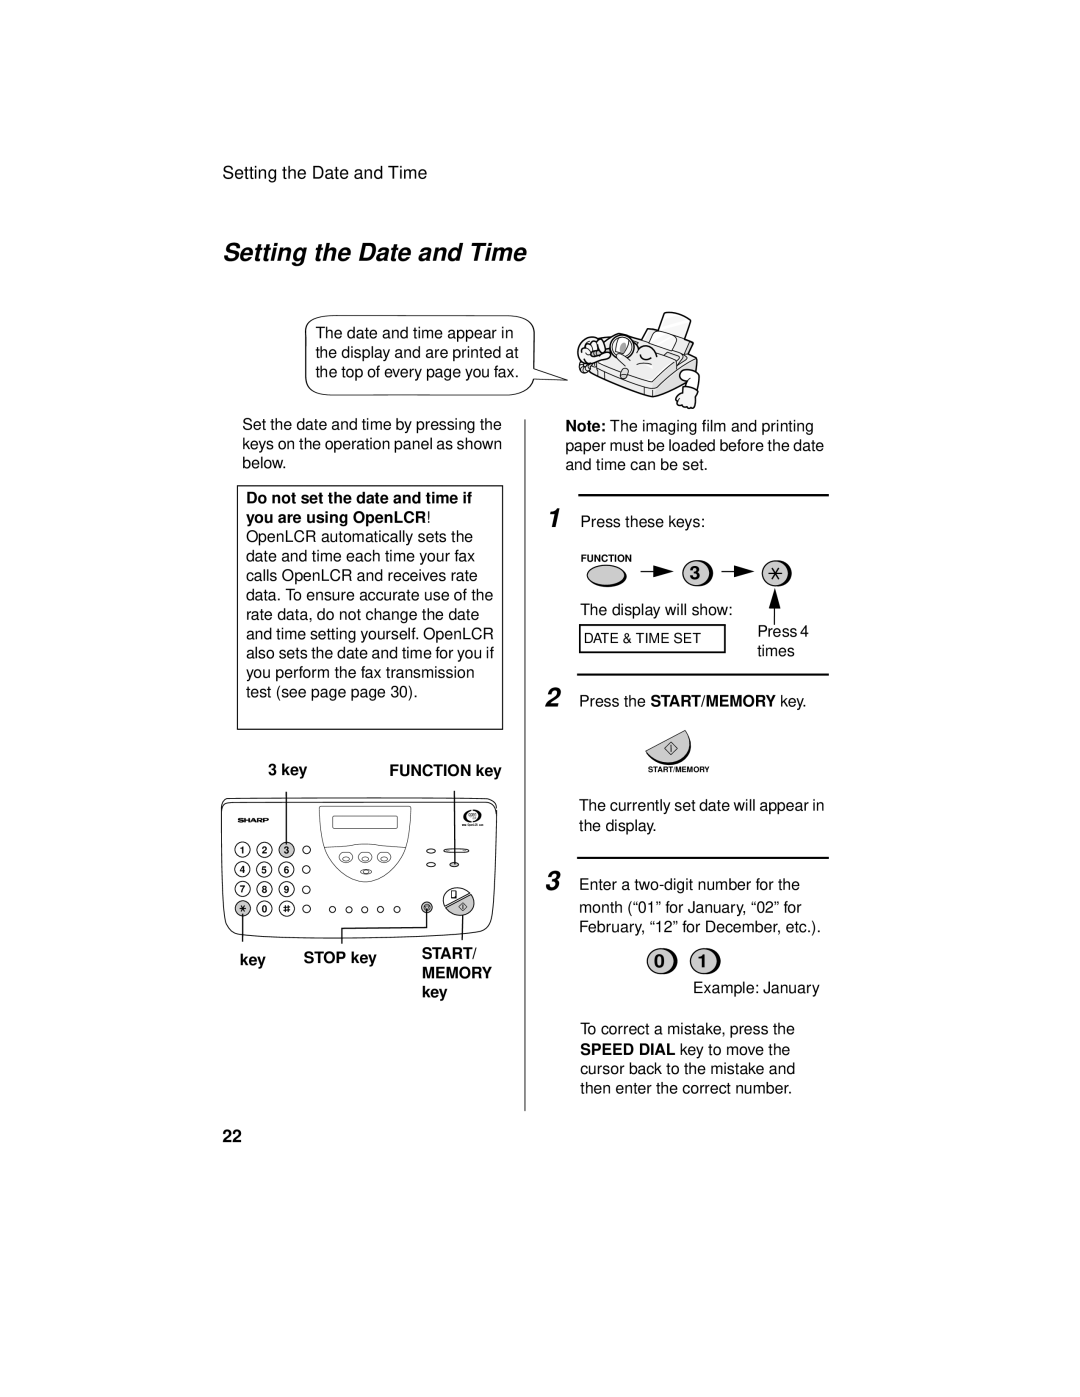
Set the date and time by pressing the keys on the operation panel as shown below.
Do not set the date and time if you are using OpenLCR!
OpenLCR automatically sets the date and time each time your fax calls OpenLCR and receives rate data. To ensure accurate use of the rate data, do not change the date and time setting yourself. OpenLCR also sets the date and time for you if you perform the fax transmission test (see page page 30).
|
| 3 key | FUNCTION key |
|
|
| open |
|
|
| LCR |
1 | 2 | 3 |
|
4 | 5 | 6 |
|
7 | 8 | 9 |
|
| 0 |
|
|
* key | STOP key | START/ |
|
| MEMORY |
|
| key |
Note: The imaging film and printing paper must be loaded before the date and time can be set.
1 Press these keys:
FUNCTION
3
The display will show:
DATE & TIME SET | Press 4 | |
times | ||
| ||
|
2 Press the START/MEMORY key.
START/MEMORY
•The currently set date will appear in the display.
3 Enter a
0 1
Example: January
•To correct a mistake, press the SPEED DIAL key to move the cursor back to the mistake and then enter the correct number.
22
