Chapter 9 Troubleshooting
Clearing Jams 3 and 4
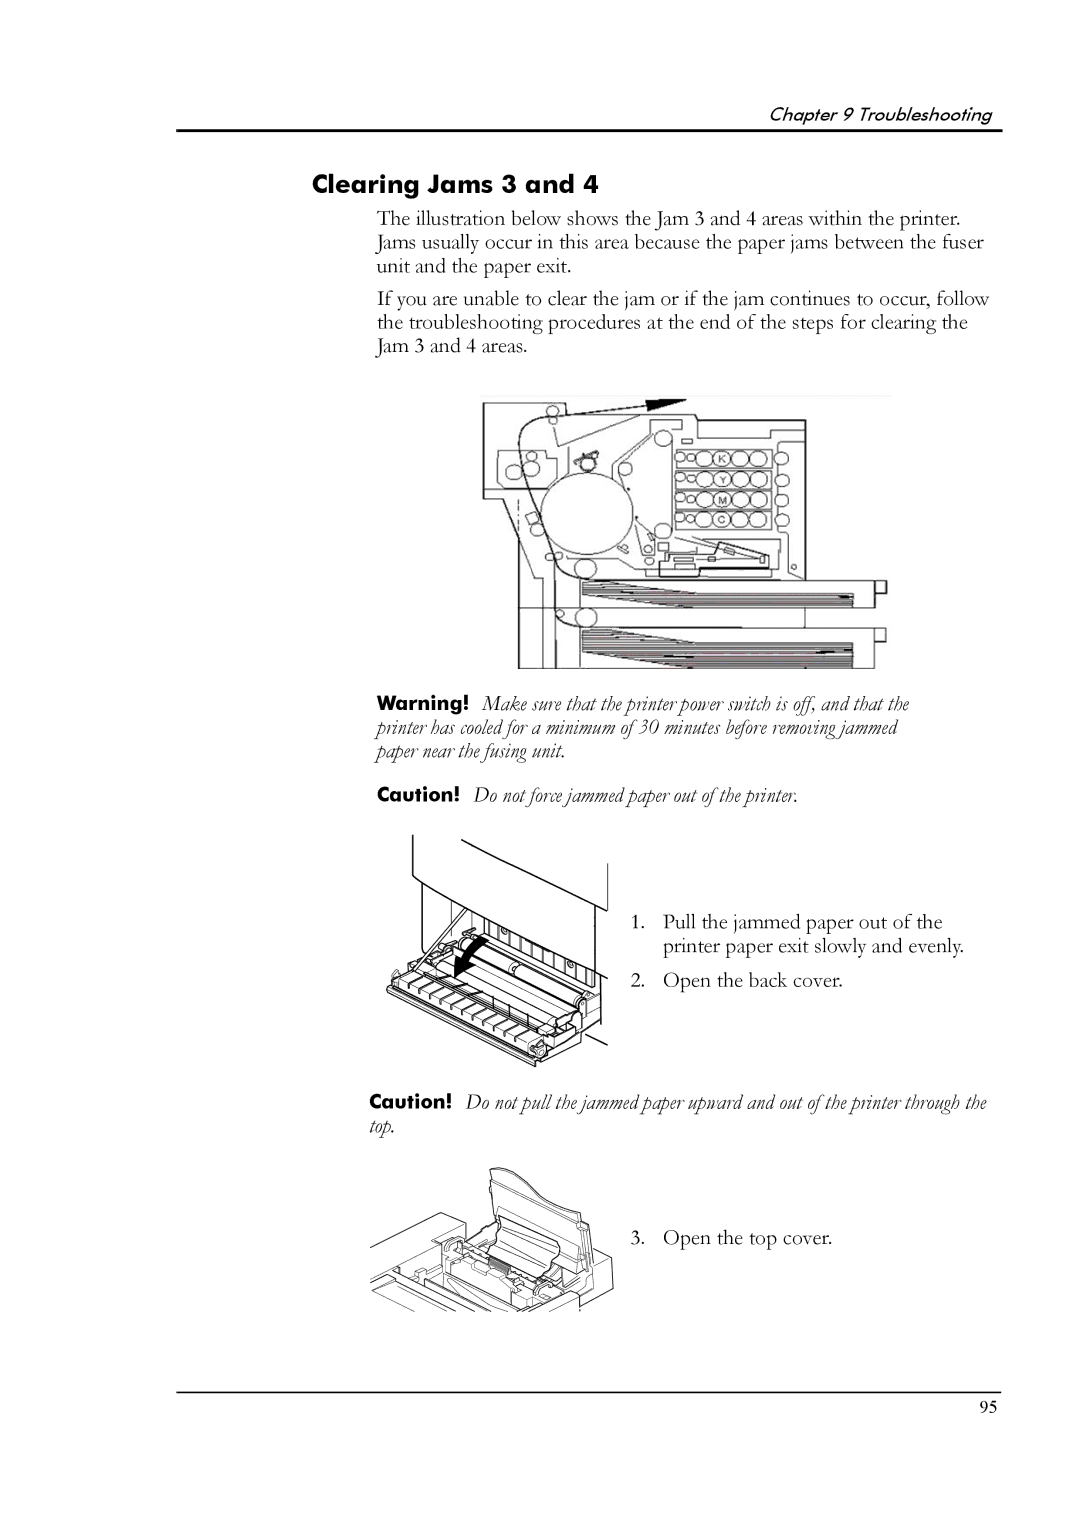
The illustration below shows the Jam 3 and 4 areas within the printer. Jams usually occur in this area because the paper jams between the fuser unit and the paper exit.
If you are unable to clear the jam or if the jam continues to occur, follow the troubleshooting procedures at the end of the steps for clearing the Jam 3 and 4 areas.
Warning! Make sure that the printer power switch is off, and that the printer has cooled for a minimum of 30 minutes before removing jammed paper near the fusing unit.
Caution! Do not force jammed paper out of the printer.
1. Pull the jammed paper out of the printer paper exit slowly and evenly.
2. Open the back cover.
Caution! Do not pull the jammed paper upward and out of the printer through the top.
3. Open the top cover.
95
