Chapter 3 Installing Printer Drivers and Utilities
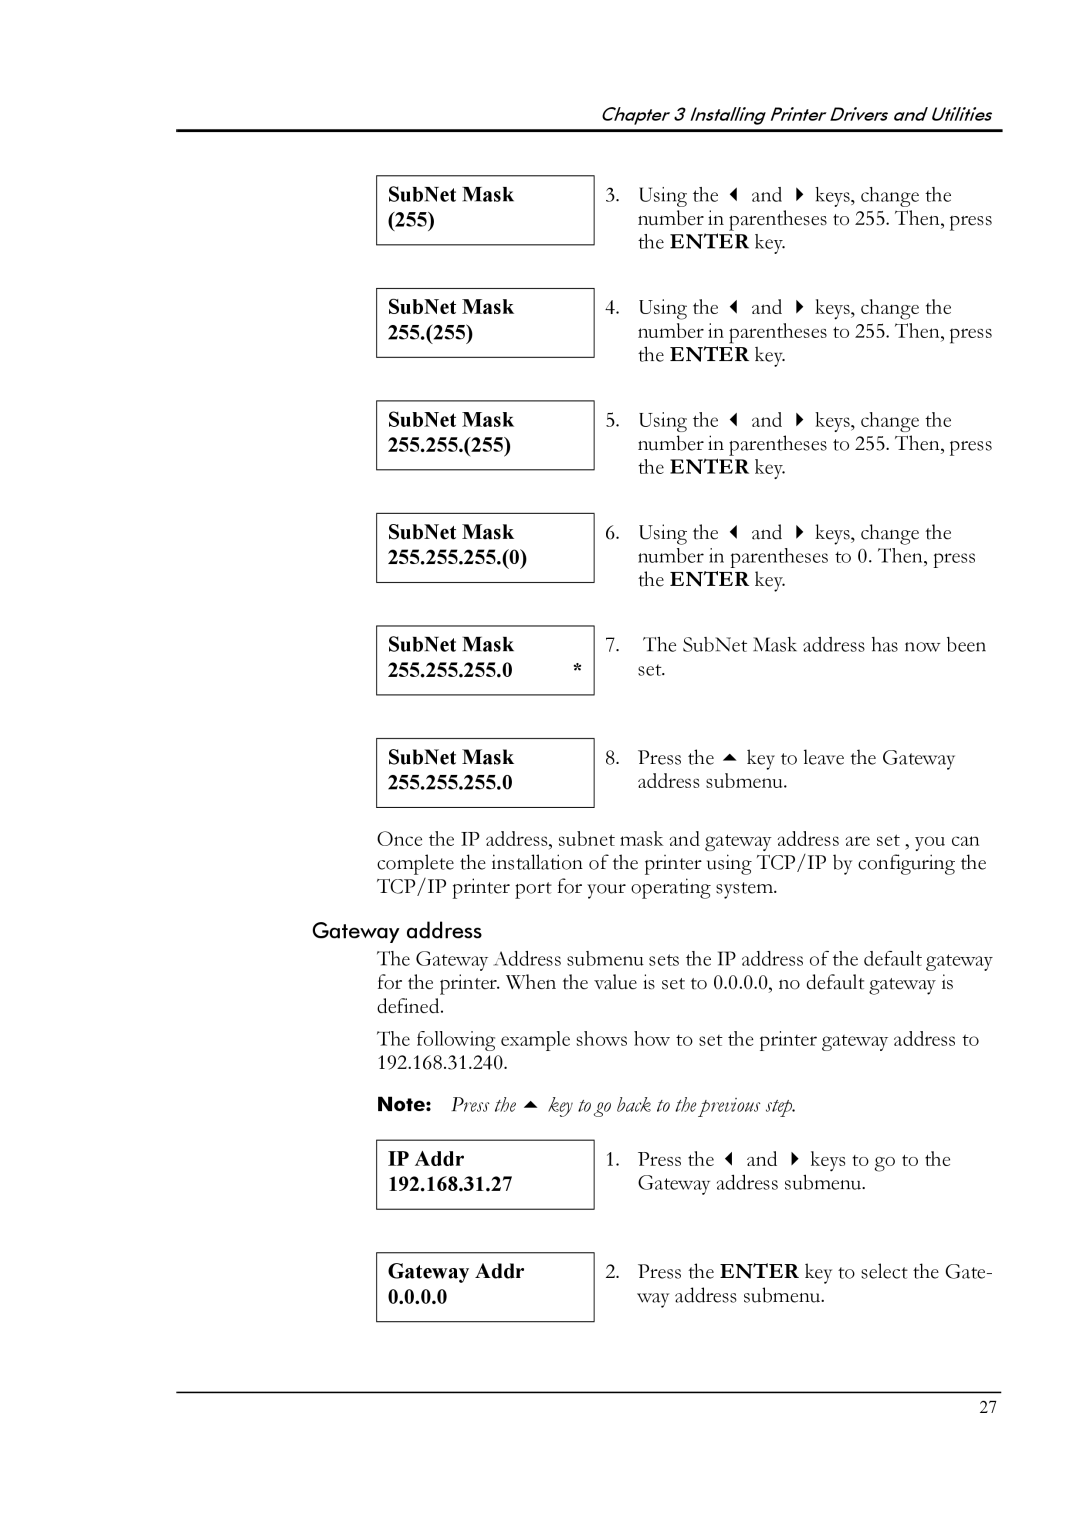
SubNet Mask (255)
SubNet Mask 255.(255)
SubNet Mask 255.255.(255)
3. | Using the | and | keys, change the |
| number in parentheses to 255. Then, press | ||
| the ENTER key. |
| |
4. | Using the | and | keys, change the |
| number in parentheses to 255. Then, press | ||
| the ENTER key. |
| |
5. | Using the | and | keys, change the |
| number in parentheses to 255. Then, press | ||
| the ENTER key. |
| |
SubNet Mask 255.255.255.(0)
6. Using the and keys, change the number in parentheses to 0. Then, press the ENTER key.
SubNet Mask
255.255.255.0 *
7.The SubNet Mask address has now been set.
SubNet Mask 255.255.255.0
8. Press the key to leave the Gateway address submenu.
Once the IP address, subnet mask and gateway address are set , you can complete the installation of the printer using TCP/IP by configuring the TCP/IP printer port for your operating system.
Gateway address
The Gateway Address submenu sets the IP address of the default gateway for the printer. When the value is set to 0.0.0.0, no default gateway is defined.
The following example shows how to set the printer gateway address to 192.168.31.240.
Note: Press the key to go back to the previous step.
IP Addr 192.168.31.27
Gateway Addr 0.0.0.0
1. Press the and keys to go to the Gateway address submenu.
2.Press the ENTER key to select the Gate- way address submenu.
27
