INSTALLATION PROCEDURE FOR OPTIONAL EQUIPMENT
(Revision Date: Jan. 19, 2006)
6. Real Time Clock:
NOTES: 1. Place the battery with the “+” mark facing up.
2.A new battery is supposed to last about 2 years or more, but it varies depending on the operating conditions. When a new battery is loaded, write down the battery replacement date on a supplied battery sticker, and attach it to the reverse side of the Side Panel as a reminder.
Battery Sticker
Reverse side of Side Panel
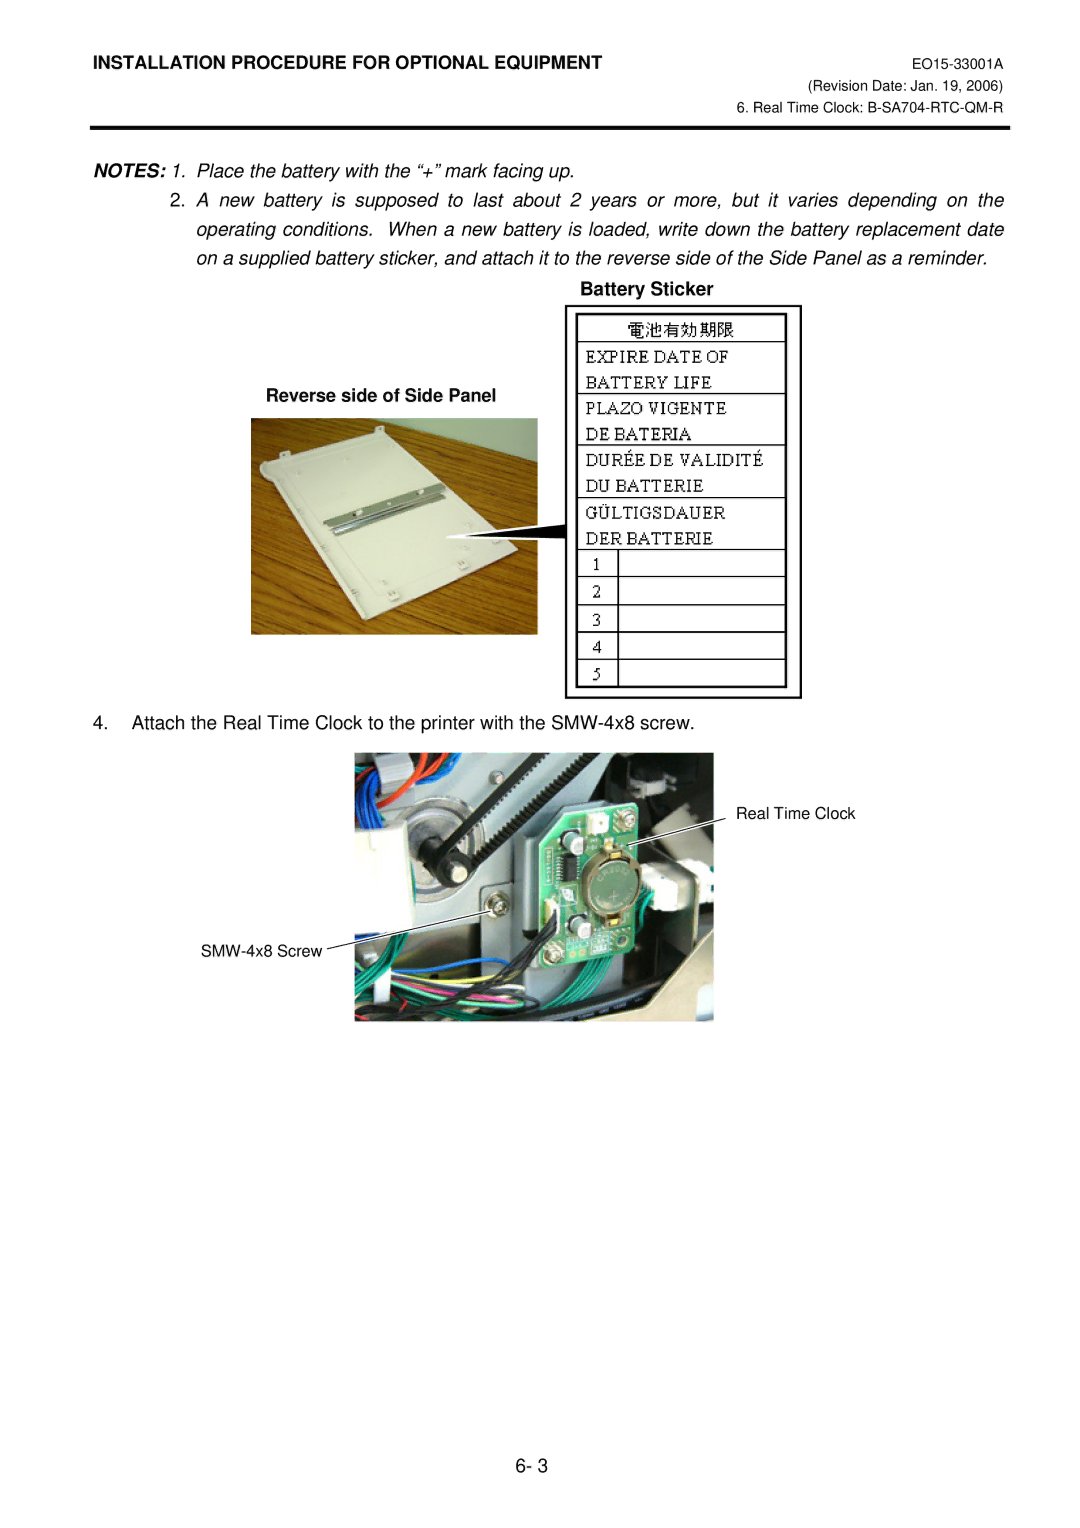
4.Attach the Real Time Clock to the printer with the
Real Time Clock
![]()
6- 3