INSTALLATION PROCEDURE FOR OPTIONAL EQUIPMENT
(Revision Date: Jan. 19, 2006)
6. Real Time Clock:
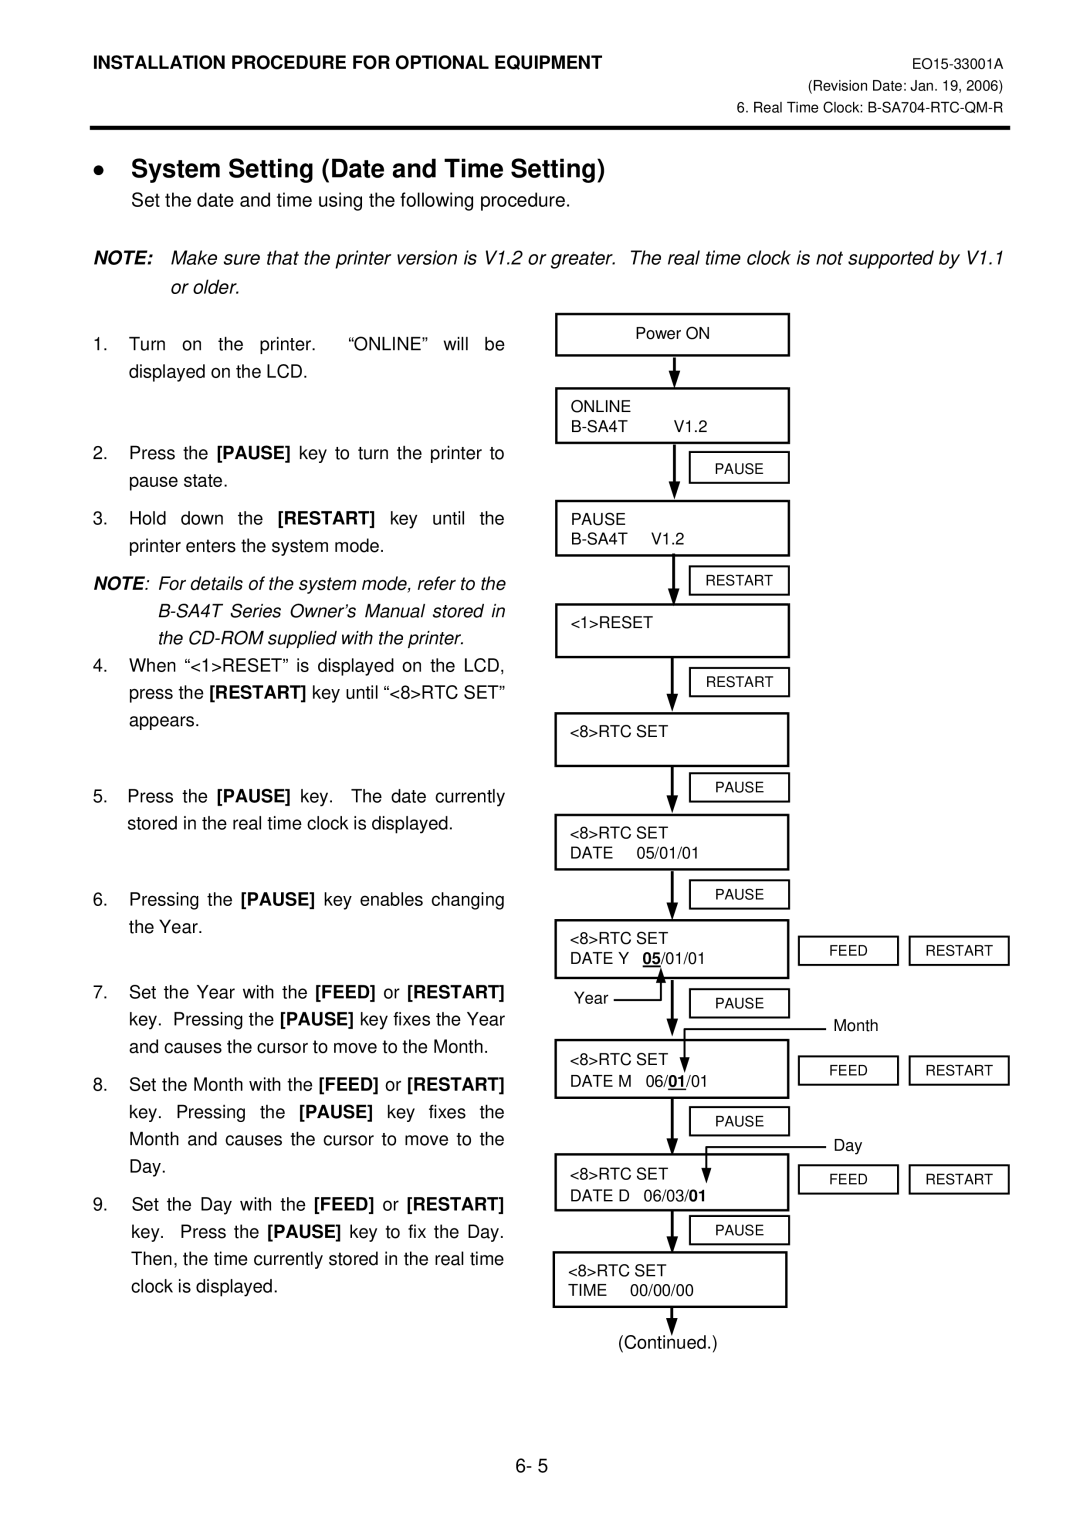
•System Setting (Date and Time Setting)
Set the date and time using the following procedure.
NOTE: Make sure that the printer version is V1.2 or greater. The real time clock is not supported by V1.1 or older.
1.Turn on the printer. “ONLINE” will be displayed on the LCD.
2.Press the [PAUSE] key to turn the printer to pause state.
3.Hold down the [RESTART] key until the printer enters the system mode.
NOTE: For details of the system mode, refer to the
4.When “<1>RESET” is displayed on the LCD, press the [RESTART] key until “<8>RTC SET” appears.
5.Press the [PAUSE] key. The date currently stored in the real time clock is displayed.
6.Pressing the [PAUSE] key enables changing the Year.
7.Set the Year with the [FEED] or [RESTART] key. Pressing the [PAUSE] key fixes the Year and causes the cursor to move to the Month.
8.Set the Month with the [FEED] or [RESTART] key. Pressing the [PAUSE] key fixes the Month and causes the cursor to move to the Day.
9.Set the Day with the [FEED] or [RESTART] key. Press the [PAUSE] key to fix the Day. Then, the time currently stored in the real time clock is displayed.
Power ON
ONLINE
PAUSE
PAUSE
RESTART
<1>RESET
RESTART
<8>RTC SET
PAUSE
<8>RTC SET DATE 05/01/01
PAUSE
<8>RTC SET DATE Y 05/01/01
Year |
|
|
|
|
|
|
| PAUSE | |
|
| |||
|
|
|
|
|
<8>RTC SET DATE M 06/01/01
PAUSE
<8>RTC SET ![]() DATE D 06/03/01
DATE D 06/03/01
PAUSE
<8>RTC SET TIME 00/00/00
FEED |
| RESTART |
|
|
|
Month
FEED |
| RESTART |
|
|
|
Day
FEED |
| RESTART |
|
|
|
(Continued.)
6- 5