Contents
CS/2500 Series
3Com Corporation 5400 Bayfront Plaza Santa Clara, California
Iii
Page
Contents
Installation
Maintenance and Upgrades
PIN Assignments
Technical Support
Page
Figures
Tables
Conventions
About this Guide
Introduction
Audience
This Typeface
Italics Italics are used to denote new terms or emphasis
About this Guide
Ten standard RS-232-D electrical interfaces
Features
Features
Overview
Software
Compatibility
SW/2500, can be used only with the CS/2500 and CS/2600
Panel, see Back Panel on
Chassis
Hardware Interrupt
Front Panel
Its +5 V DC output
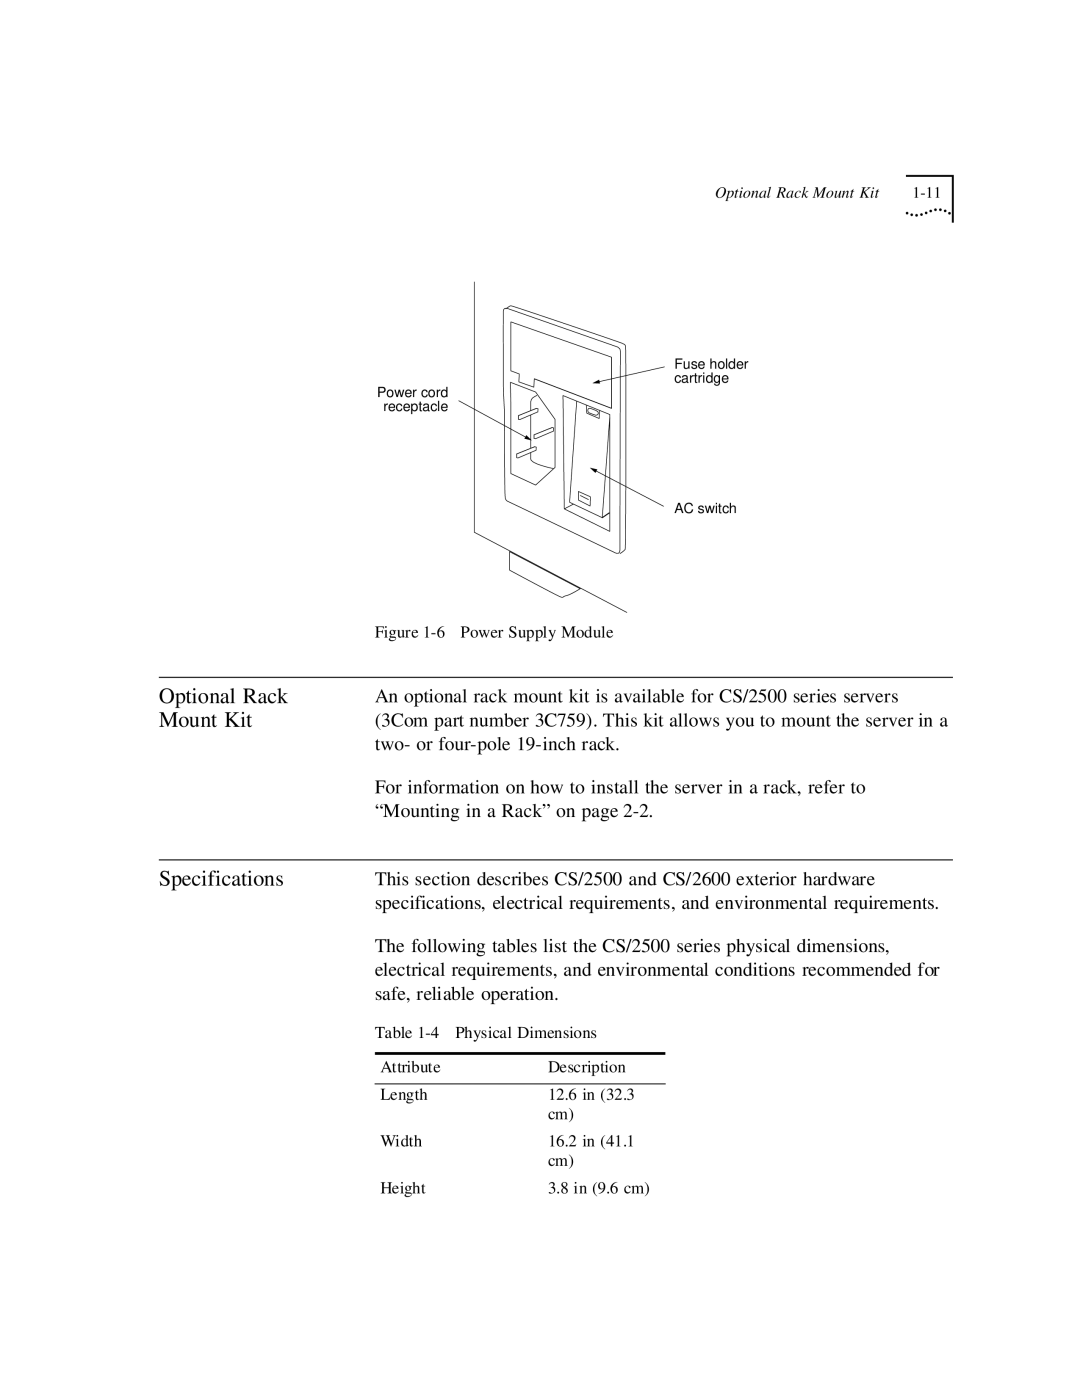
Power supply module and three types of connectors
Back Panel
CS/2500 and CS/2600 back panel, shown in -5, contains
Overview
Back Panel
Overview
Specifications
Optional Rack
Mount Kit
VAC
Installation
Do the following before beginning the installation
Preparation
Installation
Install brackets
Cabling the Server
To the Network
Turning on the server
All ports are set to terminal SETDefault -TERM DeVice =
Installation
End to the transceiver
Slide-lock connection on the server
Install brackets
Modifying
Configuration
AC power source must meet the requirements outlined
Configuration, and Appendix C, Monitor Utility
Installation
Startup
Guide or software release notes
Diskette
Booting from
Diskette
Rbcs files
Startup
3Com Corporation CS/2000 Series Monitor
Reading...OK Insert copy and hit return to continue
Parameter changes
Shutting Down
Boot Problems
Normal Startup
Messages
Shutting Down
Startup
Configuration
Entering
Firmware Monitor
Configuration
Procedure
Changing
Following menu is displayed
SLP
Changing the Configuration
Configuration
Changing the Configuration
SLP, and Trivial File Transfer Protocol Tftp
Used with 3Com Network Control Servers NCSs Com no longer
Next section
Tftp
Type B Change IP/TFTP Parameters menu appears
Configuration
Bootp
Emulating a
CS/2000 or CS/2100
Software and to operate in mixed environments
Changing Port
Configuration
Changing Port Configuration
Configuration
Maintenance
Maintenance and Upgrades
Maintenance
3Com recommends the following procedures for preventive
Maintenance and Upgrades
Maintenance
Reinstall the fuseholder cartridge in the receptacle
Upgrade procedures require you to remove the server cover
Upgrades
Removing the Server Cover
Rear
Grasp both sides of the cover and carefully lift it off
8-F
Pull taut to expose screw
Voltages. There are no user-serviceable parts inside
Upgrades
Remove Connector from
Each pin must be inserted properly into its socket
Replace the cover, as described in the next section
EPROM. Each pin must be inserted properly into its socket
Upgrades
Maintenance and Upgrades
Troubleshooting
Troubleshooting
Operating Problems
Troubleshooting
Memory Dump
Procedures
Enter the density of the dump diskettes
Return to use the default density 2mb
Troubleshooting
PIN Assignments
Figure A-1 Serial Connector Pin Numbering
TXD
DTE
Transceiver
DO-S
Slct
Startup Messages
Appendix B Startup Messages
Monitor Utility
You can access the monitor in either of the following ways
Set the Auto-reboot parameter to Boot monitor
Continuous Self-Test and Initial Boot Source parameters
Nonfunctional
Dump Procedures on
Memory dumps, refer to Memory Dump Procedures on
-2 on page 1-4. The switch is recessed into a round hole to
Become nonfunctional, enter the following command
Syntax BT
From memory location
Procedures on
Using this menu, refer to , Configuration
Filename and address parameters specify the name
Description Repeats the previous command
On-line Technical
Services
3Com Bulletin Board Service 3ComBBS
Technical Support
Press Return to see the ThreeComForum main menu
Country Telephone Number Hong Kong 852 2537 44 1442 408 727
Appendix D Technical Support
Returning Products
For Repair
Sender’s expense To obtain an RMA number, call or fax
10/25/95
Numerics
Index
Cover
Index
Index
Index
Index
Limited Warranty
Bayfront Plaza Santa Clara, CA 408 764-5000 1/1/94