Upgrades
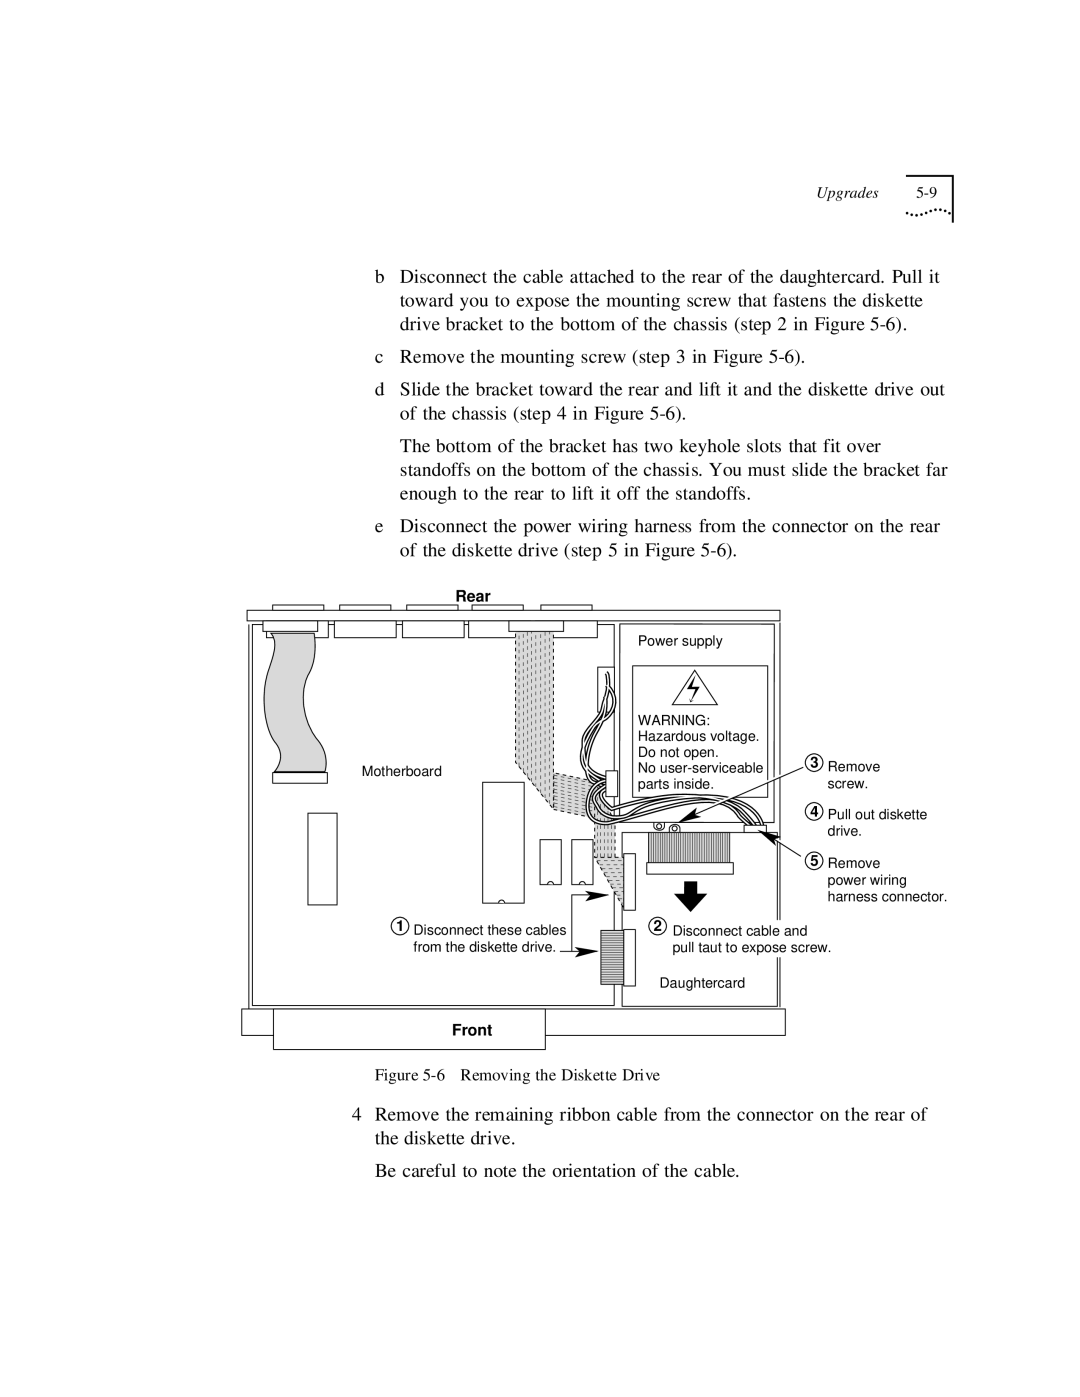
bDisconnect the cable attached to the rear of the daughtercard. Pull it toward you to expose the mounting screw that fastens the diskette drive bracket to the bottom of the chassis (step 2 in Figure
cRemove the mounting screw (step 3 in Figure
dSlide the bracket toward the rear and lift it and the diskette drive out of the chassis (step 4 in Figure
The bottom of the bracket has two keyhole slots that fit over standoffs on the bottom of the chassis. You must slide the bracket far enough to the rear to lift it off the standoffs.
eDisconnect the power wiring harness from the connector on the rear of the diskette drive (step 5 in Figure
Rear
| Power supply |
|
|
| WARNING: |
|
|
| Hazardous voltage. |
|
|
| Do not open. | 3 | Remove |
Motherboard | No | ||
| parts inside. |
| screw. |
|
| 4 | Pull out diskette |
|
|
| drive. |
5 Remove power wiring harness connector.
1 Disconnect these cables | 2 | Disconnect cable and |
from the diskette drive. |
| pull taut to expose screw. |
| Daughtercard | |
Front
Figure 5-6 Removing the Diskette Drive
4Remove the remaining ribbon cable from the connector on the rear of the diskette drive.
Be careful to note the orientation of the cable.
