Plotting of Move
At any time after the setup parameters are downloaded to the control, you may proceed to the plotting routine. Plot allows you to verify that the parameter values you entered provide adequate system response.
In this section, you will inform the software what move to perform. You will enter time (for the move), direction (CW or CCW) and speed. It is recommended that you start with low speeds and short time periods (i.e. 0.5 sec) until you get a feel for your system.
Control Window
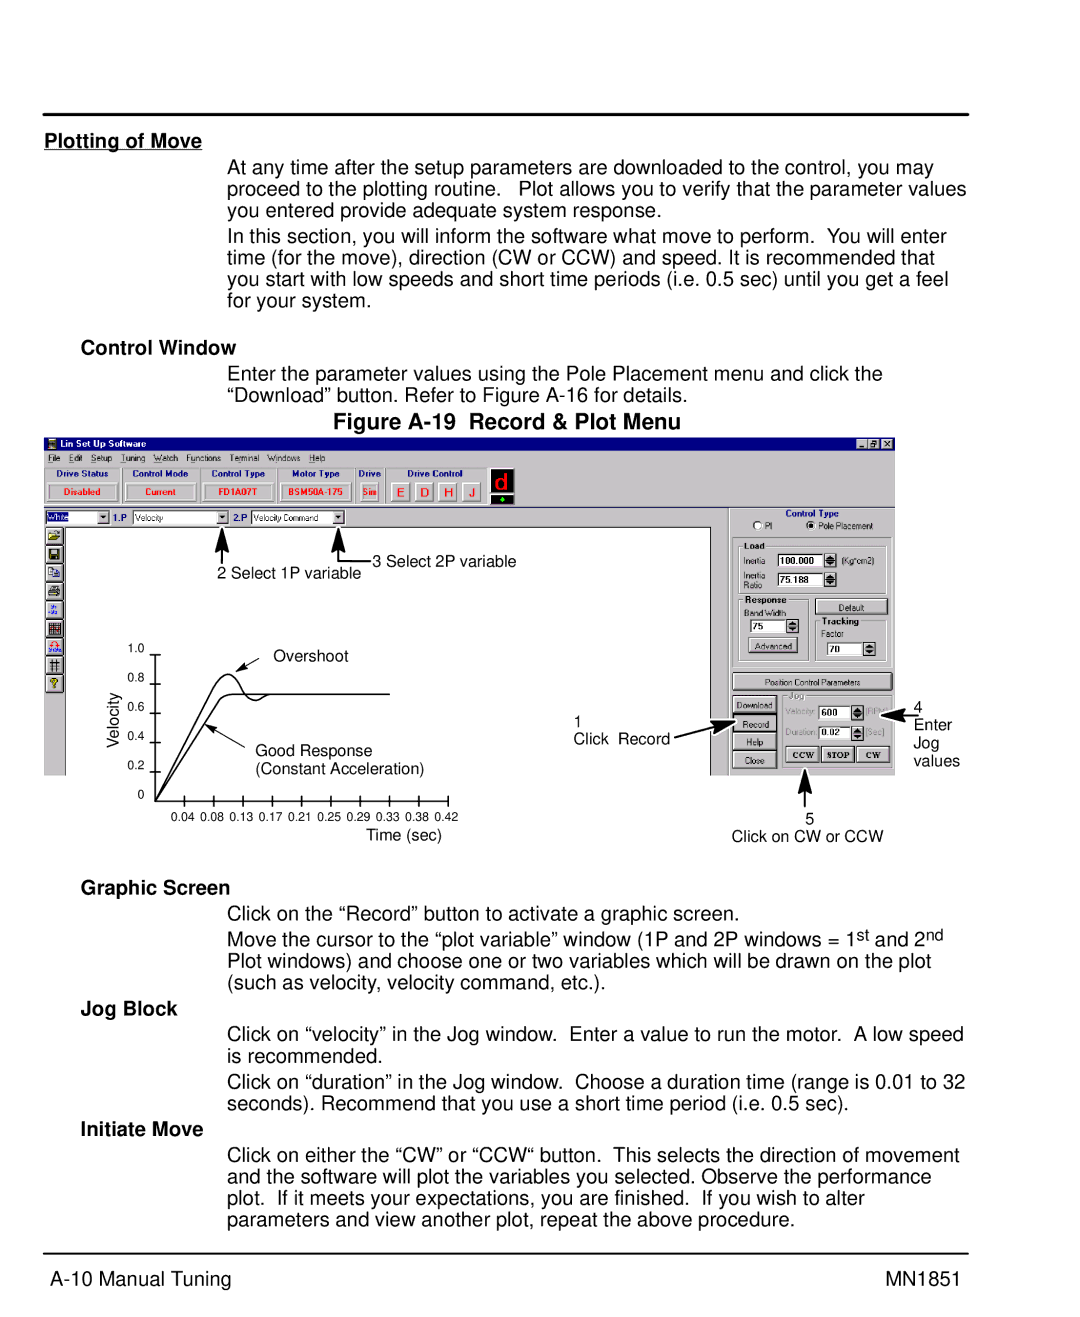
Enter the parameter values using the Pole Placement menu and click the “Download” button. Refer to Figure
Figure A-19 Record & Plot Menu
2 Select 1P variable
3 Select 2P variable
| 1.0 | Overshoot |
|
| |
| 0.8 |
|
Velocity | 0.6 |
|
0.4 | Good Response | |
| ||
| 0.2 | |
| (Constant Acceleration) | |
| 0 |
|
|
| 0.04 0.08 0.13 0.17 0.21 0.25 0.29 0.33 0.38 0.42 |
Time (sec)
1
Click Record
4 Enter Jog values
5
Click on CW or CCW
Graphic Screen
Click on the “Record” button to activate a graphic screen.
Move the cursor to the “plot variable” window (1P and 2P windows = 1st and 2nd Plot windows) and choose one or two variables which will be drawn on the plot (such as velocity, velocity command, etc.).
Jog Block
Click on “velocity” in the Jog window. Enter a value to run the motor. A low speed is recommended.
Click on “duration” in the Jog window. Choose a duration time (range is 0.01 to 32 seconds). Recommend that you use a short time period (i.e. 0.5 sec).
Initiate Move
Click on either the “CW” or “CCW“button. This selects the direction of movement and the software will plot the variables you selected. Observe the performance plot. If it meets your expectations, you are finished. If you wish to alter parameters and view another plot, repeat the above procedure.
MN1851 |
