Using the Motion Detection Function with a Predetermined Schedule
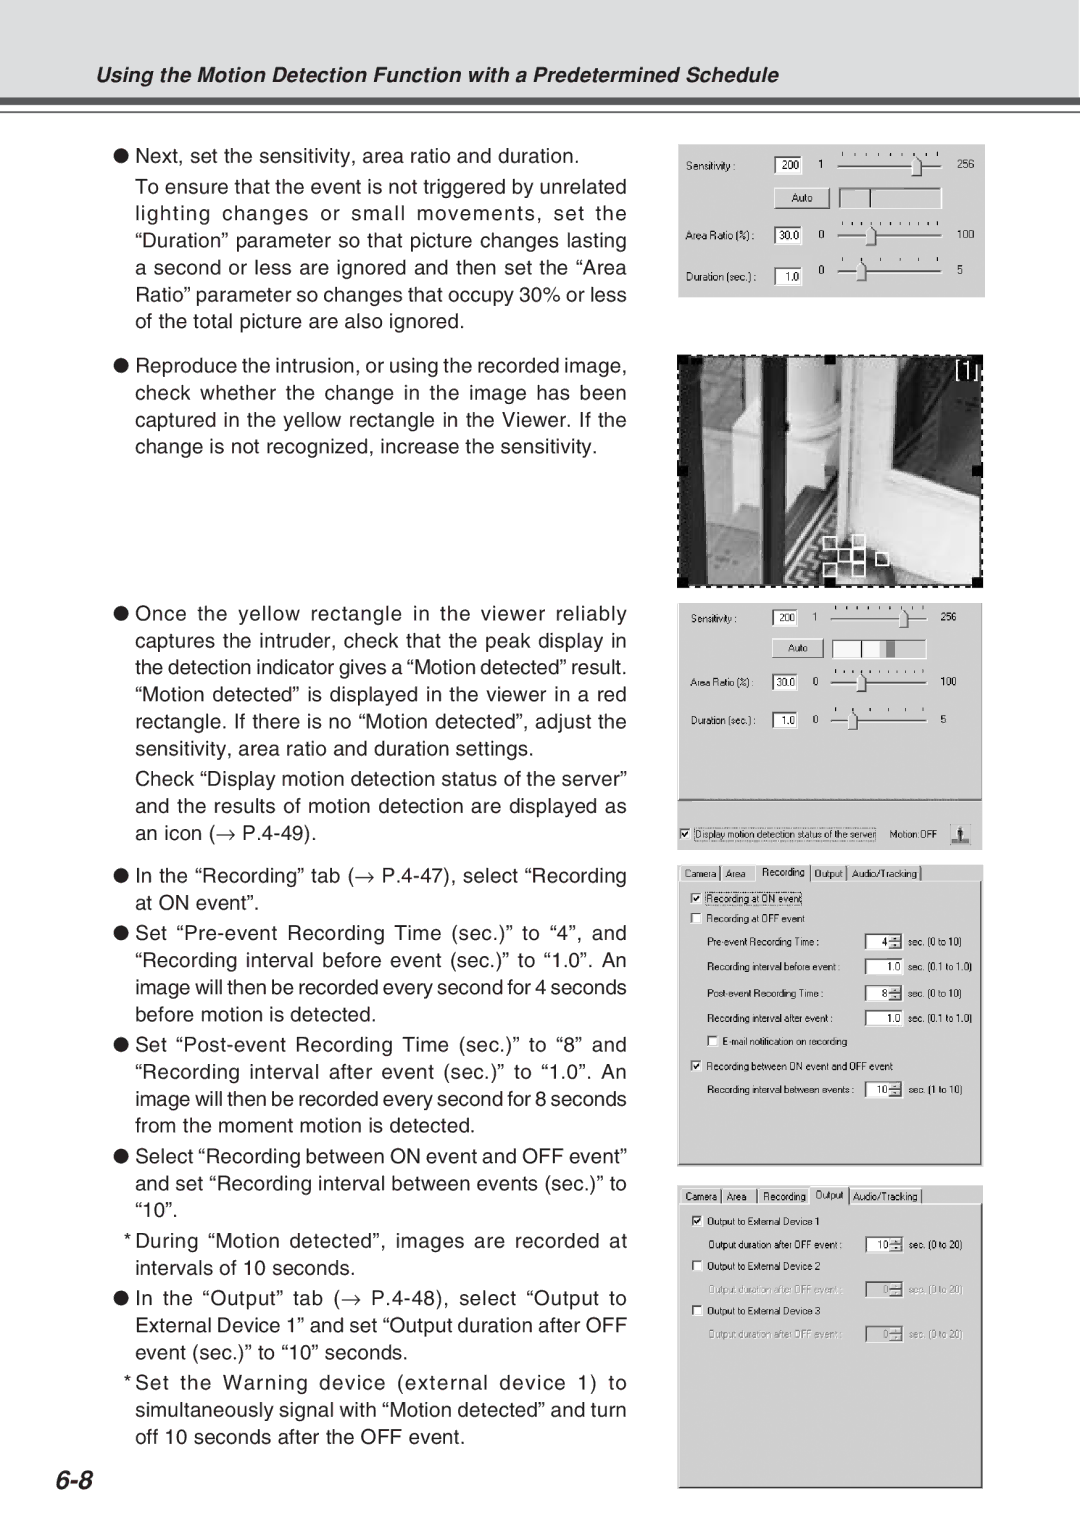
●Next, set the sensitivity, area ratio and duration.
To ensure that the event is not triggered by unrelated lighting changes or small movements, set the “Duration” parameter so that picture changes lasting a second or less are ignored and then set the “Area Ratio” parameter so changes that occupy 30% or less of the total picture are also ignored.
●Reproduce the intrusion, or using the recorded image, check whether the change in the image has been captured in the yellow rectangle in the Viewer. If the change is not recognized, increase the sensitivity.
●Once the yellow rectangle in the viewer reliably captures the intruder, check that the peak display in the detection indicator gives a “Motion detected” result. “Motion detected” is displayed in the viewer in a red rectangle. If there is no “Motion detected”, adjust the sensitivity, area ratio and duration settings.
Check “Display motion detection status of the server”
and the results of motion detection are displayed as an icon (→
●In the “Recording” tab (→
●Set
●Set
●Select “Recording between ON event and OFF event” and set “Recording interval between events (sec.)” to “10”.
*During “Motion detected”, images are recorded at intervals of 10 seconds.
●In the “Output” tab (→
*Set the Warning device (external device 1) to simultaneously signal with “Motion detected” and turn off 10 seconds after the OFF event.
