Ethernet Configuration Using the Printer Front Panel
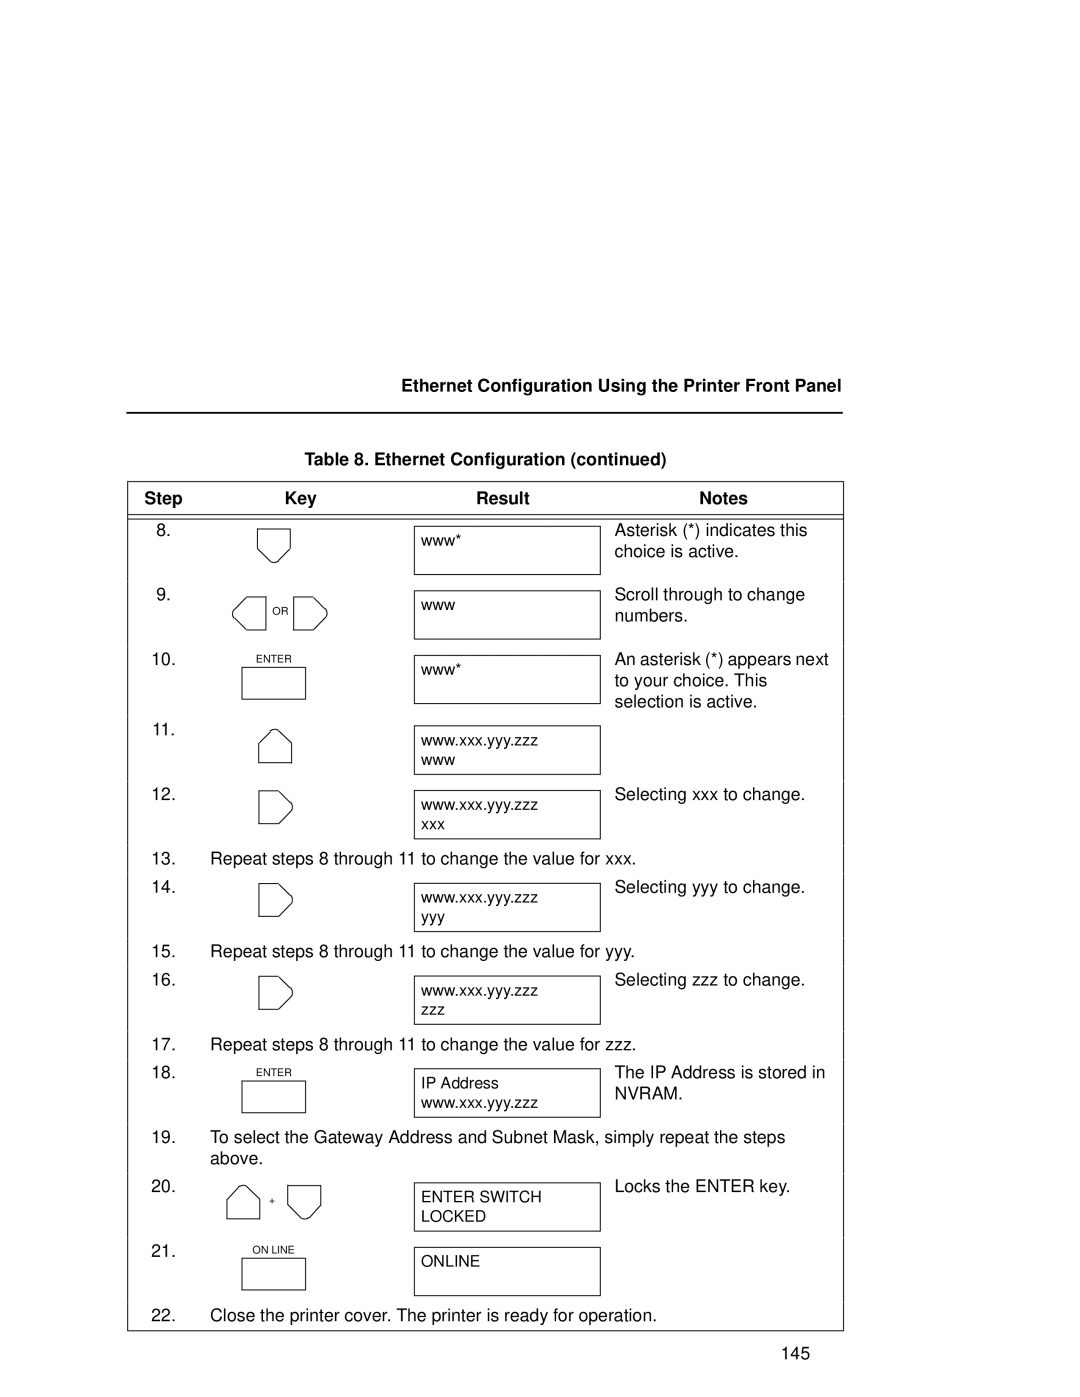
Table 8. Ethernet Configuration (continued)
Step | Key | Result | Notes |
8.
www*
Asterisk (*) indicates this choice is active.
9.
OR
www
Scroll through to change numbers.
10. ENTER
www*
An asterisk (*) appears next to your choice. This selection is active.
11.
www.xxx.yyy.zzz www
12.
www.xxx.yyy.zzz xxx
Selecting xxx to change.
13.Repeat steps 8 through 11 to change the value for xxx.
14. |
|
|
| Selecting yyy to change. |
|
| www.xxx.yyy.zzz | ||
|
|
|
| |
|
|
| yyy |
|
|
|
| ||
|
|
|
|
|
15.Repeat steps 8 through 11 to change the value for yyy.
16. |
|
|
| Selecting zzz to change. |
|
| www.xxx.yyy.zzz | ||
|
|
|
| |
|
|
| zzz |
|
|
|
| ||
|
|
|
|
|
17.Repeat steps 8 through 11 to change the value for zzz.
18. | ENTER |
|
| The IP Address is stored in |
| IP Address | |||
|
|
| NVRAM. | |
|
|
| www.xxx.yyy.zzz | |
|
|
|
| |
|
|
|
|
|
19.To select the Gateway Address and Subnet Mask, simply repeat the steps above.
20.
+
ENTER SWITCH LOCKED
Locks the ENTER key.
21. | ON LINE |
| ||
ONLINE | ||||
|
|
| ||
|
|
|
| |
|
|
|
| |
22.Close the printer cover. The printer is ready for operation.
145
