|
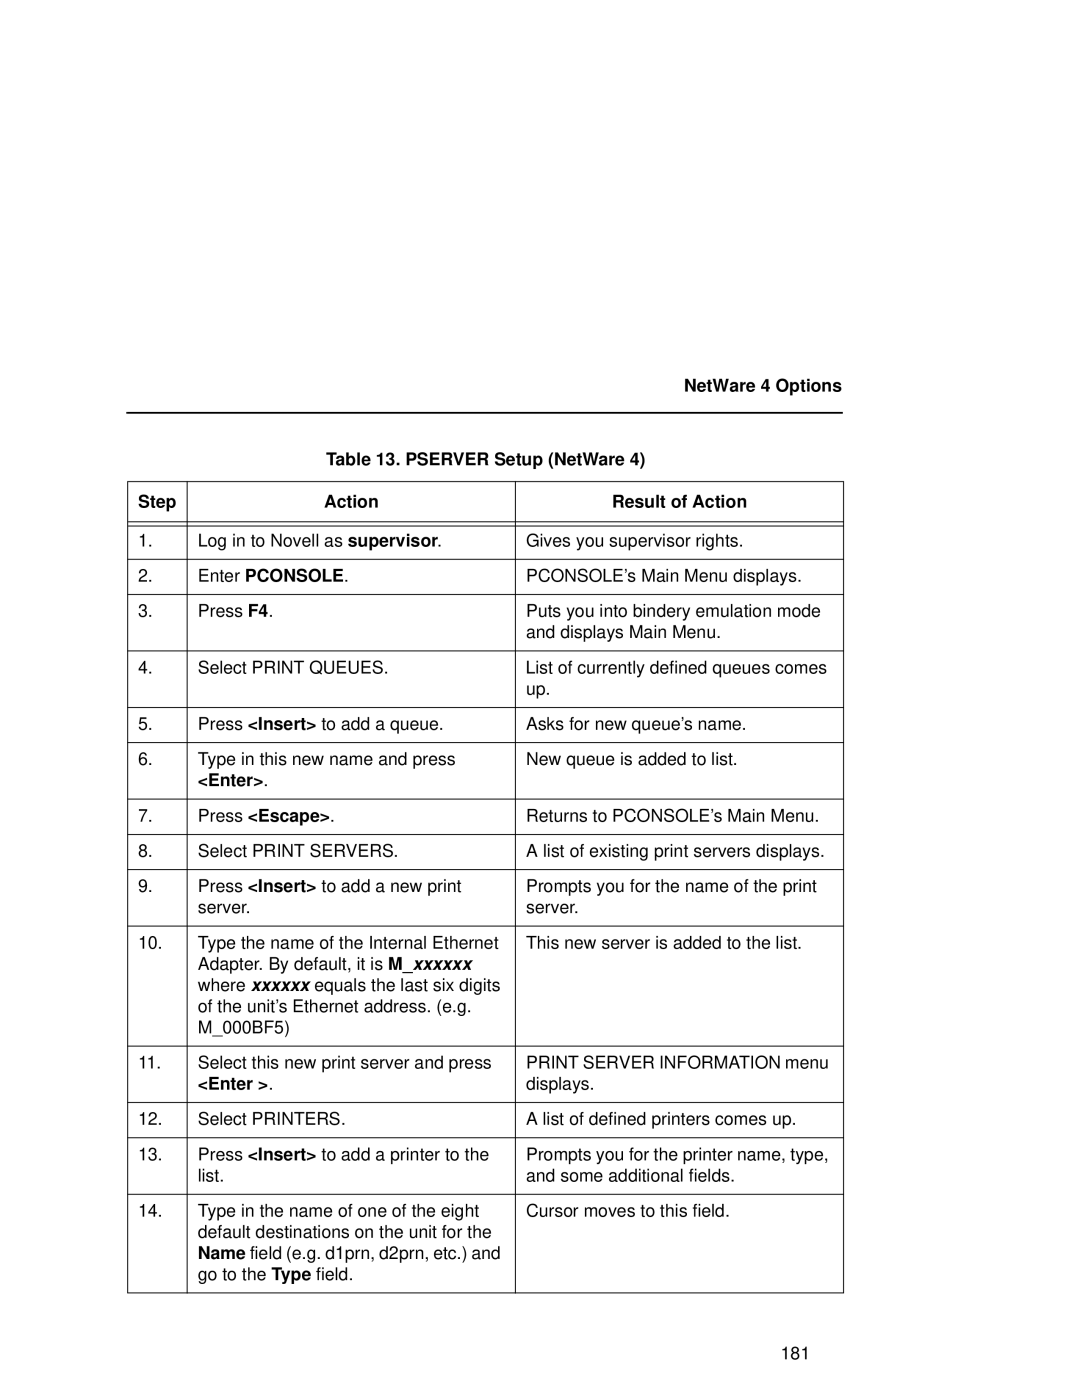
| NetWare 4 Options |
|
|
|
| Table 13. PSERVER Setup (NetWare 4) | |
|
|
|
Step | Action | Result of Action |
|
|
|
|
|
|
1. | Log in to Novell as supervisor. | Gives you supervisor rights. |
|
|
|
2. | Enter PCONSOLE. | PCONSOLE’s Main Menu displays. |
|
|
|
3. | Press F4. | Puts you into bindery emulation mode |
|
| and displays Main Menu. |
|
|
|
4. | Select PRINT QUEUES. | List of currently defined queues comes |
|
| up. |
|
|
|
5. | Press <Insert> to add a queue. | Asks for new queue’s name. |
|
|
|
6. | Type in this new name and press | New queue is added to list. |
| <Enter>. |
|
|
|
|
7. | Press <Escape>. | Returns to PCONSOLE’s Main Menu. |
|
|
|
8. | Select PRINT SERVERS. | A list of existing print servers displays. |
|
|
|
9. | Press <Insert> to add a new print | Prompts you for the name of the print |
| server. | server. |
|
|
|
10. | Type the name of the Internal Ethernet | This new server is added to the list. |
| Adapter. By default, it is M_xxxxxx |
|
| where xxxxxx equals the last six digits |
|
| of the unit’s Ethernet address. (e.g. |
|
| M_000BF5) |
|
|
|
|
11. | Select this new print server and press | PRINT SERVER INFORMATION menu |
| <Enter >. | displays. |
|
|
|
12. | Select PRINTERS. | A list of defined printers comes up. |
|
|
|
13. | Press <Insert> to add a printer to the | Prompts you for the printer name, type, |
| list. | and some additional fields. |
|
|
|
14. | Type in the name of one of the eight | Cursor moves to this field. |
| default destinations on the unit for the |
|
| Name field (e.g. d1prn, d2prn, etc.) and |
|
| go to the Type field. |
|
|
|
|
181