battery
BATTERY socket
Figure 7-6. Battery Replacement
6.Replace the front bezel, the left and right computer covers, reconnect the computer and peripherals to their power sources, and turn them on.
Is the problem resolved?
Yes. The battery was defective. You have fixed the problem.
No. See Chapter 11, “Getting Help,” for instructions on obtaining technical assistance.
Troubleshooting Power Supply Problems
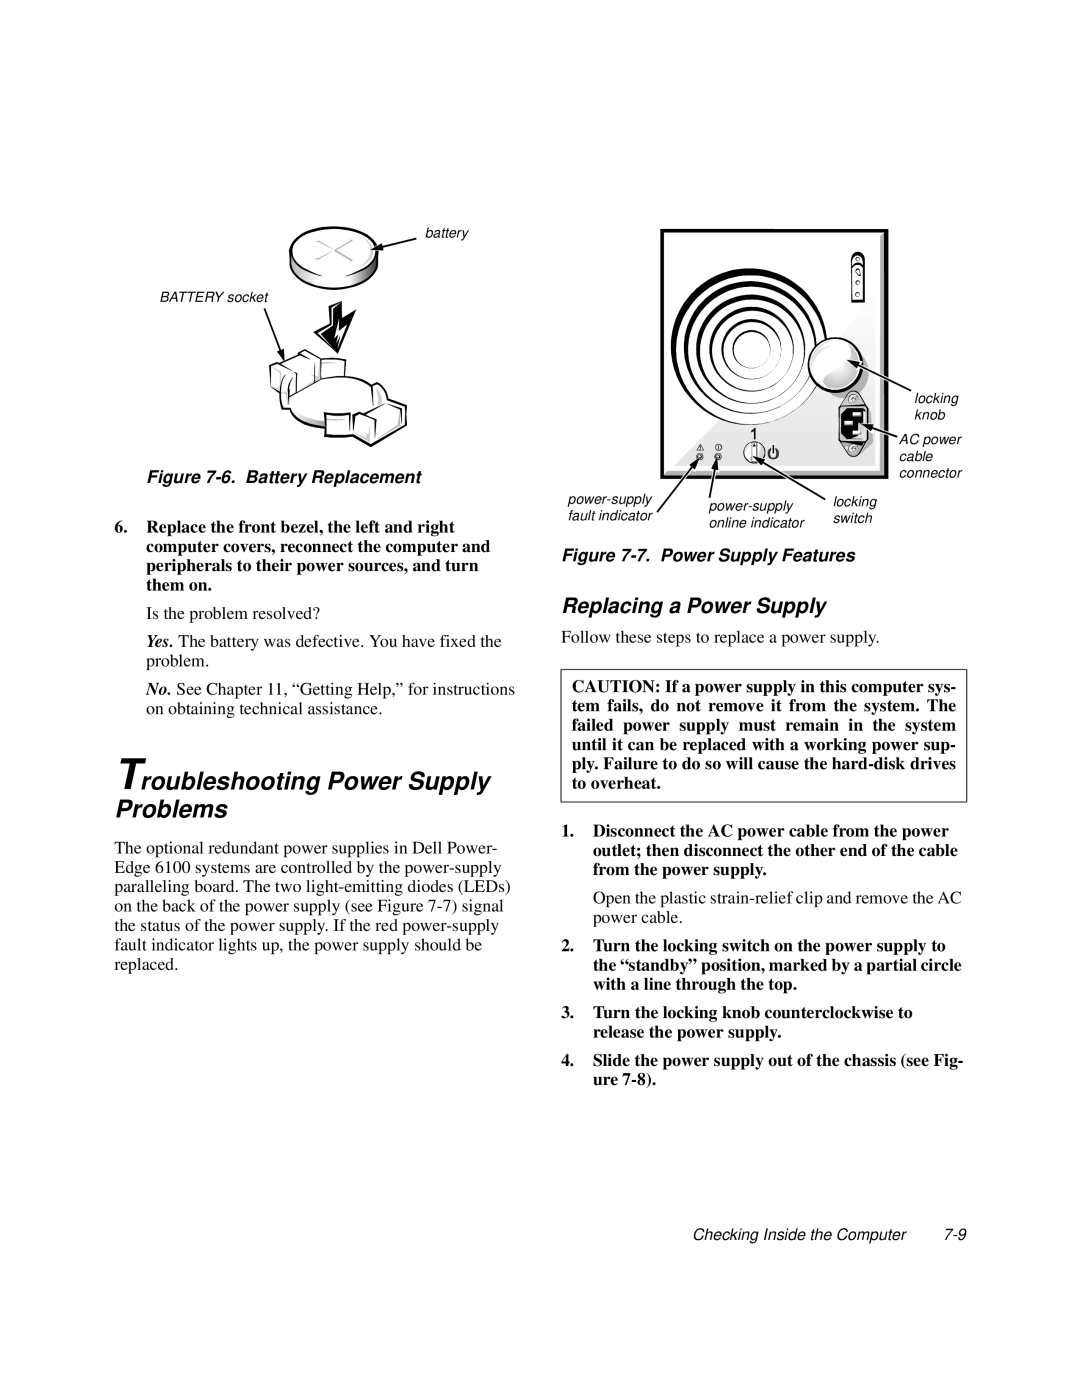
The optional redundant power supplies in Dell Power- Edge 6100 systems are controlled by the
locking knob
AC power cable connector
locking | |||
fault indicator | switch | ||
online indicator | |||
|
|
Figure 7-7. Power Supply Features
Replacing a Power Supply
Follow these steps to replace a power supply.
CAUTION: If a power supply in this computer sys- tem fails, do not remove it from the system. The failed power supply must remain in the system until it can be replaced with a working power sup- ply. Failure to do so will cause the
1.Disconnect the AC power cable from the power outlet; then disconnect the other end of the cable from the power supply.
Open the plastic
2.Turn the locking switch on the power supply to the “standby” position, marked by a partial circle with a line through the top.
3.Turn the locking knob counterclockwise to release the power supply.
4.Slide the power supply out of the chassis (see Fig- ure
Checking Inside the Computer |
