CAUTION: If you need to power off the blade to service a hard drive/PCIe SSD, wait 30 seconds after the blade’s power indicator turns off before removing the hard drive/PCIe SSD. Otherwise, the hard drive/PCIe SSD may not be recognized after it is reinstalled and the blade is powered on again.
Configuring The Boot Drive
The drive or device from which the system boots is determined by the boot order specified in the System Setup.
Removing A Hard Drive/PCIe SSD From A
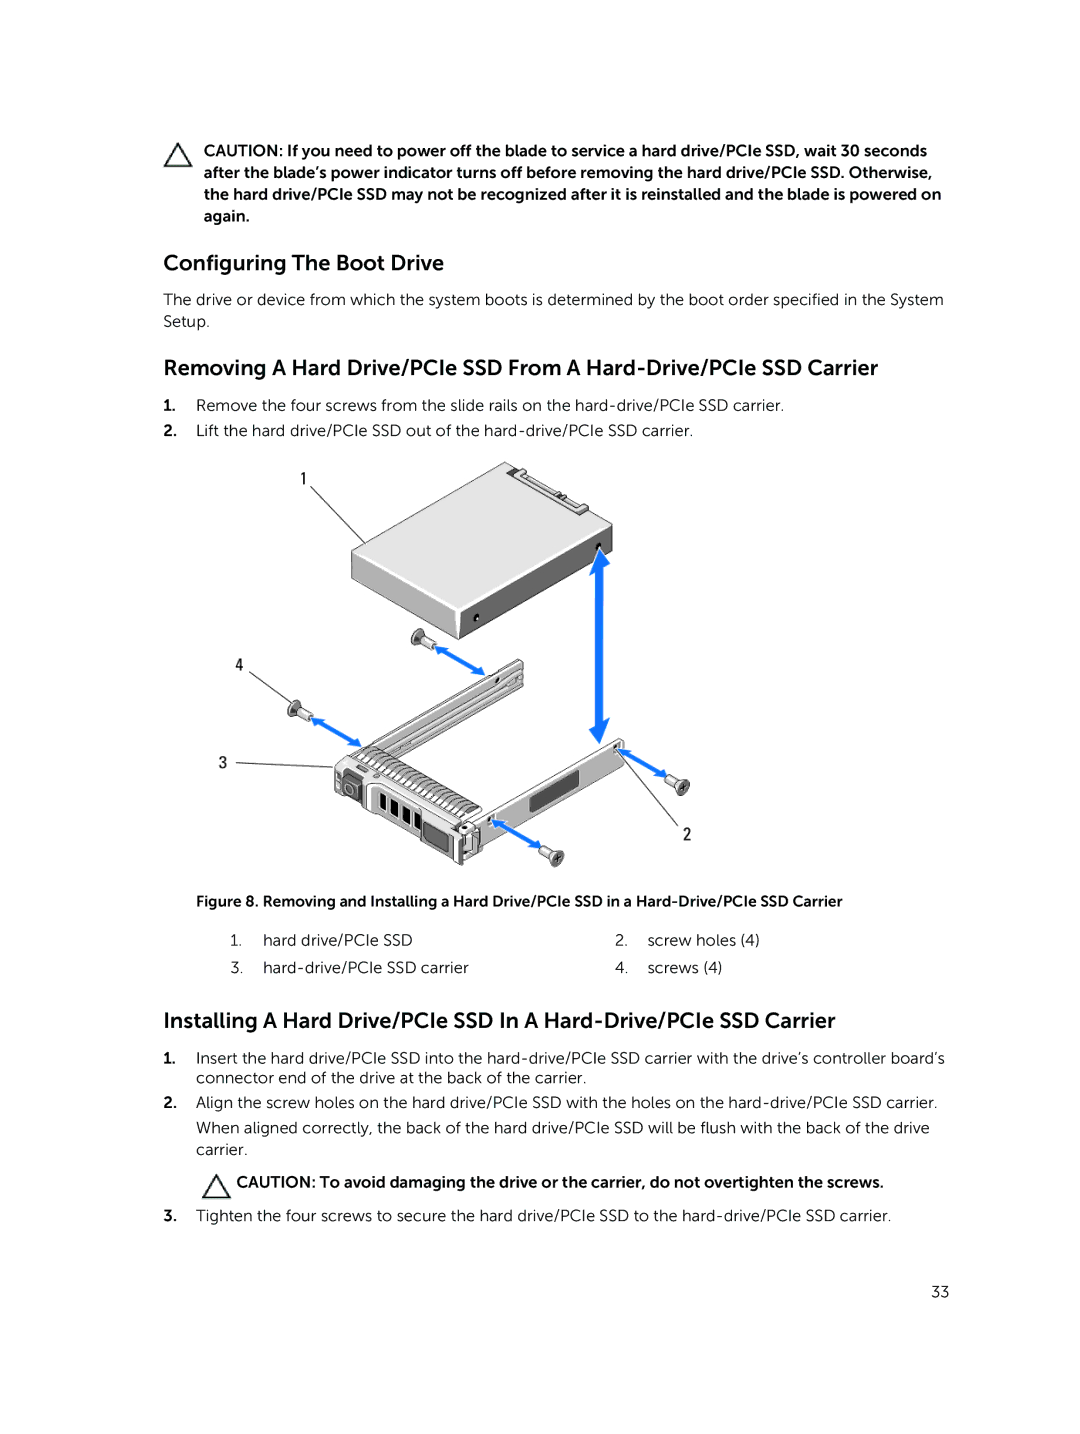
1.Remove the four screws from the slide rails on the
2.Lift the hard drive/PCIe SSD out of the
Figure 8. Removing and Installing a Hard Drive/PCIe SSD in a Hard-Drive/PCIe SSD Carrier
1. | hard drive/PCIe SSD | 2. | screw holes (4) |
3. | 4. | screws (4) |
Installing A Hard Drive/PCIe SSD In A
1.Insert the hard drive/PCIe SSD into the
2.Align the screw holes on the hard drive/PCIe SSD with the holes on the
When aligned correctly, the back of the hard drive/PCIe SSD will be flush with the back of the drive carrier.
![]() CAUTION: To avoid damaging the drive or the carrier, do not overtighten the screws.
CAUTION: To avoid damaging the drive or the carrier, do not overtighten the screws.
3.Tighten the four screws to secure the hard drive/PCIe SSD to the
33
