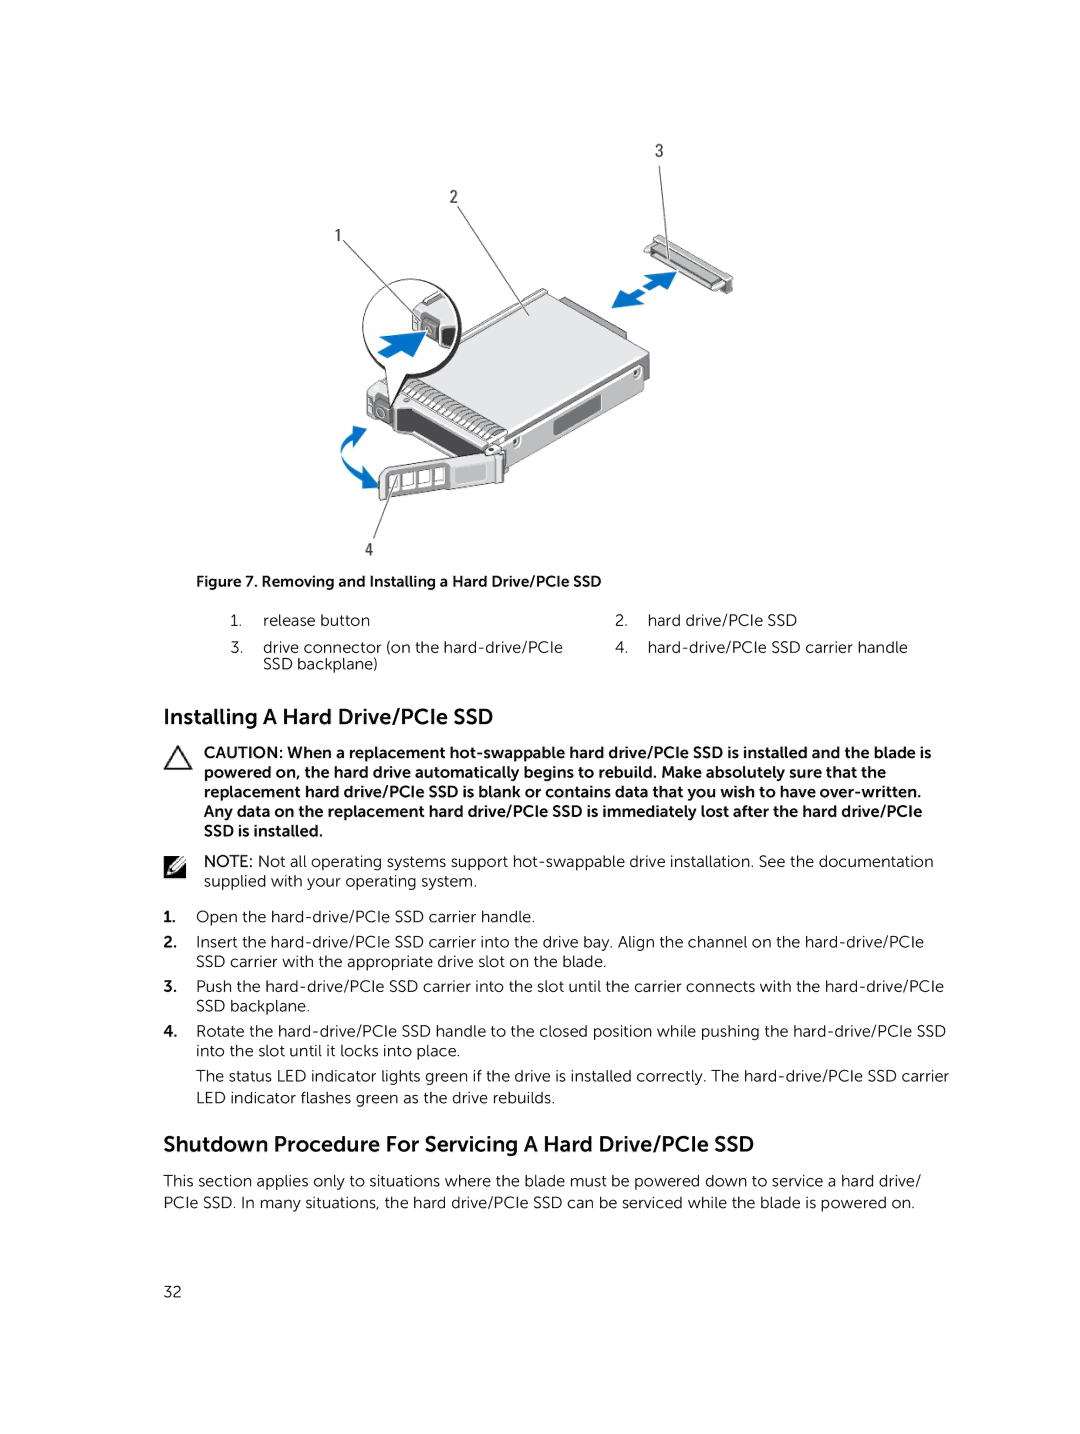
Figure 7. Removing and Installing a Hard Drive/PCIe SSD
1. release button 2. hard drive/PCIe SSD
3. drive connector (on the hard-drive/PCIe
SSD backplane) 4. hard-drive/PCIe SSD carrier handle

Installing A Hard Drive/PCIe SSD

CAUTION: When a replacement hot-swappable hard drive/PCIe SSD is installed and the blade is
powered on, the hard drive automatically begins to rebuild. Make absolutely sure that the
replacement hard drive/PCIe SSD is blank or contains data that you wish to have over-written.
Any data on the replacement hard drive/PCIe SSD is immediately lost after the hard drive/PCIe
SSD is installed.
NOTE: Not all operating systems support hot-swappable drive installation. See the documentation
supplied with your operating system.
1. Open the hard-drive/PCIe SSD carrier handle.
2. Insert the hard-drive/PCIe SSD carrier into the drive bay. Align the channel on the hard-drive/PCIe
SSD carrier with the appropriate drive slot on the blade.
3. Push the hard-drive/PCIe SSD carrier into the slot until the carrier connects with the hard-drive/PCIe
SSD backplane.
4. Rotate the hard-drive/PCIe SSD handle to the closed position while pushing the hard-drive/PCIe SSD
into the slot until it locks into place.
The status LED indicator lights green if the drive is installed correctly. The hard-drive/PCIe SSD carrier
LED indicator flashes green as the drive rebuilds.

Shutdown Procedure For Servicing A Hard Drive/PCIe SSD

This section applies only to situations where the blade must be powered down to service a hard drive/
PCIe SSD. In many situations, the hard drive/PCIe SSD can be serviced while the blade is powered on.
32