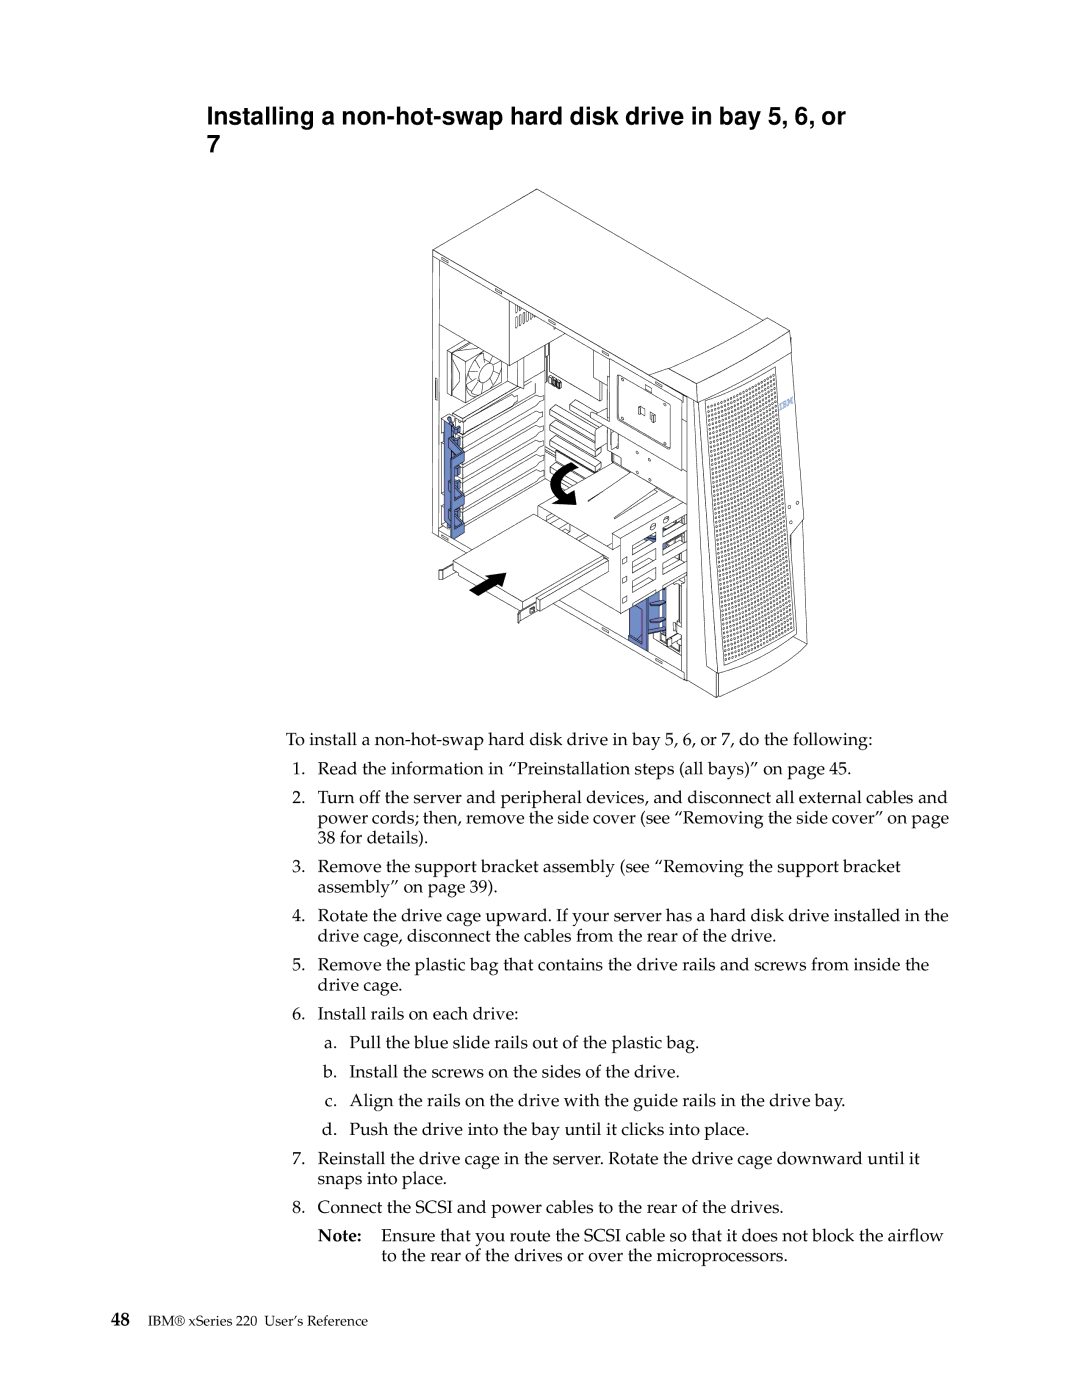
Installing a non-hot-swap hard disk drive in bay 5, 6, or 7
To install a
1.Read the information in “Preinstallation steps (all bays)” on page 45.
2.Turn off the server and peripheral devices, and disconnect all external cables and power cords; then, remove the side cover (see “Removing the side cover” on page 38 for details).
3.Remove the support bracket assembly (see “Removing the support bracket assembly” on page 39).
4.Rotate the drive cage upward. If your server has a hard disk drive installed in the drive cage, disconnect the cables from the rear of the drive.
5.Remove the plastic bag that contains the drive rails and screws from inside the drive cage.
6.Install rails on each drive:
a.Pull the blue slide rails out of the plastic bag.
b.Install the screws on the sides of the drive.
c.Align the rails on the drive with the guide rails in the drive bay.
d.Push the drive into the bay until it clicks into place.
7.Reinstall the drive cage in the server. Rotate the drive cage downward until it snaps into place.
8.Connect the SCSI and power cables to the rear of the drives.
Note: Ensure that you route the SCSI cable so that it does not block the airflow to the rear of the drives or over the microprocessors.
