Appendix B: Client Setup for 802.1x, WPA, and
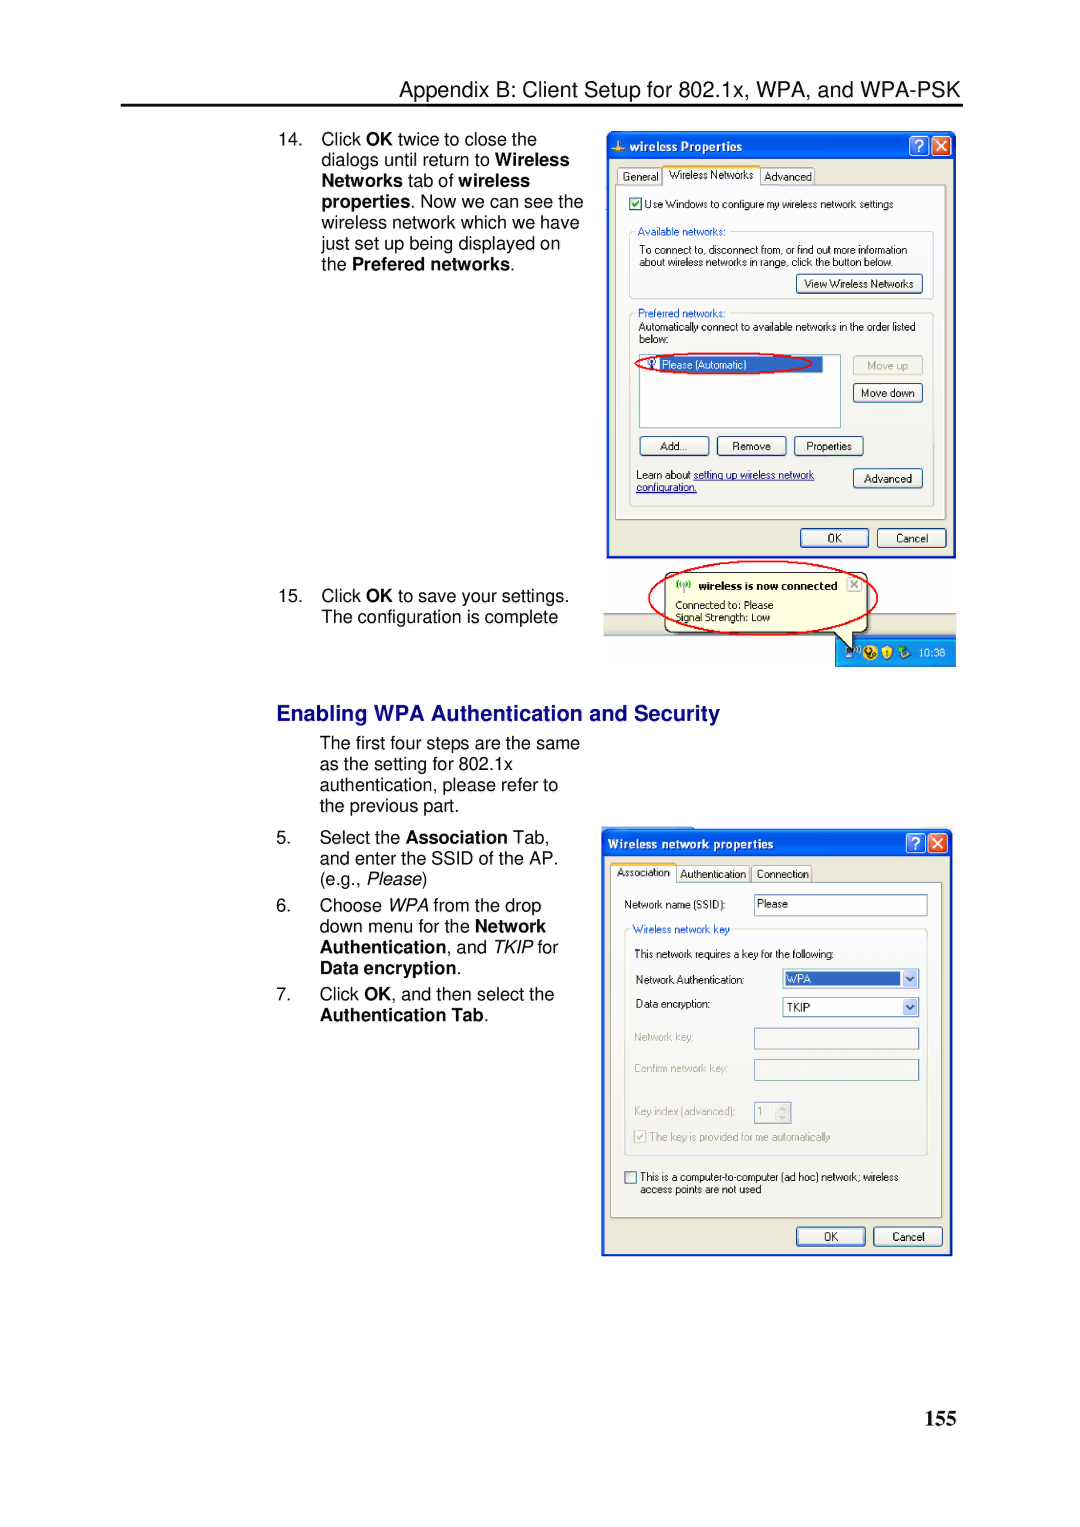
14.Click OK twice to close the dialogs until return to Wireless Networks tab of wireless properties. Now we can see the wireless network which we have just set up being displayed on the Prefered networks.
15.Click OK to save your settings. The configuration is complete
Enabling WPA Authentication and Security
The first four steps are the same as the setting for 802.1x authentication, please refer to the previous part.
5.Select the Association Tab, and enter the SSID of the AP. (e.g., Please)
6.Choose WPA from the drop down menu for the Network Authentication, and TKIP for Data encryption.
7.Click OK, and then select the Authentication Tab.