Installation of the RTM-ATCA-7150
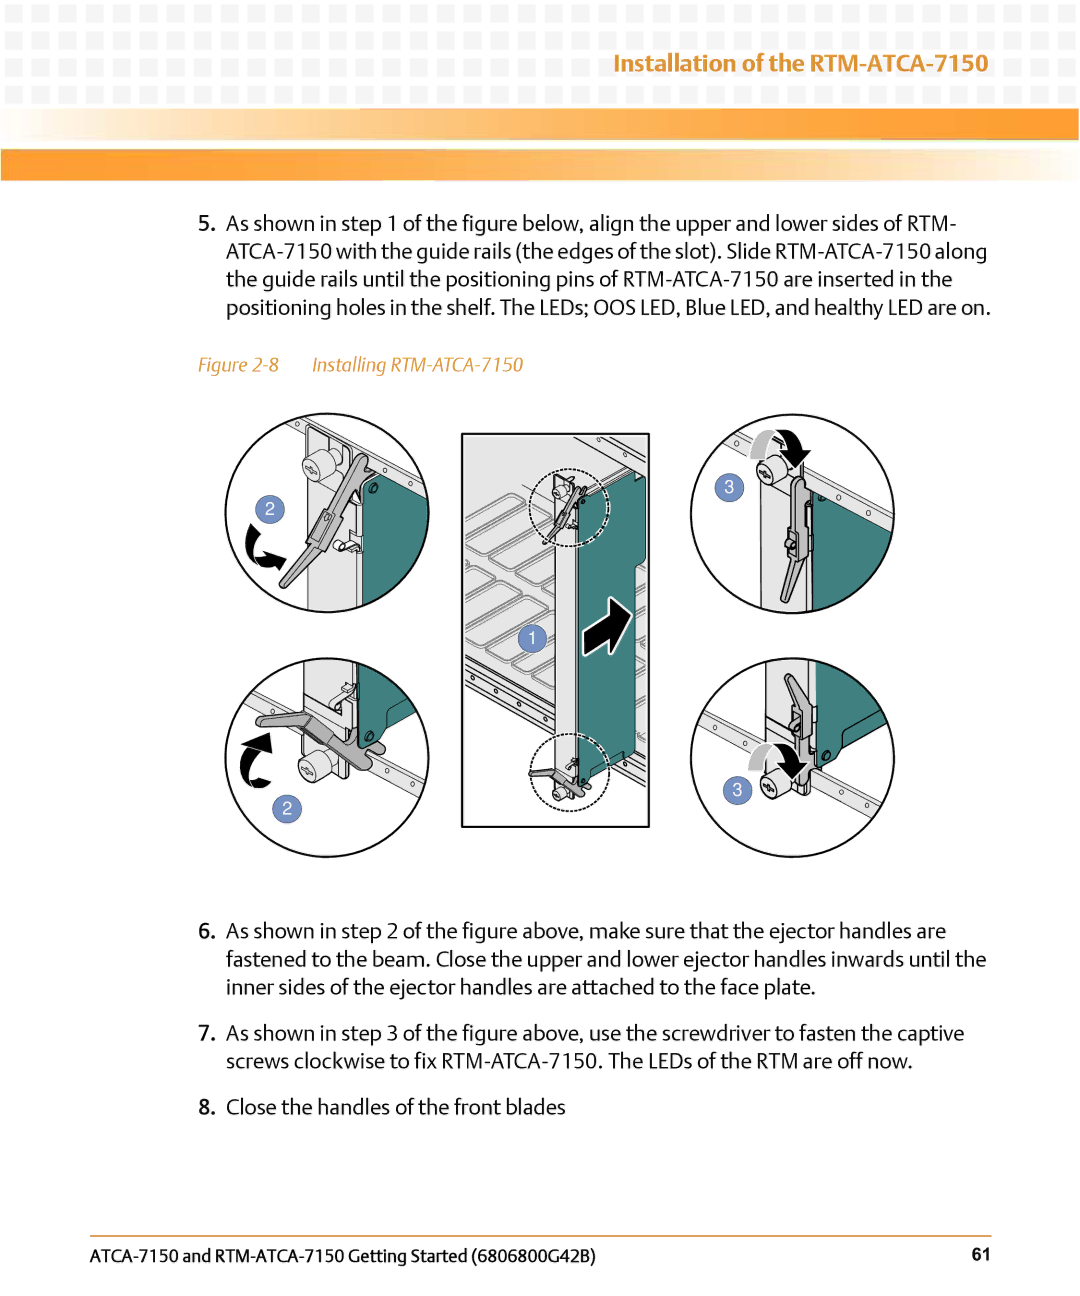
5.As shown in step 1 of the figure below, align the upper and lower sides of RTM-
Figure 2-8 Installing RTM-ATCA-7150
2
2
1 |
3
3
6.As shown in step 2 of the figure above, make sure that the ejector handles are fastened to the beam. Close the upper and lower ejector handles inwards until the inner sides of the ejector handles are attached to the face plate.
7.As shown in step 3 of the figure above, use the screwdriver to fasten the captive screws clockwise to fix
8.Close the handles of the front blades
61 |
