Installing the Hardware | Installing the System in the Rack |
ÊRepeat the procedure with the second support bracket.
Note that the second bracket will be mounted level with the upper edge of the first support bracket mounted (see figure 6 on page 38).
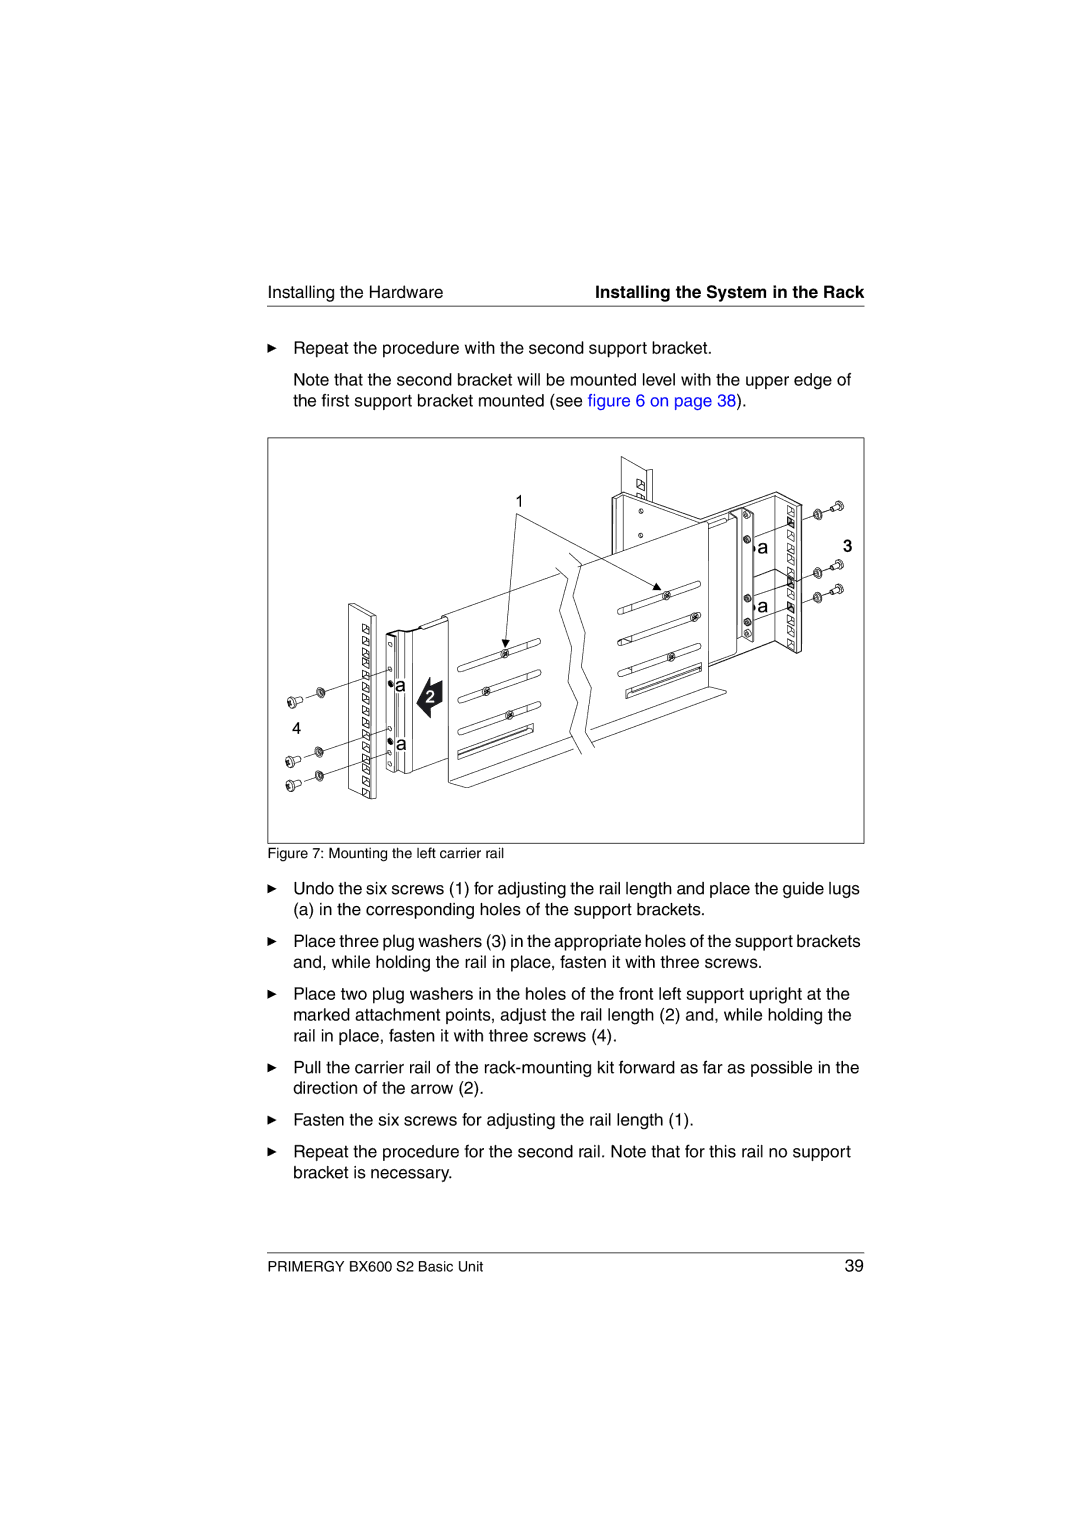
Figure 7: Mounting the left carrier rail
ÊUndo the six screws (1) for adjusting the rail length and place the guide lugs
(a) in the corresponding holes of the support brackets.
ÊPlace three plug washers (3) in the appropriate holes of the support brackets and, while holding the rail in place, fasten it with three screws.
ÊPlace two plug washers in the holes of the front left support upright at the marked attachment points, adjust the rail length (2) and, while holding the rail in place, fasten it with three screws (4).
ÊPull the carrier rail of the
ÊFasten the six screws for adjusting the rail length (1).
ÊRepeat the procedure for the second rail. Note that for this rail no support bracket is necessary.
PRIMERGY BX600 S2 Basic Unit | 39 |