Installing an HP JetDirect EIO Card
1 |
2 |
![]() 3
3 ![]()
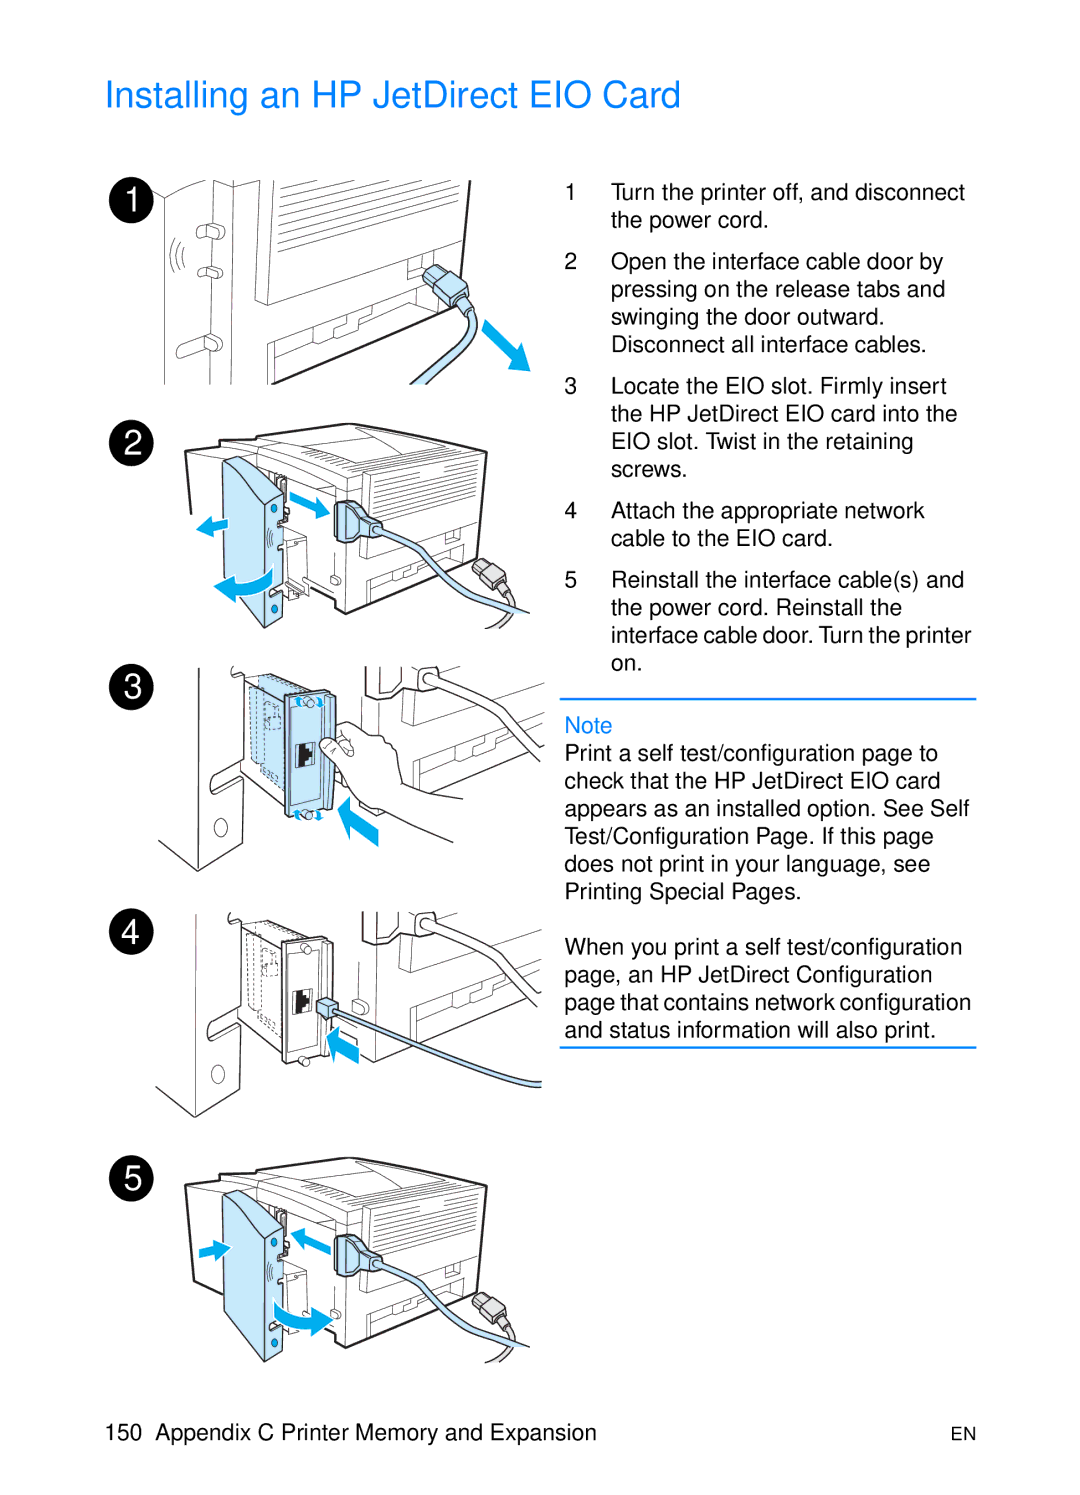
1Turn the printer off, and disconnect the power cord.
2Open the interface cable door by pressing on the release tabs and swinging the door outward.
Disconnect all interface cables.
3Locate the EIO slot. Firmly insert the HP JetDirect EIO card into the EIO slot. Twist in the retaining screws.
4Attach the appropriate network cable to the EIO card.
5Reinstall the interface cable(s) and the power cord. Reinstall the interface cable door. Turn the printer on.
Note
Print a self test/configuration page to check that the HP JetDirect EIO card appears as an installed option. See Self Test/Configuration Page. If this page does not print in your language, see Printing Special Pages.
4 |
4 |
5 |
When you print a self test/configuration page, an HP JetDirect Configuration page that contains network configuration and status information will also print.
150 Appendix C Printer Memory and Expansion | EN |
