Server |
| Server |
| Selector | |
Selector |
| |
| Unit | |
Cable |
| |
|
| |
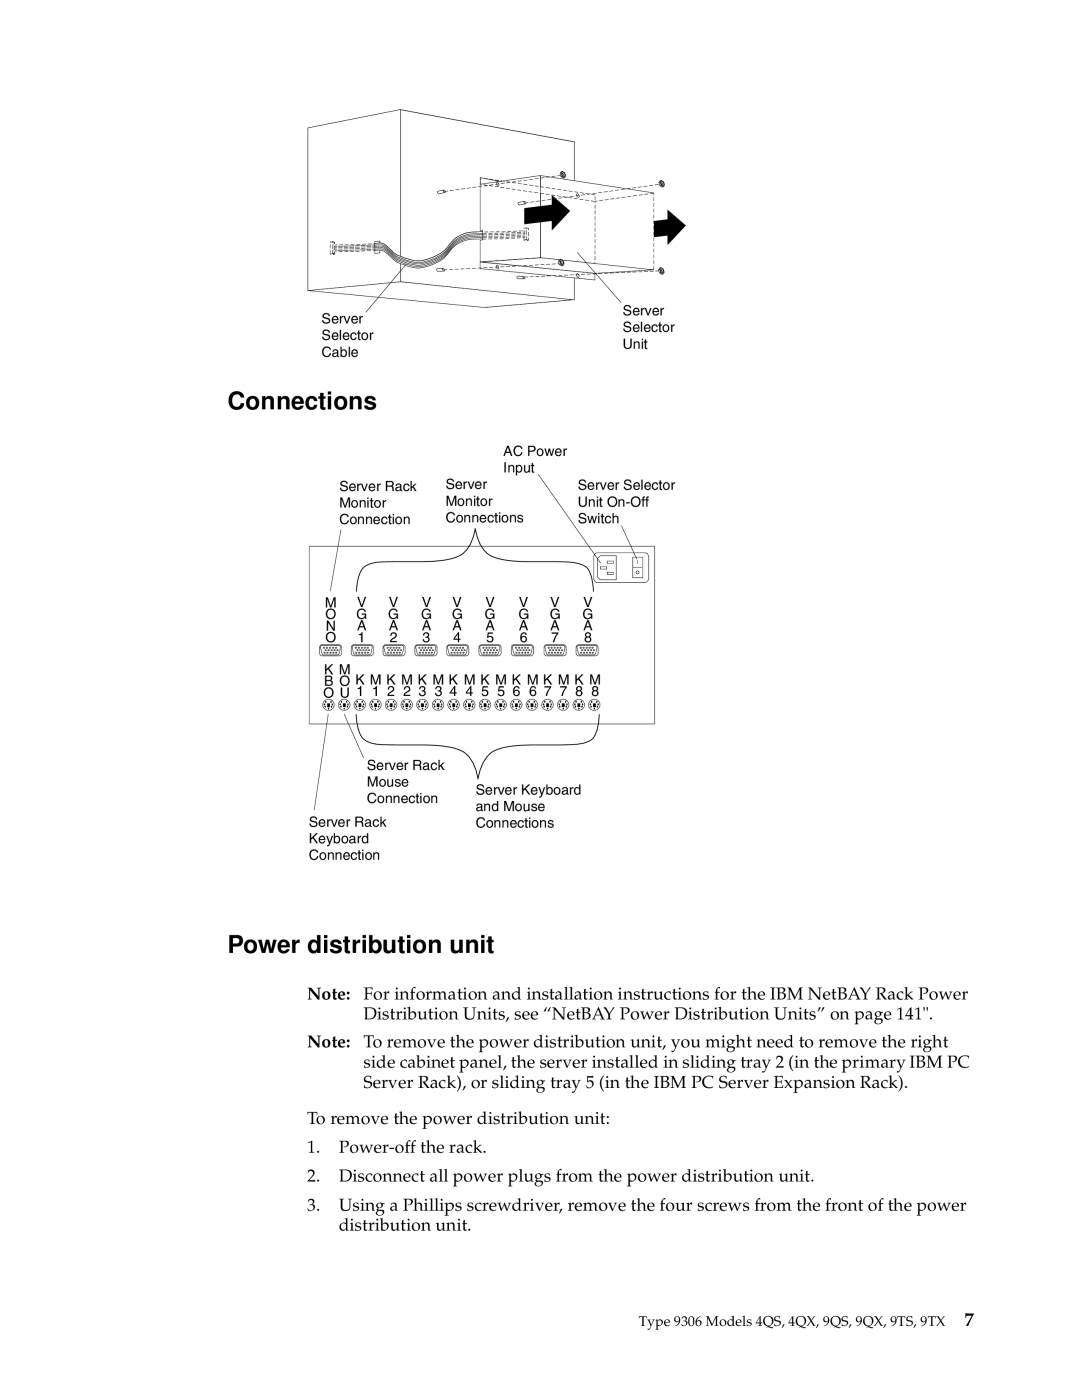
Connections |
|
|
| AC Power |
|
| Input |
|
Server Rack | Server | Server Selector |
Monitor | Monitor | Unit |
Connection | Connections | Switch |
M | V | V | V | V | V | V | V | V |
O | G | G | G | G | G | G | G | G |
N | A | A | A | A | A | A | A | A |
O | 1 | 2 | 3 | 4 | 5 | 6 | 7 | 8 |
K M
B O K M K M K M K M K M K M K M K M
O U 1 1 2 2 3 3 4 4 5 5 6 6 7 7 8 8
Server Rack |
| |
Mouse | Server Keyboard | |
Connection | ||
and Mouse | ||
| ||
Server Rack | Connections | |
Keyboard |
| |
Connection |
|
Power distribution unit
Note: For information and installation instructions for the IBM NetBAY Rack Power Distribution Units, see “NetBAY Power Distribution Units” on page 141".
Note: To remove the power distribution unit, you might need to remove the right side cabinet panel, the server installed in sliding tray 2 (in the primary IBM PC Server Rack), or sliding tray 5 (in the IBM PC Server Expansion Rack).
To remove the power distribution unit:
1.
2.Disconnect all power plugs from the power distribution unit.
3.Using a Phillips screwdriver, remove the four screws from the front of the power distribution unit.
Type 9306 Models 4QS, 4QX, 9QS, 9QX, 9TS, 9TX 7