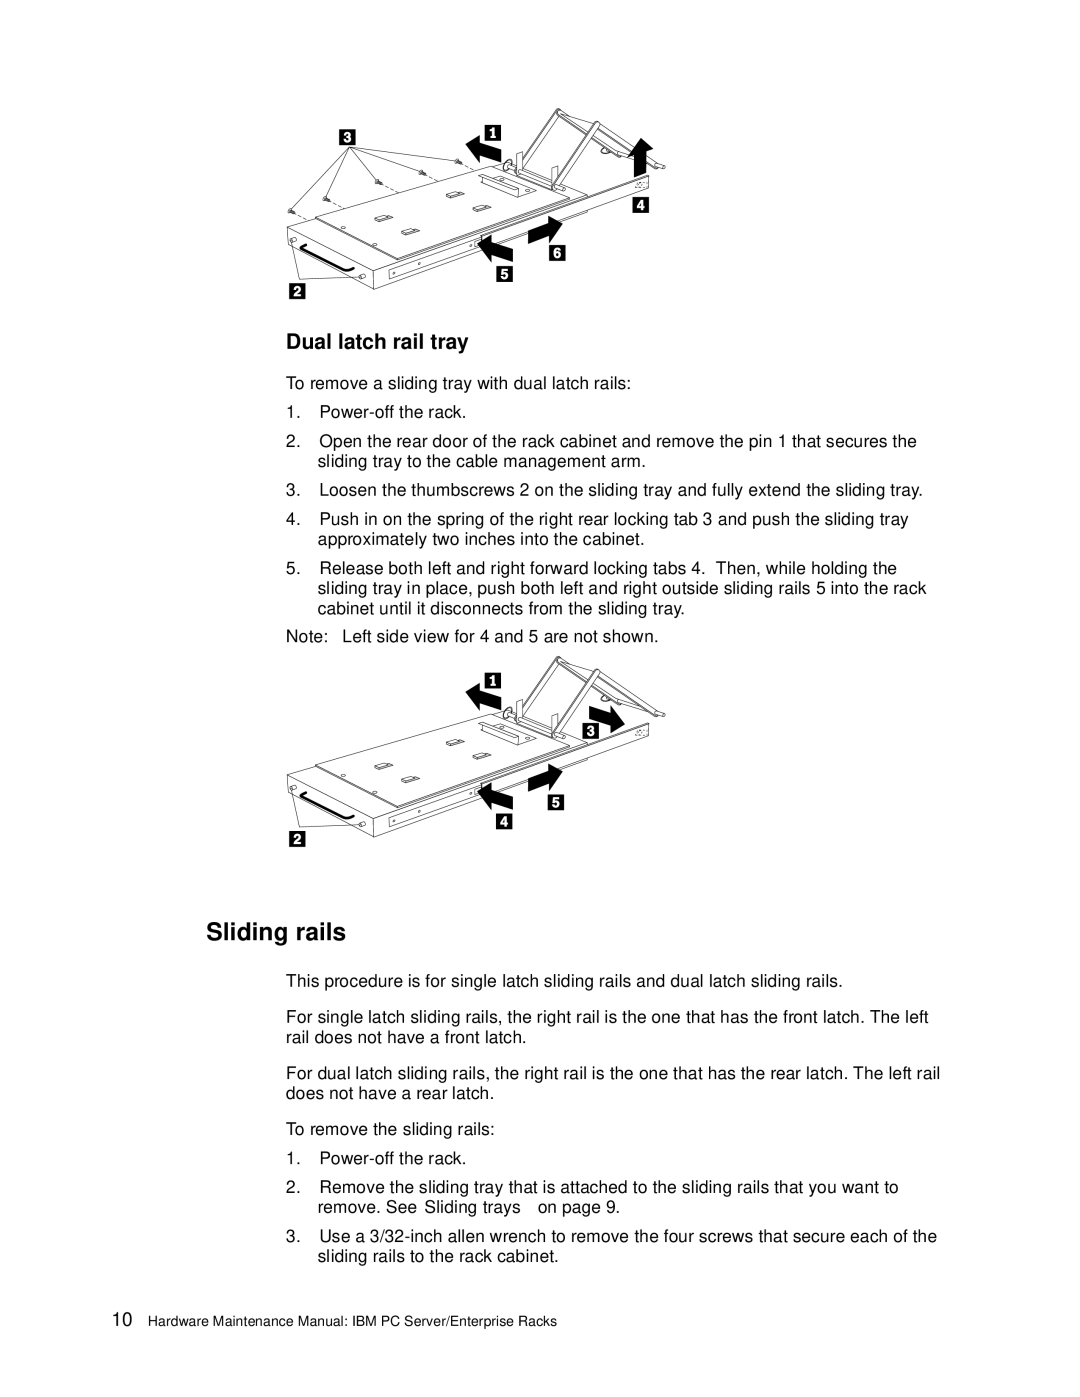
Dual latch rail tray
To remove a sliding tray with dual latch rails:
1.
2.Open the rear door of the rack cabinet and remove the pin 1 that secures the sliding tray to the cable management arm.
3.Loosen the thumbscrews 2 on the sliding tray and fully extend the sliding tray.
4.Push in on the spring of the right rear locking tab 3 and push the sliding tray approximately two inches into the cabinet.
5.Release both left and right forward locking tabs 4. Then, while holding the sliding tray in place, push both left and right outside sliding rails 5 into the rack cabinet until it disconnects from the sliding tray.
Note: Left side view for 4 and 5 are not shown.
Sliding rails
This procedure is for single latch sliding rails and dual latch sliding rails.
For single latch sliding rails, the right rail is the one that has the front latch. The left rail does not have a front latch.
For dual latch sliding rails, the right rail is the one that has the rear latch. The left rail does not have a rear latch.
To remove the sliding rails:
1.
2.Remove the sliding tray that is attached to the sliding rails that you want to remove. See “Sliding trays” on page 9.
3.Use a