Attach a Rail Assembly to a Front Bracket
1.Position a rail assembly (middle and outer rails) with its black plastic end caps toward the rear of the rack and its outer rail closest to the brackets.
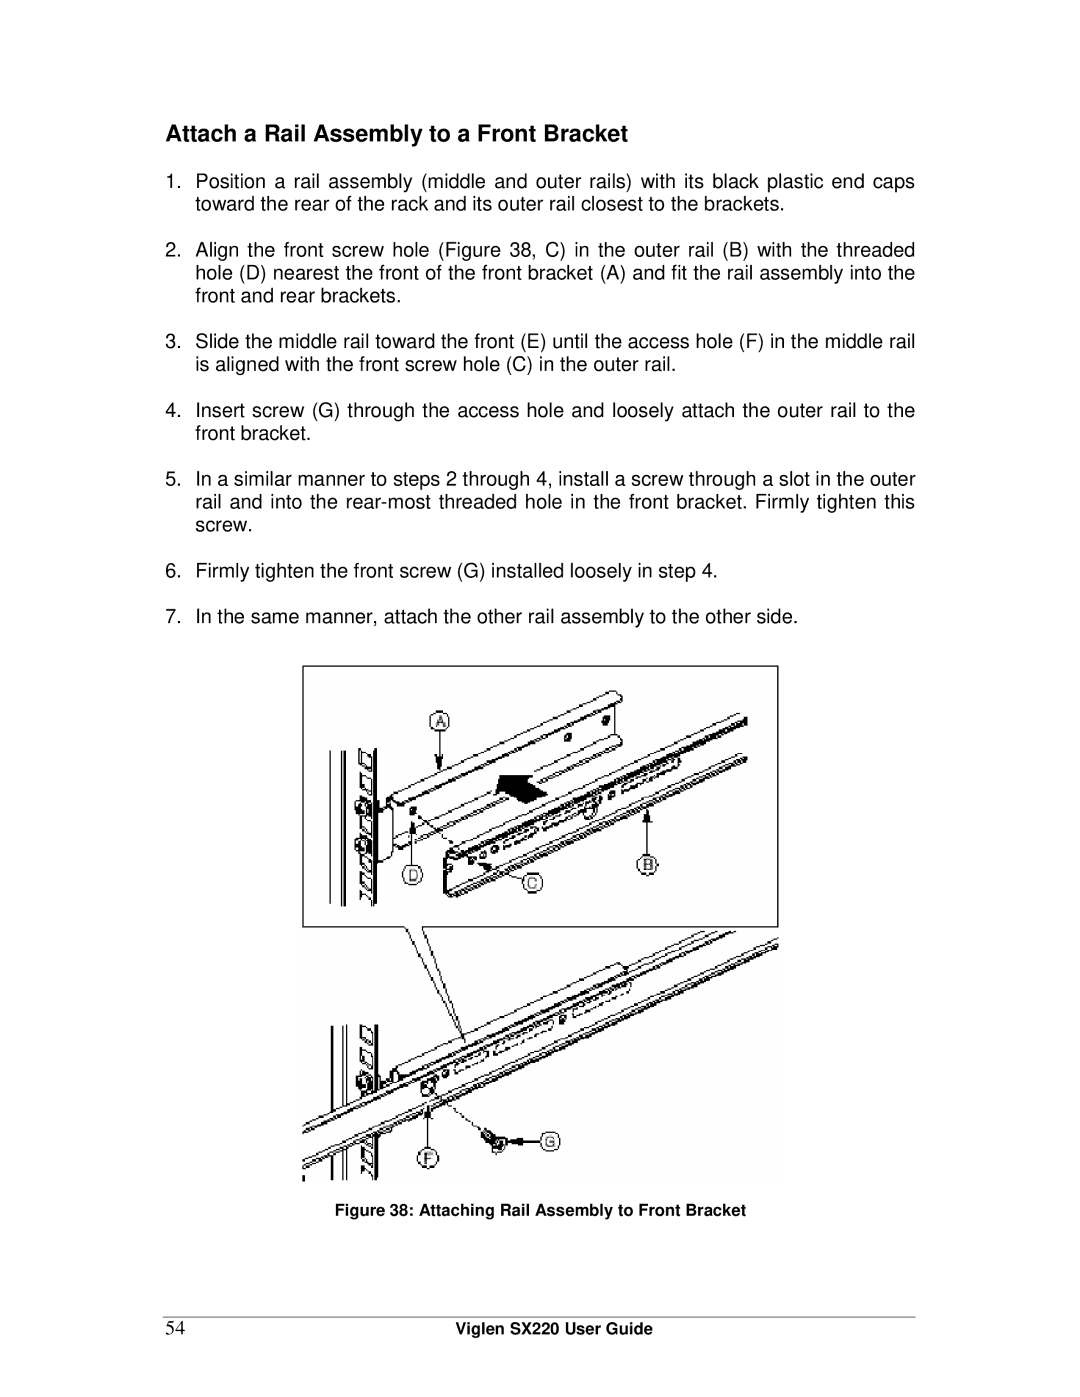
2.Align the front screw hole (Figure 38, C) in the outer rail (B) with the threaded hole (D) nearest the front of the front bracket (A) and fit the rail assembly into the front and rear brackets.
3.Slide the middle rail toward the front (E) until the access hole (F) in the middle rail is aligned with the front screw hole (C) in the outer rail.
4.Insert screw (G) through the access hole and loosely attach the outer rail to the front bracket.
5.In a similar manner to steps 2 through 4, install a screw through a slot in the outer rail and into the
6.Firmly tighten the front screw (G) installed loosely in step 4.
7.In the same manner, attach the other rail assembly to the other side.
Figure 38: Attaching Rail Assembly to Front Bracket
54 | Viglen SX220 User Guide |
