Tab Area Settings
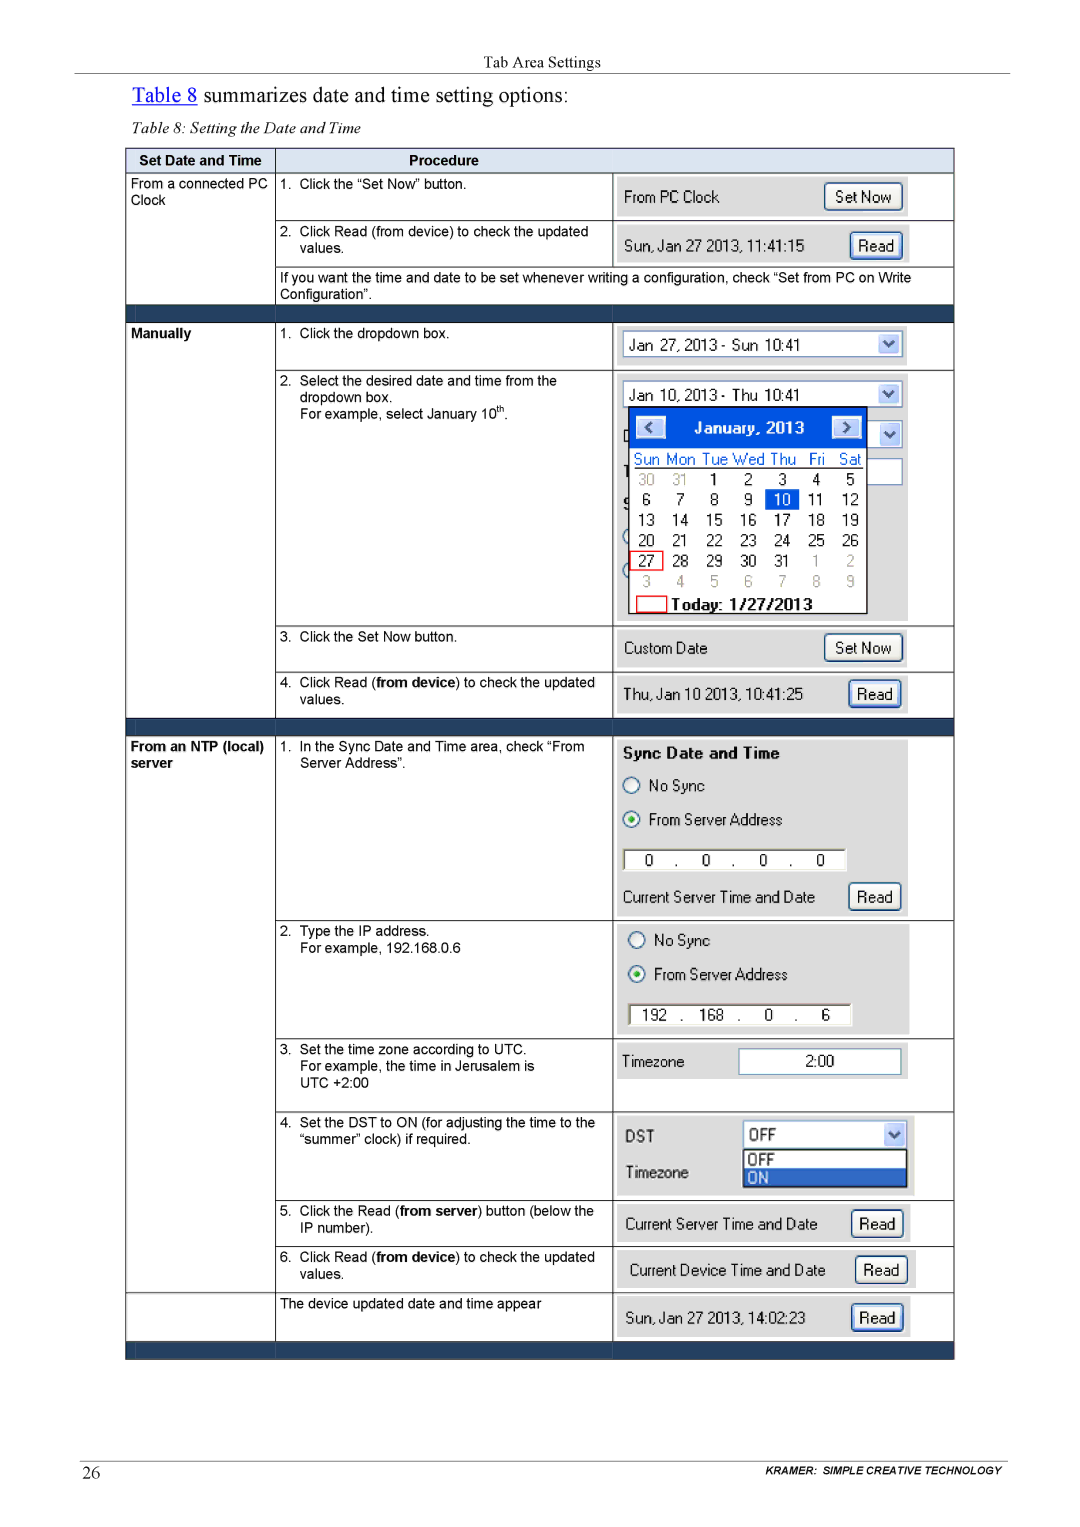
Table 8 summarizes date and time setting options:
Table 8: Setting the Date and Time
| Set Date and Time |
| Procedure |
| |
| From a connected PC | 1. Click the “Set Now” button. |
|
| |
| Clock |
|
|
|
|
|
|
|
|
|
|
|
| 2. | Click Read (from device) to check the updated |
|
|
|
|
| values. |
|
|
|
|
|
|
| |
|
| If you want the time and date to be set whenever writing a configuration, check “Set from PC on Write |
| ||
|
| Configuration”. |
| ||
|
|
|
|
| |
| Manually | 1. | Click the dropdown box. |
|
|
|
|
|
|
|
|
|
| 2. | Select the desired date and time from the |
|
|
|
|
| dropdown box. |
|
|
|
|
| For example, select January 10th. |
|
|
|
|
|
|
|
|
|
| 3. | Click the Set Now button. |
|
|
|
|
|
|
|
|
|
| 4. | Click Read (from device) to check the updated |
|
|
|
|
| values. |
|
|
|
|
|
|
| |
|
|
|
| ||
| From an NTP (local) | 1. In the Sync Date and Time area, check “From |
|
| |
| server |
| Server Address”. |
|
|
|
|
|
|
|
|
|
| 2. | Type the IP address. |
|
|
|
|
| For example, 192.168.0.6 |
|
|
|
|
|
|
|
|
|
| 3. | Set the time zone according to UTC. |
|
|
|
|
| For example, the time in Jerusalem is |
|
|
|
|
| UTC +2:00 |
|
|
|
|
|
|
|
|
|
| 4. | Set the DST to ON (for adjusting the time to the |
|
|
|
|
| “summer” clock) if required. |
|
|
|
|
|
|
|
|
|
| 5. | Click the Read (from server) button (below the |
|
|
|
|
| IP number). |
|
|
|
|
|
|
|
|
|
| 6. | Click Read (from device) to check the updated |
|
|
|
|
| values. |
|
|
|
|
|
|
| |
|
| The device updated date and time appear |
|
| |
|
|
|
|
|
|
|
|
|
|
|
|
|
|
|
|
|
|
26 |
|
|
| KRAMER: SIMPLE CREATIVE TECHNOLOGY | |