Chapter 3: Server Installation
7. Setting Up the Mail Server
The FaxFinder uses a mail server to send, by email, call log reports to the administrator. An email is also sent to the administrator each time the FaxFinder is powered up. In all cases, you must specify the address of the mail server and the email address of the administrator. Some email servers require authentication before allowing the FaxFinder access. In these cases, the FaxFinder unit must be assigned a Server User Name and a password. If the mail server does not require authentication, the bottom row of SMTP Configuration fields (“Server User ID,” “Password,” and “Retype Password”) must be left blank.
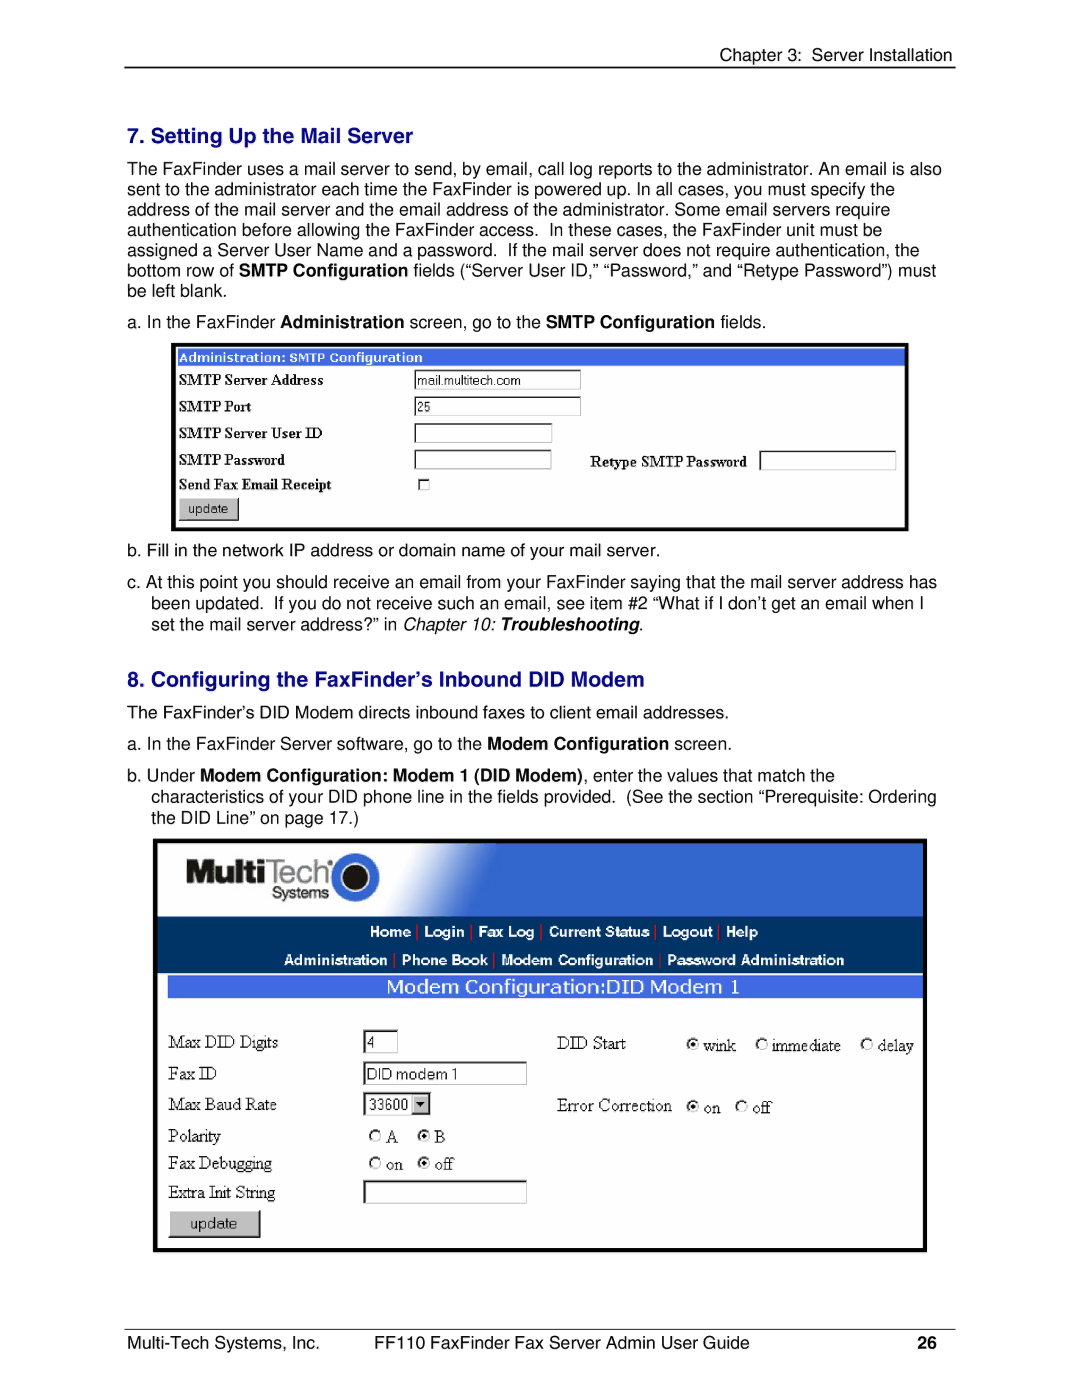
a. In the FaxFinder Administration screen, go to the SMTP Configuration fields.
b. Fill in the network IP address or domain name of your mail server.
c. At this point you should receive an email from your FaxFinder saying that the mail server address has been updated. If you do not receive such an email, see item #2 “What if I don’t get an email when I set the mail server address?” in Chapter 10: Troubleshooting.
8. Configuring the FaxFinder’s Inbound DID Modem
The FaxFinder’s DID Modem directs inbound faxes to client email addresses.
a. In the FaxFinder Server software, go to the Modem Configuration screen.
b. Under Modem Configuration: Modem 1 (DID Modem), enter the values that match the characteristics of your DID phone line in the fields provided. (See the section “Prerequisite: Ordering the DID Line” on page 17.)
FF110 FaxFinder Fax Server Admin User Guide | 26 |
