NETWORK menu
JJAdjust clock page
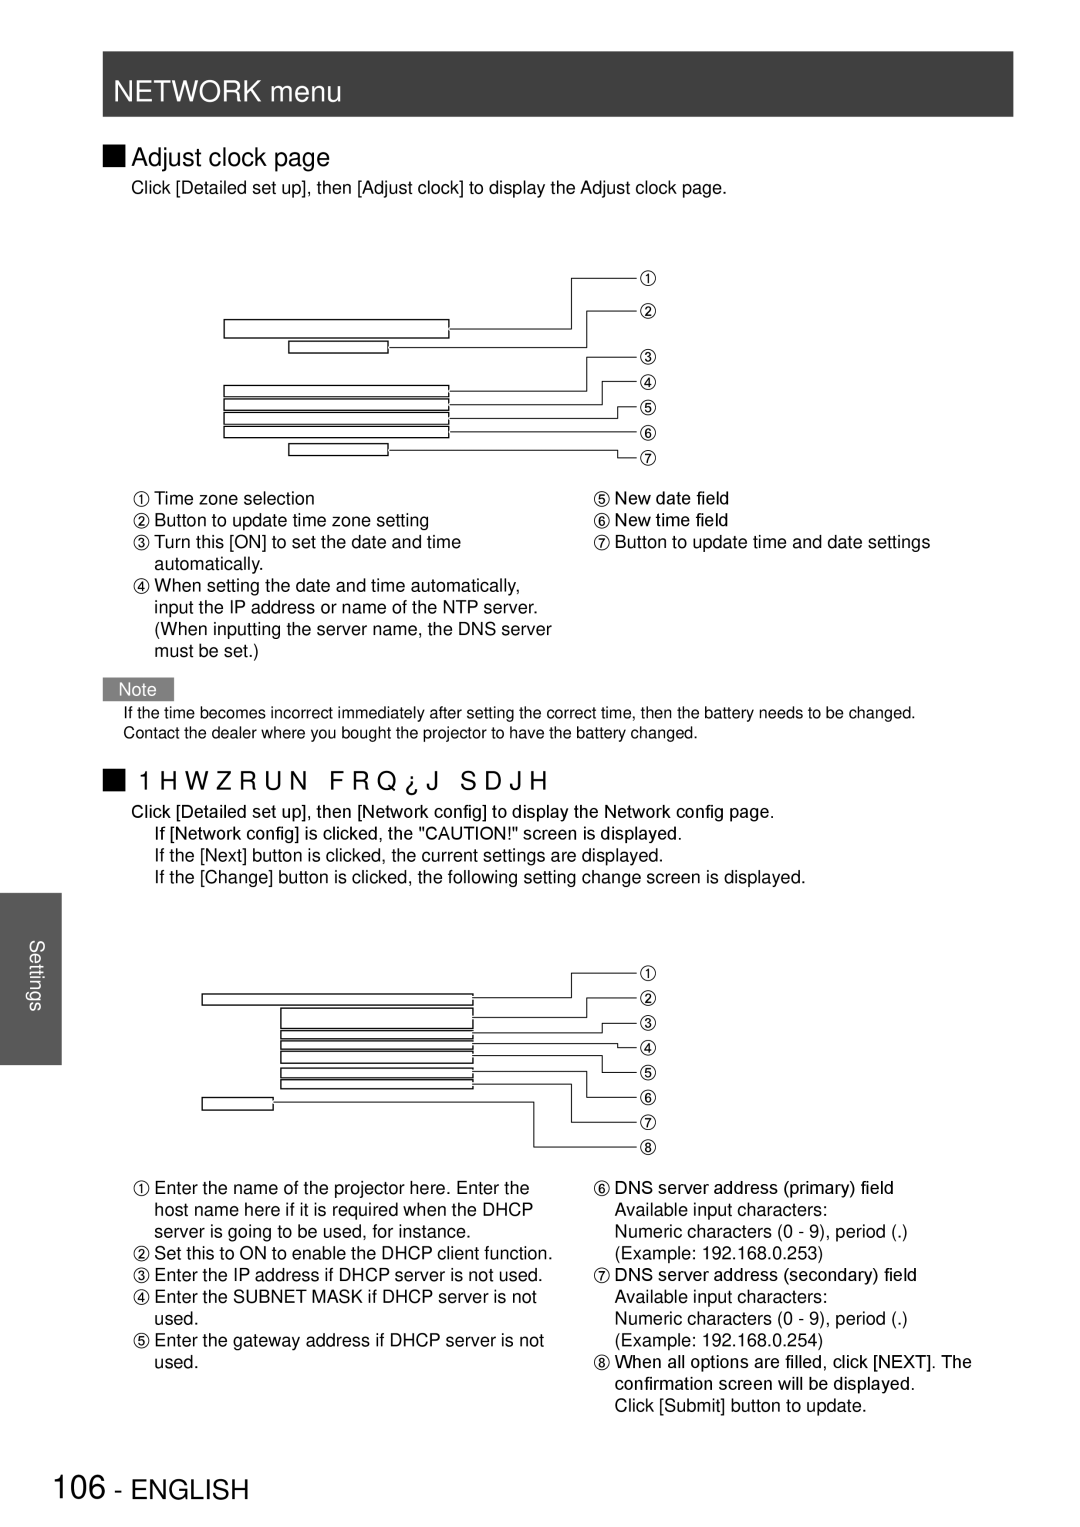
Click [Detailed set up], then [Adjust clock] to display the Adjust clock page.
Time zone selection | New date field |
Button to update time zone setting | New time field |
Turn this [ON] to set the date and time | Button to update time and date settings |
automatically. |
|
When setting the date and time automatically, |
|
input the IP address or name of the NTP server. |
|
(When inputting the server name, the DNS server |
|
must be set.) |
|
Note
zzIf the time becomes incorrect immediately after setting the correct time, then the battery needs to be changed. Contact the dealer where you bought the projector to have the battery changed.
JJNetwork config page
Click [Detailed set up], then [Network config] to display the Network config page. zzIf [Network config] is clicked, the "CAUTION!" screen is displayed.
zzIf the [Next] button is clicked, the current settings are displayed.
zzIf the [Change] button is clicked, the following setting change screen is displayed.
Settings
![]() Enter the name of the projector here. Enter the host name here if it is required when the DHCP server is going to be used, for instance.
Enter the name of the projector here. Enter the host name here if it is required when the DHCP server is going to be used, for instance.
![]() Set this to ON to enable the DHCP client function.
Set this to ON to enable the DHCP client function.
![]() Enter the IP address if DHCP server is not used.
Enter the IP address if DHCP server is not used.
![]() Enter the SUBNET MASK if DHCP server is not used.
Enter the SUBNET MASK if DHCP server is not used.
![]() Enter the gateway address if DHCP server is not used.
Enter the gateway address if DHCP server is not used.
![]() DNS server address (primary) field Available input characters:
DNS server address (primary) field Available input characters:
Numeric characters (0 - 9), period (.) (Example: 192.168.0.253)
![]() DNS server address (secondary) field Available input characters:
DNS server address (secondary) field Available input characters:
Numeric characters (0 - 9), period (.) (Example: 192.168.0.254)
![]() When all options are filled, click [NEXT]. The confirmation screen will be displayed.
When all options are filled, click [NEXT]. The confirmation screen will be displayed.
Click [Submit] button to update.
106 - ENGLISH