23 Troubleshooting
23 Troubleshooting
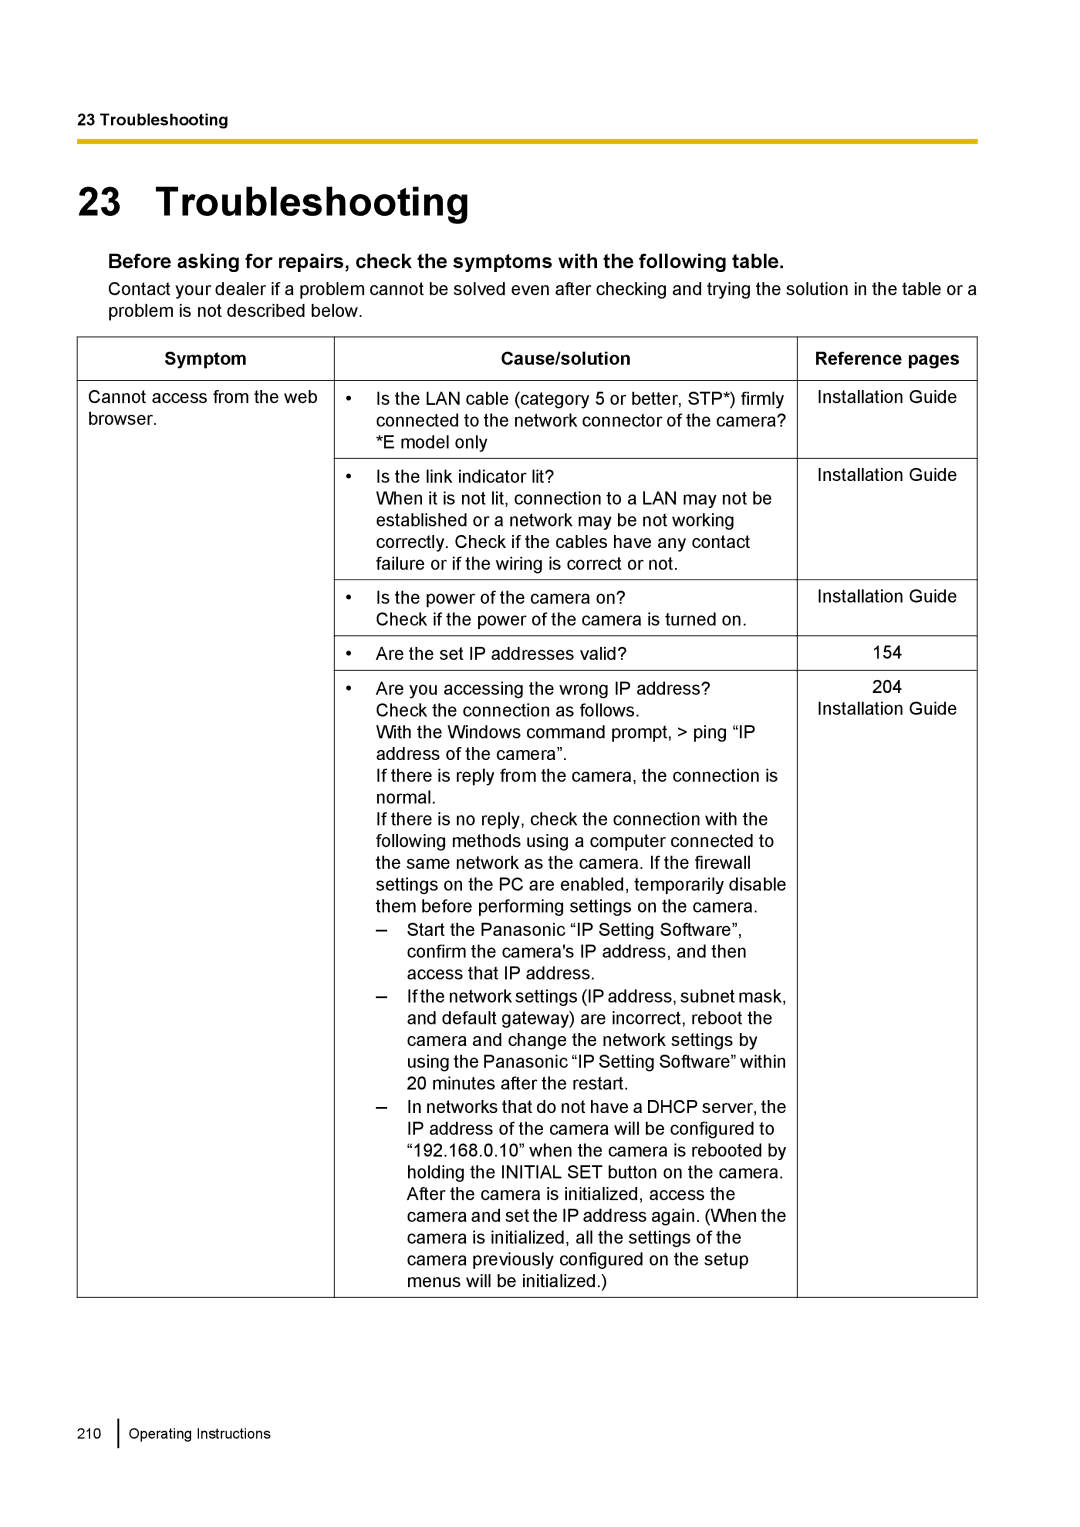
Before asking for repairs, check the symptoms with the following table.
Contact your dealer if a problem cannot be solved even after checking and trying the solution in the table or a problem is not described below.
Symptom
Cannot access from the web browser.
Cause/solution
•Is the LAN cable (category 5 or better, STP*) firmly connected to the network connector of the camera? *E model only
•Is the link indicator lit?
When it is not lit, connection to a LAN may not be established or a network may be not working correctly. Check if the cables have any contact failure or if the wiring is correct or not.
•Is the power of the camera on?
Check if the power of the camera is turned on.
•Are the set IP addresses valid?
•Are you accessing the wrong IP address? Check the connection as follows.
With the Windows command prompt, > ping “IP address of the camera”.
If there is reply from the camera, the connection is normal.
If there is no reply, check the connection with the following methods using a computer connected to the same network as the camera. If the firewall settings on the PC are enabled, temporarily disable them before performing settings on the camera.
–Start the Panasonic “IP Setting Software”, confirm the camera's IP address, and then access that IP address.
–If the network settings (IP address, subnet mask, and default gateway) are incorrect, reboot the camera and change the network settings by using the Panasonic “IP Setting Software” within 20 minutes after the restart.
–In networks that do not have a DHCP server, the IP address of the camera will be configured to “192.168.0.10” when the camera is rebooted by holding the INITIAL SET button on the camera. After the camera is initialized, access the camera and set the IP address again. (When the camera is initialized, all the settings of the camera previously configured on the setup menus will be initialized.)
Reference pages
Installation Guide
Installation Guide
Installation Guide
154
204
Installation Guide
210
