21 Using the
•The information displayed can be sorted by clicking the title of each displayed item.
•When the [Network Settings] button is clicked, the “Network Settings” screen is displayed and network settings can be changed. For further information, refer to page 205.
3.The viewer software “Network Camera View 4S” must be installed in order to view images. Follow the
•The “Live” page of the camera is displayed.
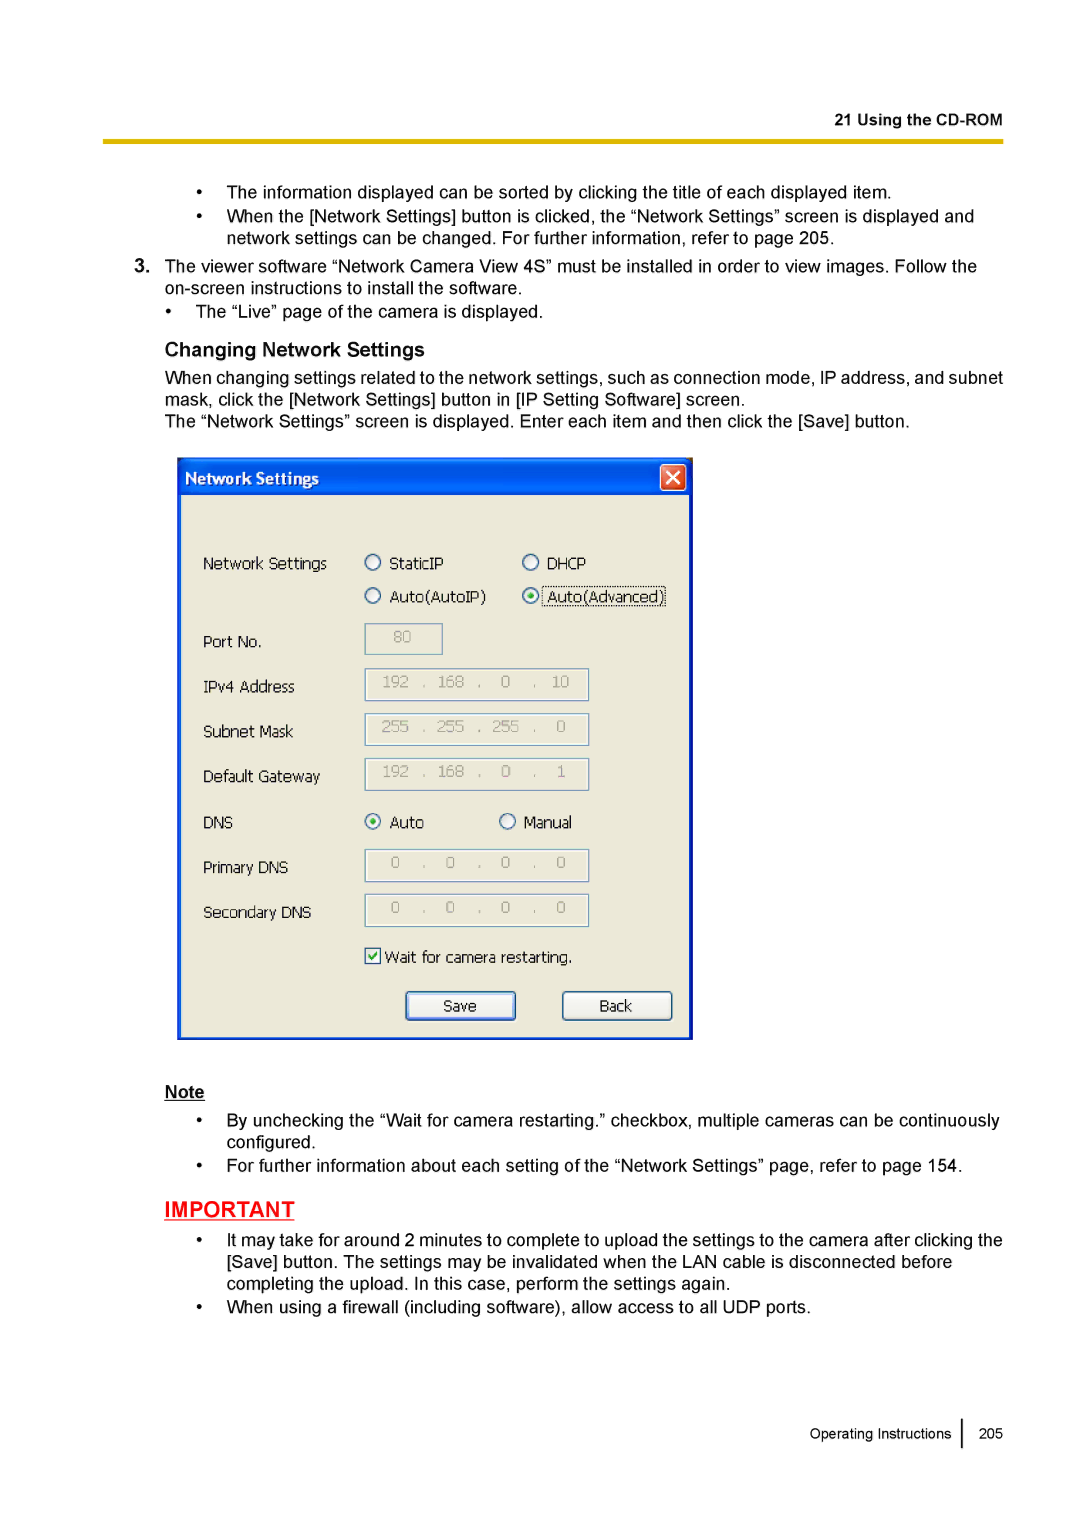
Changing Network Settings
When changing settings related to the network settings, such as connection mode, IP address, and subnet mask, click the [Network Settings] button in [IP Setting Software] screen.
The “Network Settings” screen is displayed. Enter each item and then click the [Save] button.
Note
•By unchecking the “Wait for camera restarting.” checkbox, multiple cameras can be continuously configured.
•For further information about each setting of the “Network Settings” page, refer to page 154.
IMPORTANT
•It may take for around 2 minutes to complete to upload the settings to the camera after clicking the [Save] button. The settings may be invalidated when the LAN cable is disconnected before completing the upload. In this case, perform the settings again.
•When using a firewall (including software), allow access to all UDP ports.
Operating Instructions
205