Print Module Handling
CAUTION: Do not lay the print module flat on the sides, back, or front if removed from the printer. The unit must stand on end as shown below.
Installing the Stacker
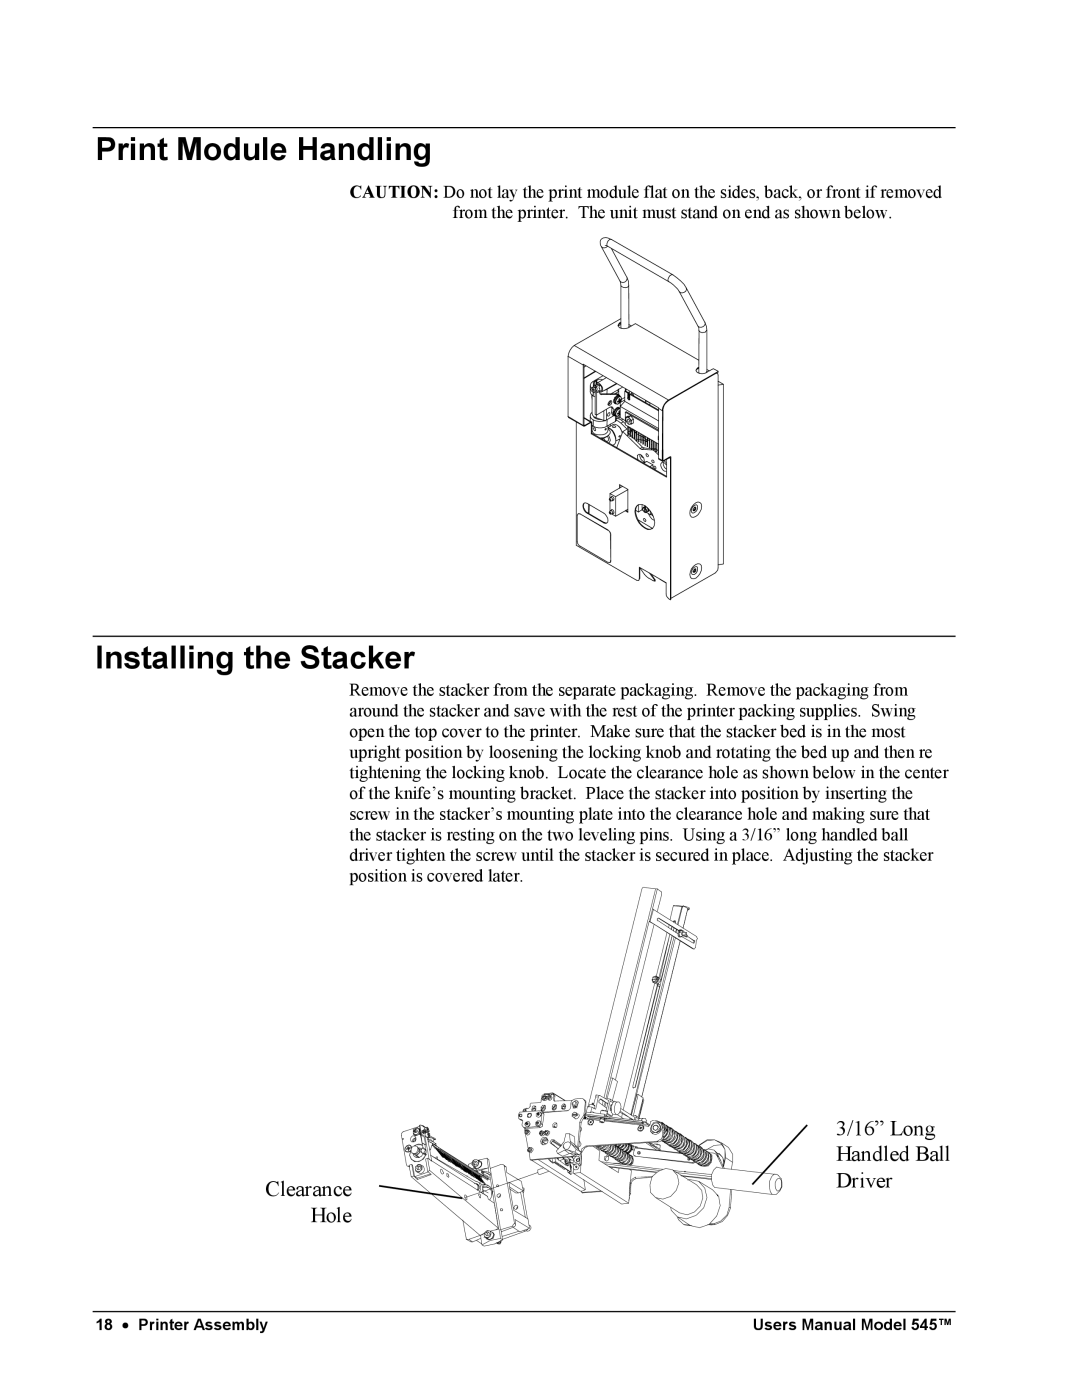
Remove the stacker from the separate packaging. Remove the packaging from around the stacker and save with the rest of the printer packing supplies. Swing open the top cover to the printer. Make sure that the stacker bed is in the most upright position by loosening the locking knob and rotating the bed up and then re tightening the locking knob. Locate the clearance hole as shown below in the center of the knife’s mounting bracket. Place the stacker into position by inserting the screw in the stacker’s mounting plate into the clearance hole and making sure that the stacker is resting on the two leveling pins. Using a 3/16” long handled ball driver tighten the screw until the stacker is secured in place. Adjusting the stacker position is covered later.
| 3/16” Long |
| Handled Ball |
Clearance | Driver |
| |
Hole |
|
18 • Printer Assembly | Users Manual Model 545™ |