5SEARCHING FOR RECORDED VIDEO
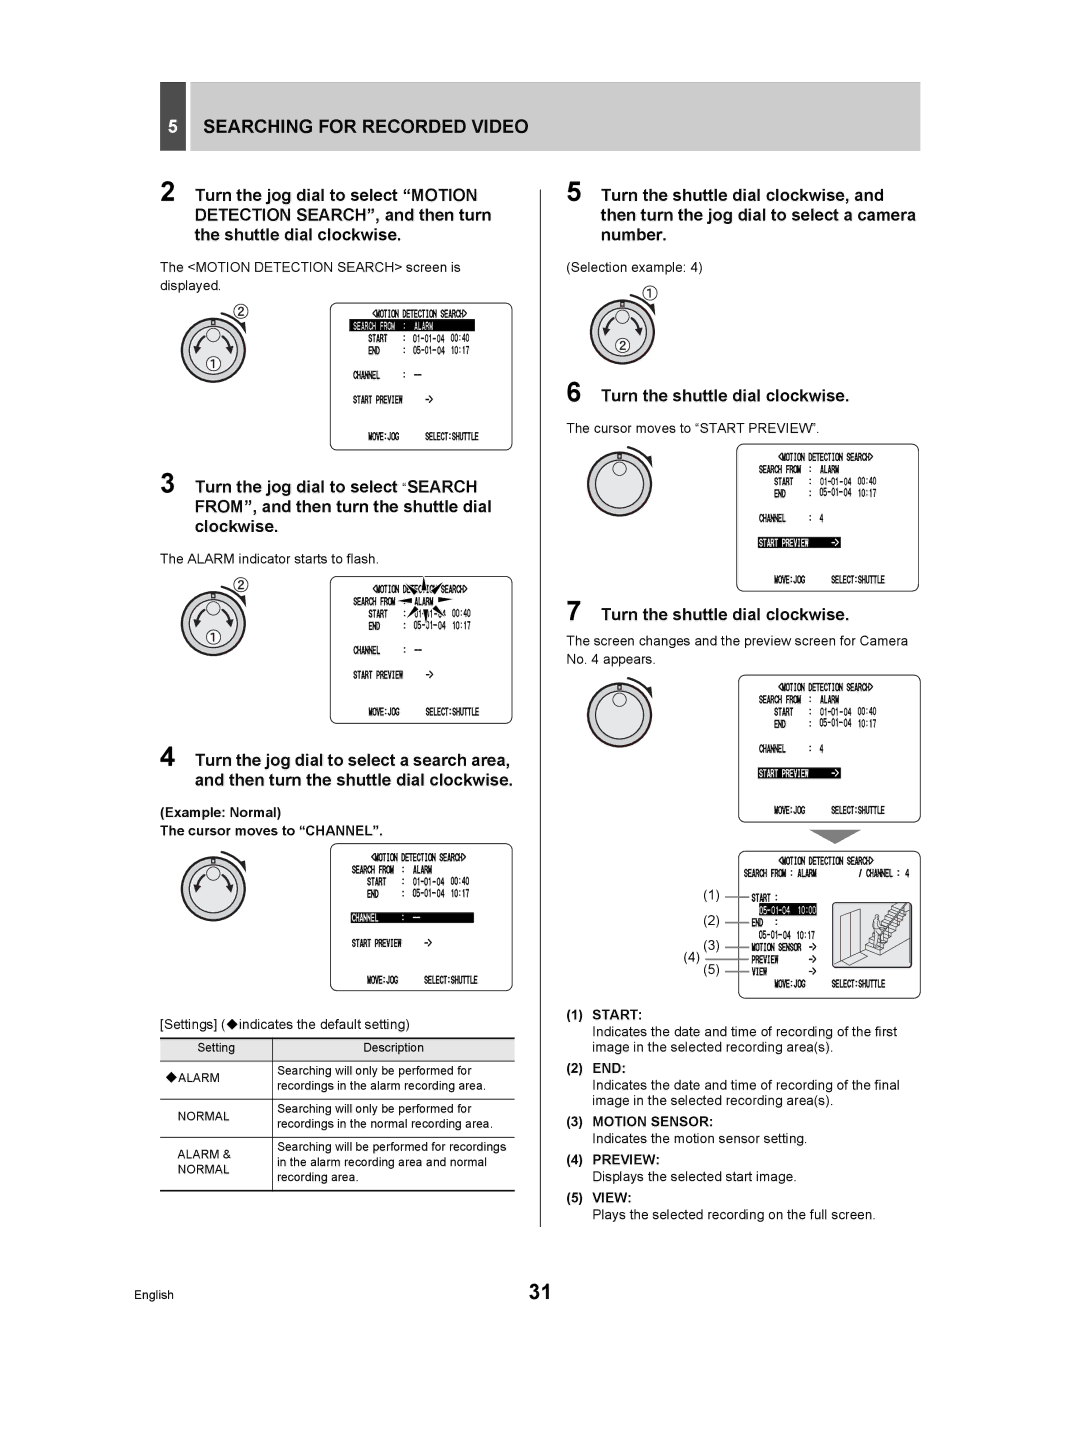
2 Turn the jog dial to select “MOTION DETECTION SEARCH”, and then turn the shuttle dial clockwise.
The <MOTION DETECTION SEARCH> screen is displayed.
3 Turn the jog dial to select “SEARCH
FROM”, and then turn the shuttle dial clockwise.
The ALARM indicator starts to flash.
4 Turn the jog dial to select a search area, and then turn the shuttle dial clockwise.
(Example: Normal)
The cursor moves to “CHANNEL”.
[Settings] (indicates the default setting)
Setting | Description |
|
|
Searching will only be performed for
ALARM recordings in the alarm recording area.
NORMAL | Searching will only be performed for | |
recordings in the normal recording area. | ||
| ||
|
| |
ALARM & | Searching will be performed for recordings | |
in the alarm recording area and normal | ||
NORMAL | ||
recording area. | ||
|
5 Turn the shuttle dial clockwise, and then turn the jog dial to select a camera number.
(Selection example: 4)
6 Turn the shuttle dial clockwise.
The cursor moves to “START PREVIEW”.
7 Turn the shuttle dial clockwise.
The screen changes and the preview screen for Camera No. 4 appears.
(1)
(2)
(4) (3)(5) ![]()
(1)START:
Indicates the date and time of recording of the first image in the selected recording area(s).
(2)END:
Indicates the date and time of recording of the final image in the selected recording area(s).
(3)MOTION SENSOR:
Indicates the motion sensor setting.
(4)PREVIEW:
Displays the selected start image.
(5)VIEW:
Plays the selected recording on the full screen.
English | 31 |
