1MENU CONFIGURATION AND OPERATIONS
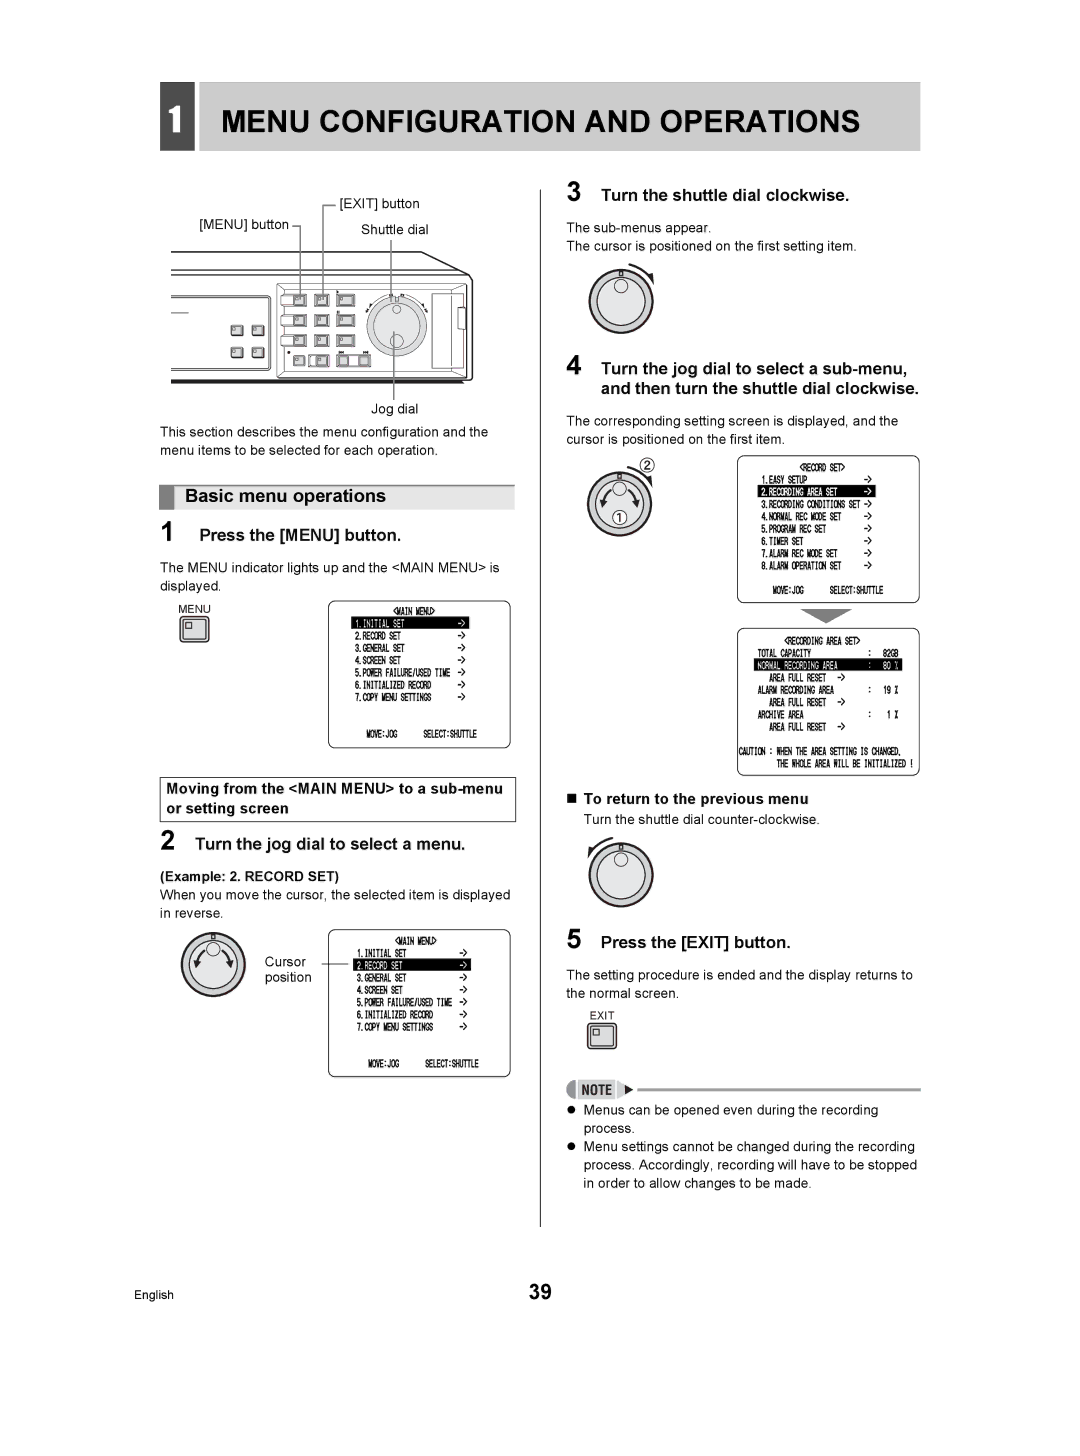
[MENU] button |
|
|
|
| [EXIT] button | ||
|
|
|
| ||||
|
|
|
| Shuttle dial | |||
|
|
|
| ||||
|
|
|
|
|
| ||
|
|
|
|
|
|
|
|
|
|
|
|
|
|
|
|
|
|
|
|
|
|
|
|
|
|
|
|
|
|
|
|
|
|
|
|
|
|
|
|
|
|
|
|
|
|
|
|
|
|
|
|
|
|
|
|
|
|
|
|
|
|
|
|
Jog dial
This section describes the menu configuration and the menu items to be selected for each operation.
Basic menu operations
1 Press the [MENU] button.
The MENU indicator lights up and the <MAIN MENU> is displayed.
MENU
Moving from the <MAIN MENU> to a sub-menu or setting screen
2 Turn the jog dial to select a menu.
(Example: 2. RECORD SET)
When you move the cursor, the selected item is displayed in reverse.
Cursor position
3 Turn the shuttle dial clockwise.
The
The cursor is positioned on the first setting item.
4 Turn the jog dial to select a
The corresponding setting screen is displayed, and the cursor is positioned on the first item.
To return to the previous menu
Turn the shuttle dial
5 Press the [EXIT] button.
The setting procedure is ended and the display returns to the normal screen.
EXIT
zMenus can be opened even during the recording process.
zMenu settings cannot be changed during the recording process. Accordingly, recording will have to be stopped in order to allow changes to be made.
English | 39 |