5SEARCHING FOR RECORDED VIDEO
Set the motion sensor to use for searching.
1 Turn the shuttle dial clockwise while video is being displayed on the preview screen.
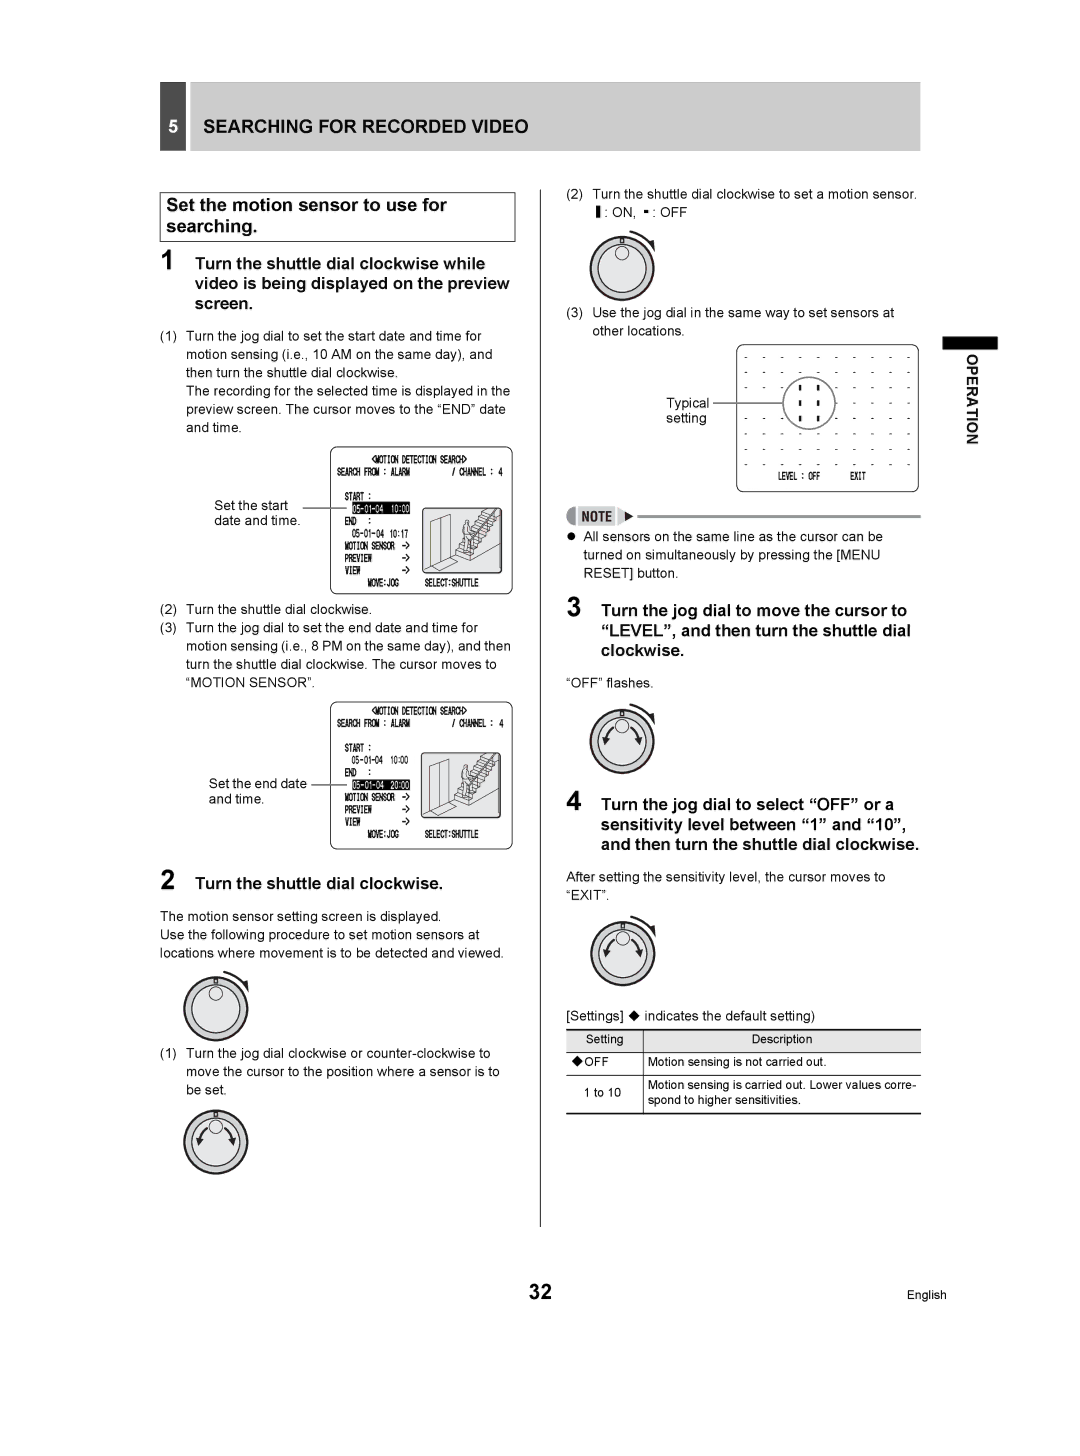
(1)Turn the jog dial to set the start date and time for motion sensing (i.e., 10 AM on the same day), and then turn the shuttle dial clockwise.
The recording for the selected time is displayed in the preview screen. The cursor moves to the “END” date and time.
Set the start date and time.
(2)Turn the shuttle dial clockwise.
(3)Turn the jog dial to set the end date and time for motion sensing (i.e., 8 PM on the same day), and then turn the shuttle dial clockwise. The cursor moves to “MOTION SENSOR”.
Set the end date and time.
2 Turn the shuttle dial clockwise.
The motion sensor setting screen is displayed.
Use the following procedure to set motion sensors at locations where movement is to be detected and viewed.
(1)Turn the jog dial clockwise or
(2)Turn the shuttle dial clockwise to set a motion sensor.
![]() : ON, : OFF
: ON, : OFF
(3)Use the jog dial in the same way to set sensors at other locations.
Typical setting
zAll sensors on the same line as the cursor can be turned on simultaneously by pressing the [MENU RESET] button.
3 Turn the jog dial to move the cursor to “LEVEL”, and then turn the shuttle dial clockwise.
“OFF” flashes.
4 Turn the jog dial to select “OFF” or a sensitivity level between “1” and “10”, and then turn the shuttle dial clockwise.
After setting the sensitivity level, the cursor moves to “EXIT”.
[Settings] indicates the default setting)
Setting | Description | |
|
| |
OFF | Motion sensing is not carried out. | |
|
| |
1 to 10 | Motion sensing is carried out. Lower values corre- | |
spond to higher sensitivities. | ||
| ||
|
|
OPERATION
32 | English |