6SAVING (COPYING) RECORDED VIDEO
8 Turn the jog dial to select “SECONDS”.
[Settings] ( indicates the default setting)
Setting | Description | |
|
| |
PICTURES | The specified number of images after the | |
| specified location will be copied. | |
SECONDS | The specified duration in seconds after the | |
| specified location will be copied. | |
MINUTES | The specified duration in minutes after the | |
specified location will be copied. | ||
| ||
|
|
9 Turn the shuttle dial clockwise.
The cursor moves to “START”.
10 Turn the shuttle dial clockwise.
(1) Copying to the archive area commences. |
The message “COPY TO ARCHIVE AREA!” is |
(2)When this procedure has been completed, “COPY FINISHED!” is displayed.
To cancel a copy operation
Press the [COPY] button to cancel the current copy.
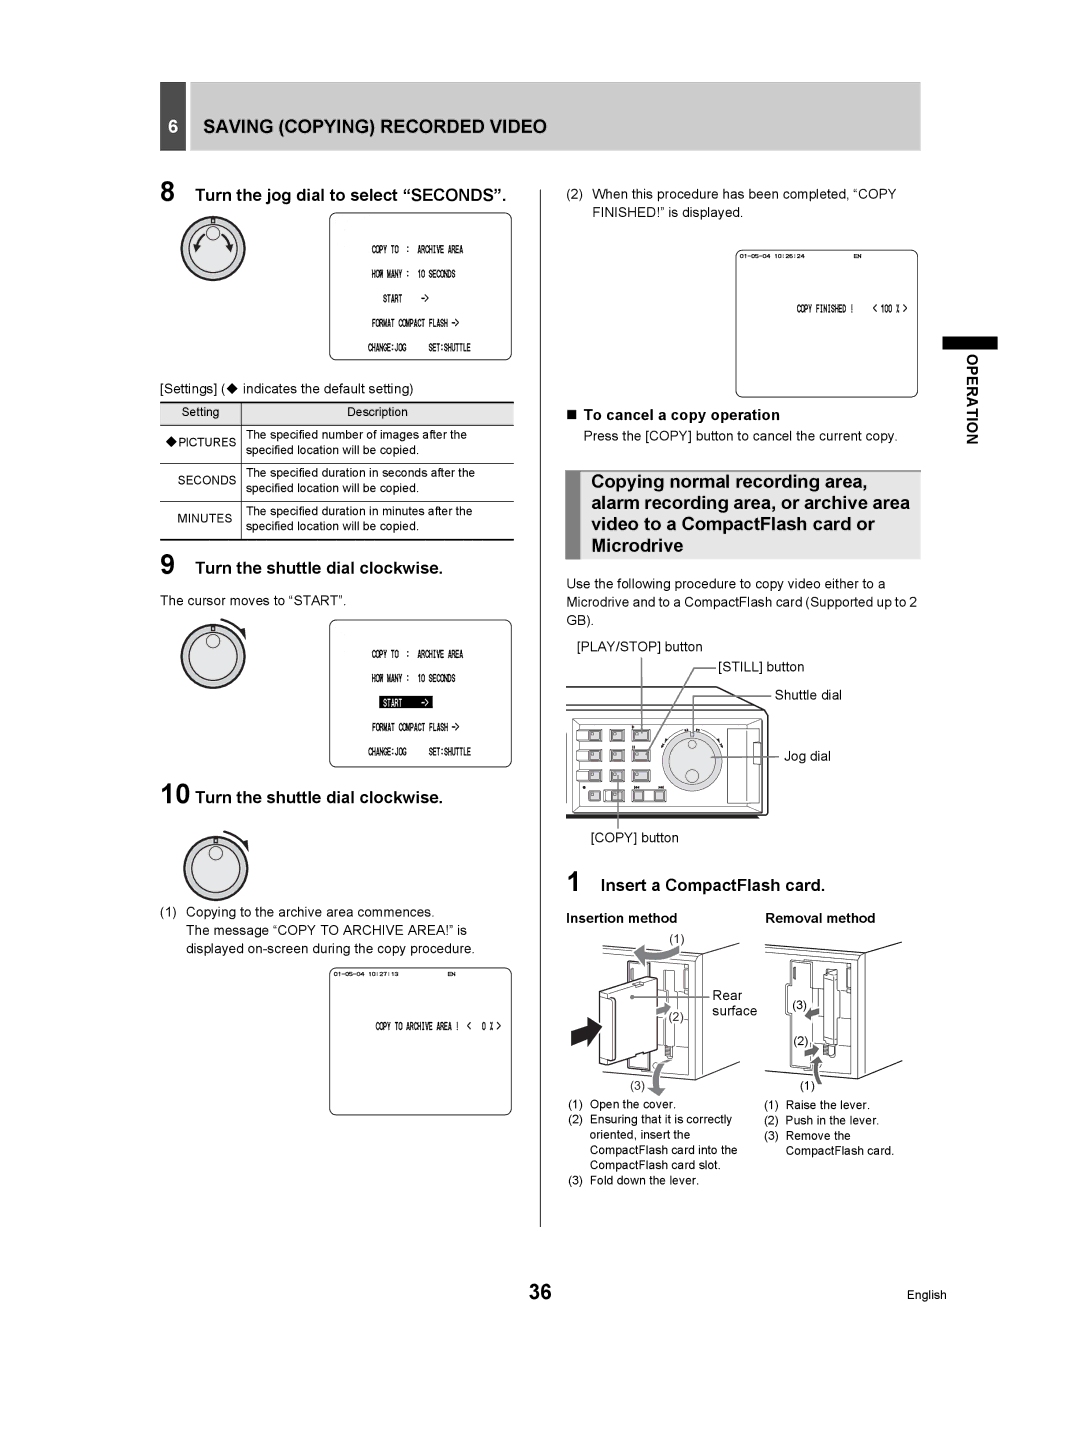
Copying normal recording area, alarm recording area, or archive area video to a CompactFlash card or Microdrive
Use the following procedure to copy video either to a Microdrive and to a CompactFlash card (Supported up to 2 GB).
[PLAY/STOP] button
[STILL] button
Shuttle dial
Jog dial
[COPY] button
1 Insert a CompactFlash card.
Insertion method | Removal method |
OPERATION
displayed |
(1)
Rear
(2) surface
(3)
(1)Open the cover.
(2)Ensuring that it is correctly oriented, insert the CompactFlash card into the CompactFlash card slot.
(3)Fold down the lever.
(3)
(2)
(1)
(1)Raise the lever.
(2)Push in the lever.
(3)Remove the CompactFlash card.
36 | English |
