3RECORD SET
Timer settings
Use the following procedures to set recording start and stop times using the timer function.
Timer setting items
Timer setting items allow you to set times at which to start and stop recording or recording rate on each specified day of the week.
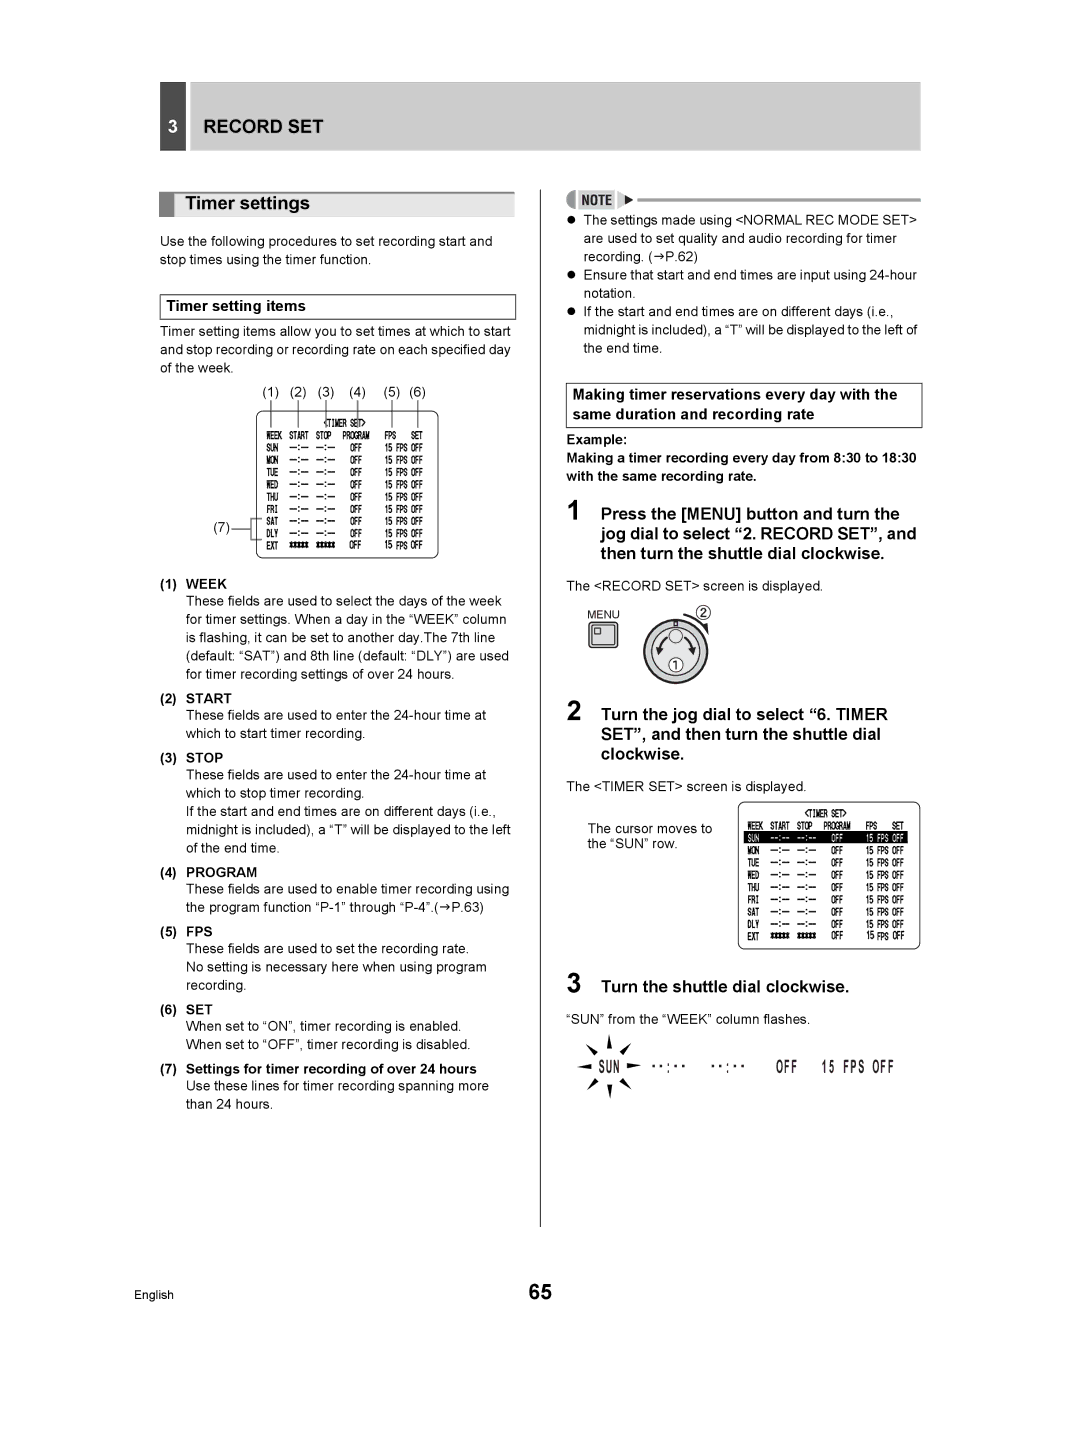
(1) | (2) | (3) | (4) | (5) | (6) |
(7) ![]()
(1)WEEK
These fields are used to select the days of the week for timer settings. When a day in the “WEEK” column is flashing, it can be set to another day.The 7th line (default: “SAT”) and 8th line (default: “DLY”) are used for timer recording settings of over 24 hours.
(2)START
These fields are used to enter the
(3)STOP
These fields are used to enter the
If the start and end times are on different days (i.e., midnight is included), a “T” will be displayed to the left of the end time.
(4)PROGRAM
These fields are used to enable timer recording using the program function
(5)FPS
These fields are used to set the recording rate. No setting is necessary here when using program recording.
(6)SET
When set to “ON”, timer recording is enabled. When set to “OFF”, timer recording is disabled.
(7)Settings for timer recording of over 24 hours Use these lines for timer recording spanning more than 24 hours.
zThe settings made using <NORMAL REC MODE SET> are used to set quality and audio recording for timer recording. (JP.62)
zEnsure that start and end times are input using
zIf the start and end times are on different days (i.e., midnight is included), a “T” will be displayed to the left of the end time.
Making timer reservations every day with the same duration and recording rate
Example:
Making a timer recording every day from 8:30 to 18:30 with the same recording rate.
1 Press the [MENU] button and turn the jog dial to select “2. RECORD SET”, and then turn the shuttle dial clockwise.
The <RECORD SET> screen is displayed.
MENU
2 Turn the jog dial to select “6. TIMER SET”, and then turn the shuttle dial clockwise.
The <TIMER SET> screen is displayed.
The cursor moves to the “SUN” row.
3 Turn the shuttle dial clockwise.
“SUN” from the “WEEK” column flashes.
SUN | OFF 15 FPS OFF |
English | 65 |