Maintenance | en |
|
3.Disconnect the adjustable nut (3) from the brake lever (4).
4.Align the hole in the brake lever to be 1/4 inch from the rear of the slot in the frame.
5.Push the clutch rod (5) toward the rear. Turn the adjustable nut until the nut will fit through the hole in the brake lever.
6.Assemble the adjustable nut to the brake lever.
7.If the belt still slips after the clutch has been ad- justed, then the motion drive belt is worn or dam- aged and must be replaced. See “Remove and Install the Motion Drive Belt”.
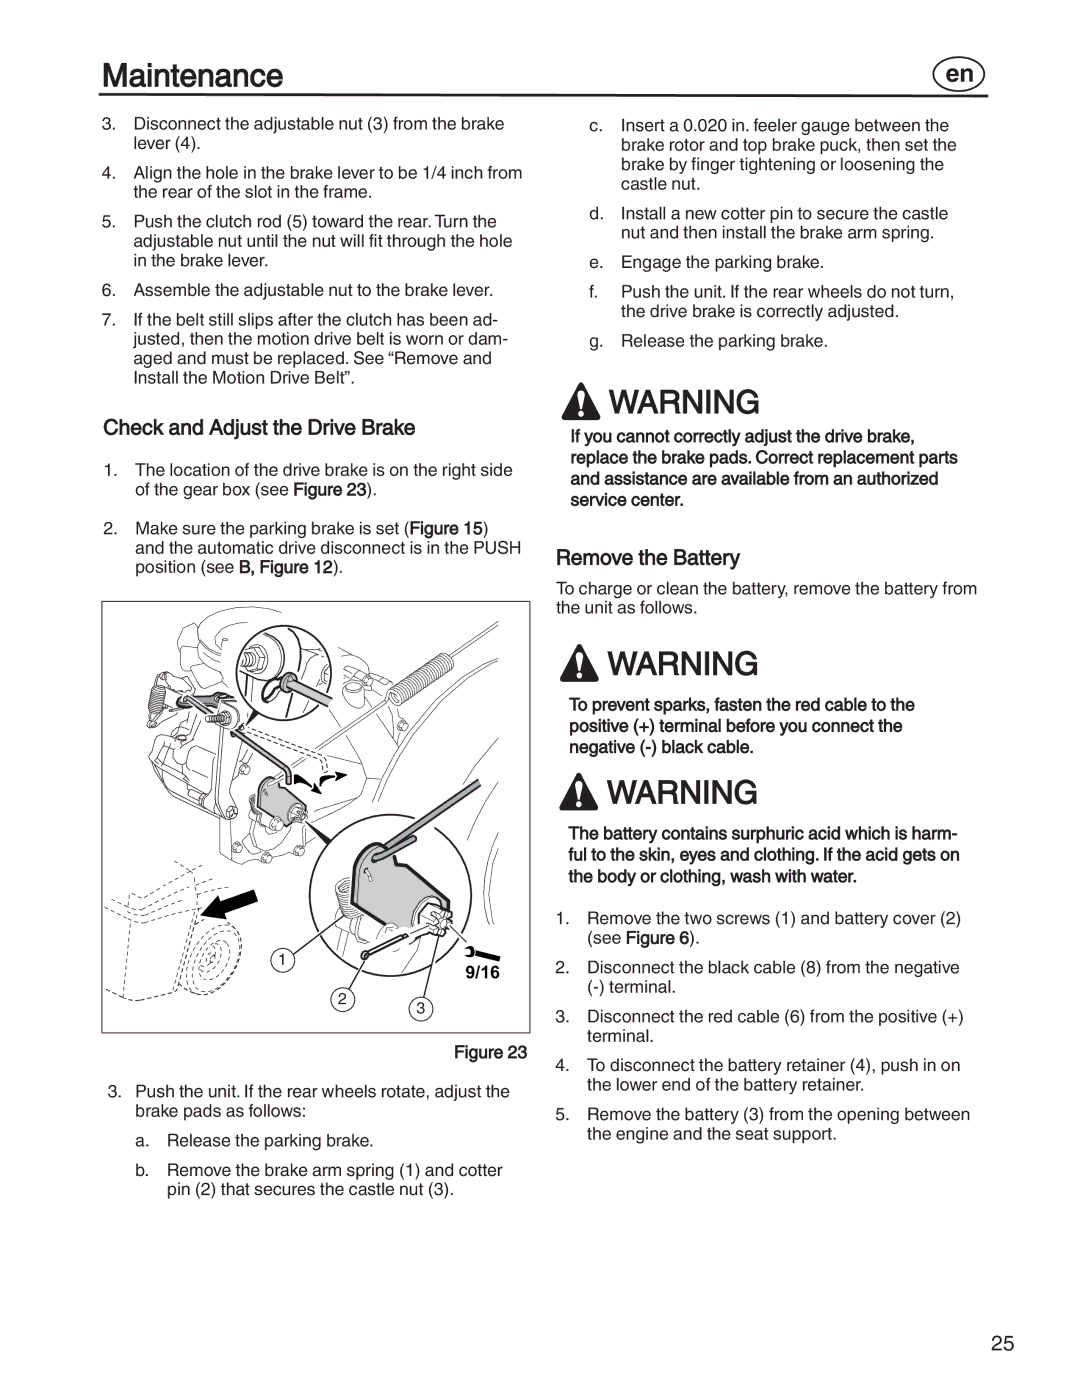
Check and Adjust the Drive Brake
1.The location of the drive brake is on the right side of the gear box (see Figure 23).
2.Make sure the parking brake is set (Figure 15) and the automatic drive disconnect is in the PUSH position (see B, Figure 12).
1 | 9/16 |
| |
2 | 3 |
|
Figure 23
3.Push the unit. If the rear wheels rotate, adjust the brake pads as follows:
a.Release the parking brake.
b.Remove the brake arm spring (1) and cotter pin (2) that secures the castle nut (3).
c.Insert a 0.020 in. feeler gauge between the brake rotor and top brake puck, then set the brake by finger tightening or loosening the castle nut.
d.Install a new cotter pin to secure the castle nut and then install the brake arm spring.
e.Engage the parking brake.
f.Push the unit. If the rear wheels do not turn, the drive brake is correctly adjusted.
g.Release the parking brake.
![]() WARNING
WARNING
If you cannot correctly adjust the drive brake, replace the brake pads. Correct replacement parts and assistance are available from an authorized service center.
Remove the Battery
To charge or clean the battery, remove the battery from the unit as follows.
![]() WARNING
WARNING
To prevent sparks, fasten the red cable to the positive (+) terminal before you connect the negative
![]() WARNING
WARNING
The battery contains surphuric acid which is harm- ful to the skin, eyes and clothing. If the acid gets on the body or clothing, wash with water.
1.Remove the two screws (1) and battery cover (2) (see Figure 6).
2.Disconnect the black cable (8) from the negative
3.Disconnect the red cable (6) from the positive (+) terminal.
4.To disconnect the battery retainer (4), push in on the lower end of the battery retainer.
5.Remove the battery (3) from the opening between the engine and the seat support.
25