2. MAJOR UNIT REPLACEMENT
2.6 REPLACING THE PRINT HEAD
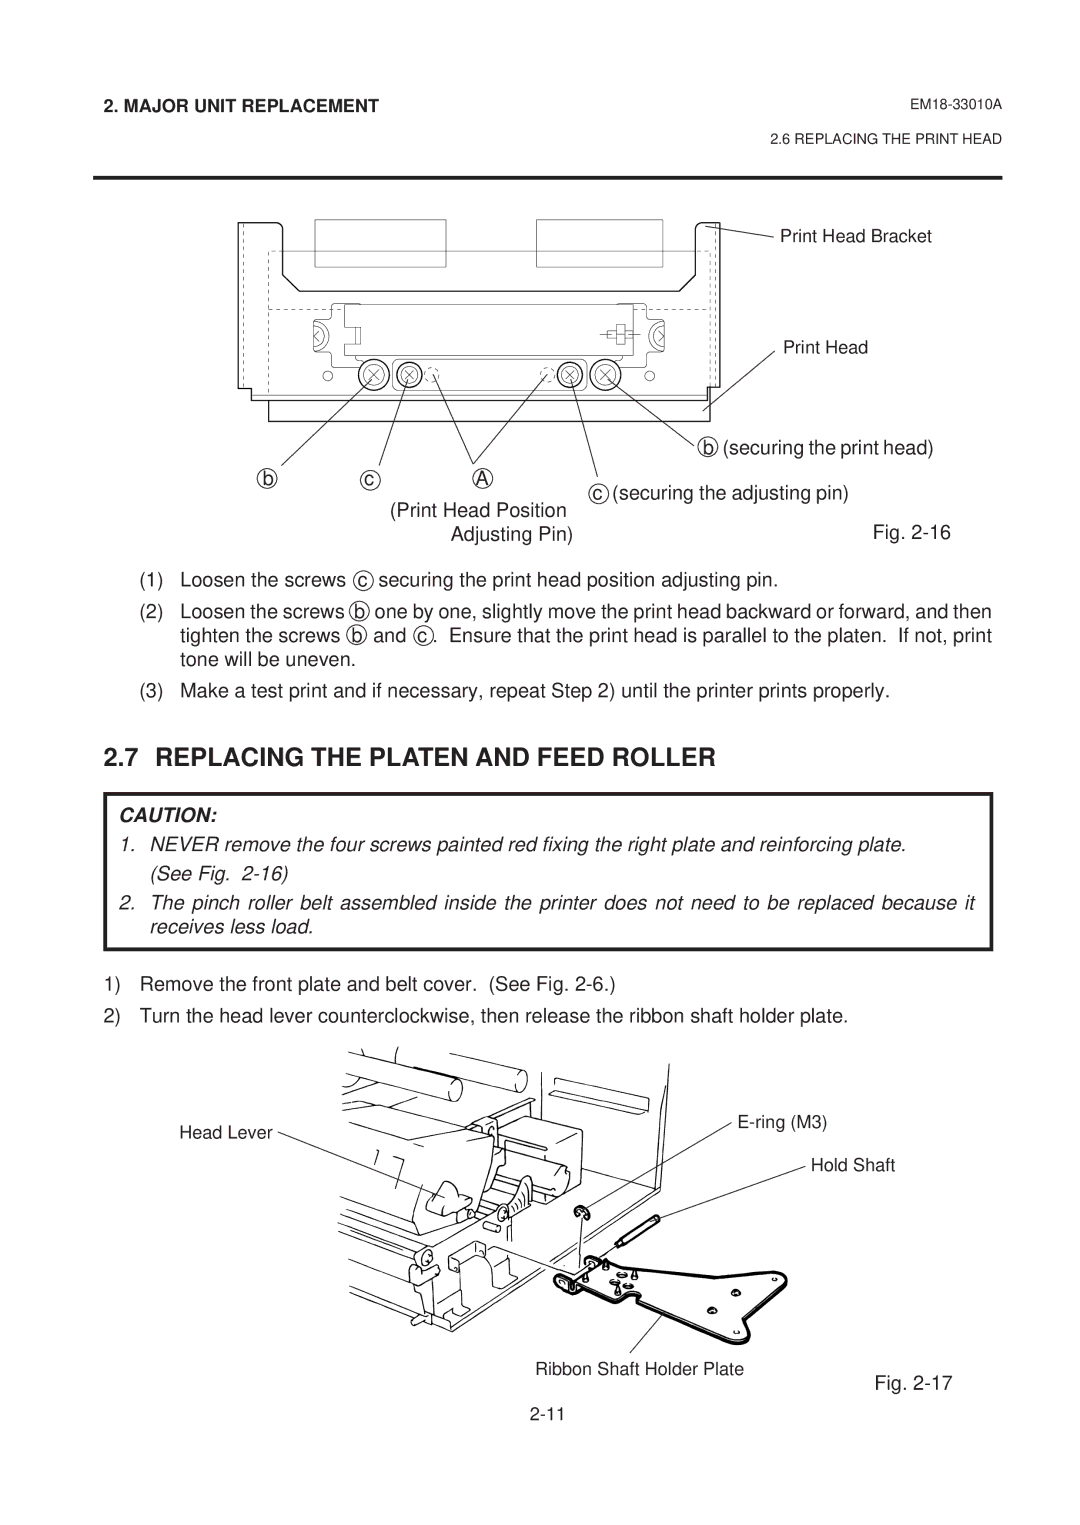
Print Head Bracket
Print Head
b (securing the print head)
b cA
(Print Head Position | c (securing the adjusting pin) | |
Fig. | ||
Adjusting Pin) |
(1)Loosen the screws c securing the print head position adjusting pin.
(2)Loosen the screws b one by one, slightly move the print head backward or forward, and then tighten the screws b and c . Ensure that the print head is parallel to the platen. If not, print tone will be uneven.
(3)Make a test print and if necessary, repeat Step 2) until the printer prints properly.
2.7REPLACING THE PLATEN AND FEED ROLLER
CAUTION:
1.NEVER remove the four screws painted red fixing the right plate and reinforcing plate. (See Fig.
2.The pinch roller belt assembled inside the printer does not need to be replaced because it receives less load.
1)Remove the front plate and belt cover. (See Fig.
2)Turn the head lever counterclockwise, then release the ribbon shaft holder plate.
Head Lever
Hold Shaft
Ribbon Shaft Holder Plate
Fig.