6. DIAG. TEST OPERATION
6.5 SENSOR SETTING MODE
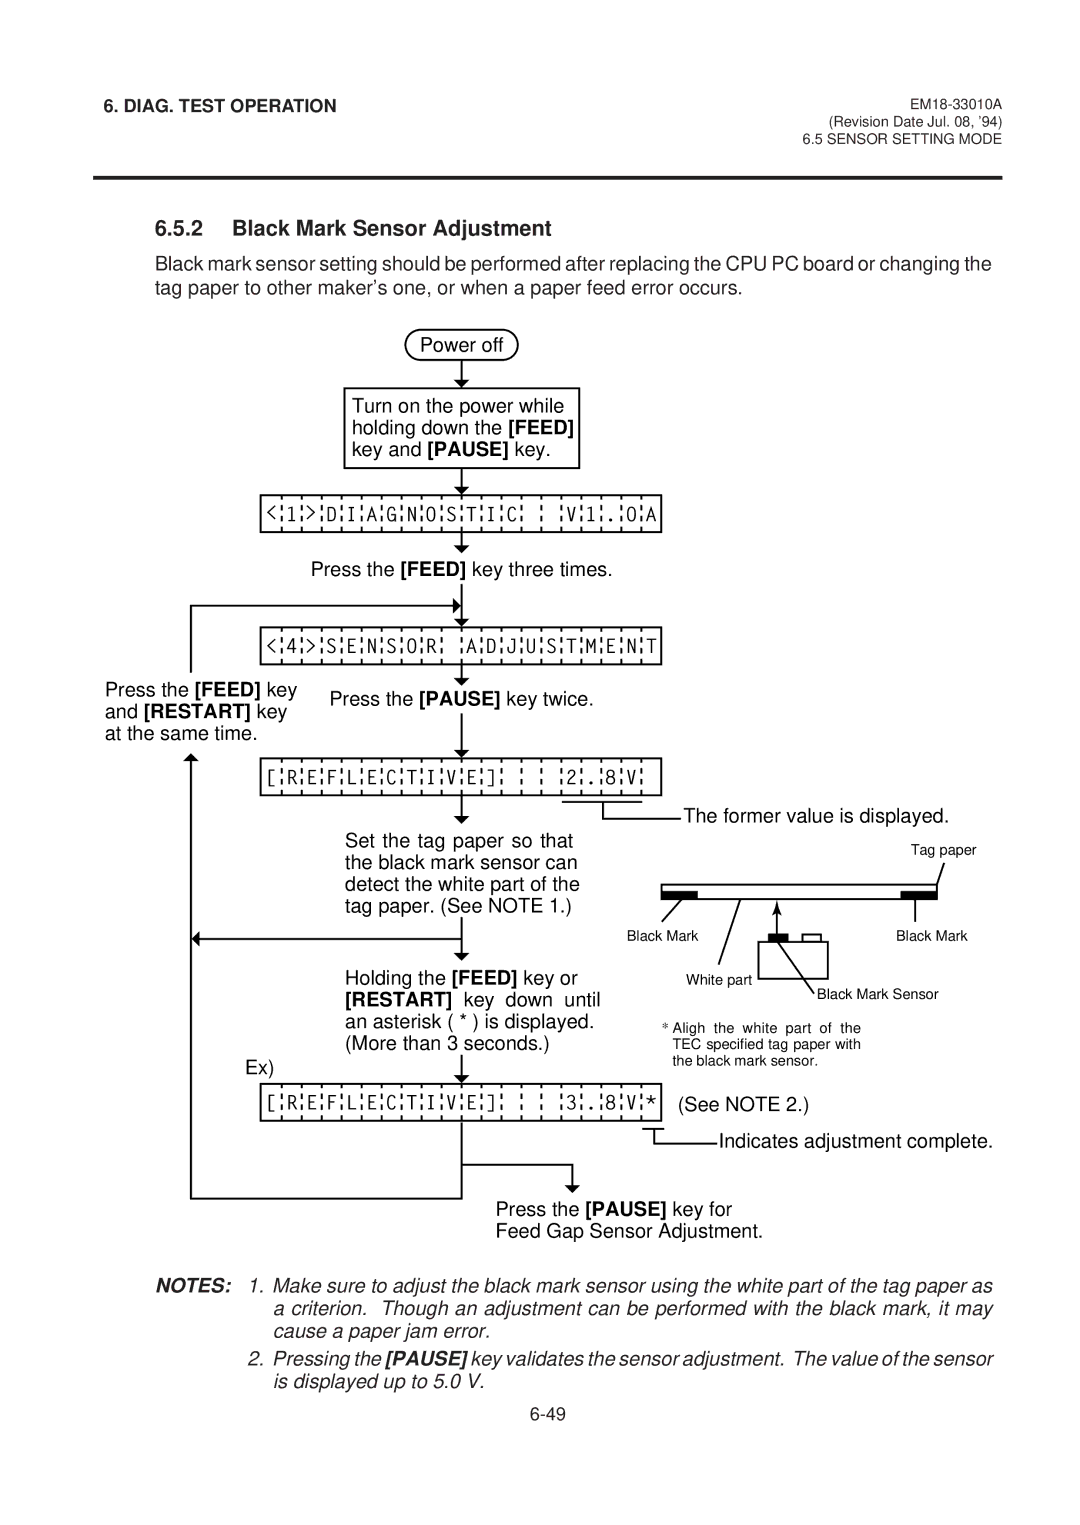
6.5.2Black Mark Sensor Adjustment
Black mark sensor setting should be performed after replacing the CPU PC board or changing the tag paper to other maker’s one, or when a paper feed error occurs.
Power off
Turn on the power while holding down the [FEED] key and [PAUSE] key.
< 1 > D I A G N O S T I C | V 1 . O A |
Press the [FEED] key three times.
< 4 > S E N S O R A D J U S T M E N T
Press the [FEED] key | Press the [PAUSE] key twice. | ||||
and [RESTART] key | |||||
|
|
| |||
|
|
| |||
at the same time. |
|
|
| ||
|
|
|
| ||
|
|
| |||
| [ R E F L E C T I V E ] | 2 . 8 V | |||
|
|
|
|
| |
The former value is displayed.
Set the tag paper so that the black mark sensor can detect the white part of the tag paper. (See NOTE 1.)
Black Mark
Tag paper
Black Mark
Holding the [FEED] key or [RESTART] key down until an asterisk ( * ) is displayed. (More than 3 seconds.)
Ex)
White part
Black Mark Sensor
*Aligh the white part of the TEC specified tag paper with the black mark sensor.
[ R E F L E C T I V E ] | 3 . 8 V * |
(See NOTE 2.)
Indicates adjustment complete.
Press the [PAUSE] key for
Feed Gap Sensor Adjustment.
NOTES: 1. Make sure to adjust the black mark sensor using the white part of the tag paper as a criterion. Though an adjustment can be performed with the black mark, it may cause a paper jam error.
2.Pressing the [PAUSE] key validates the sensor adjustment. The value of the sensor is displayed up to 5.0 V.