6. DIAG. TEST OPERATION
6.2 SLEF TEST MODE
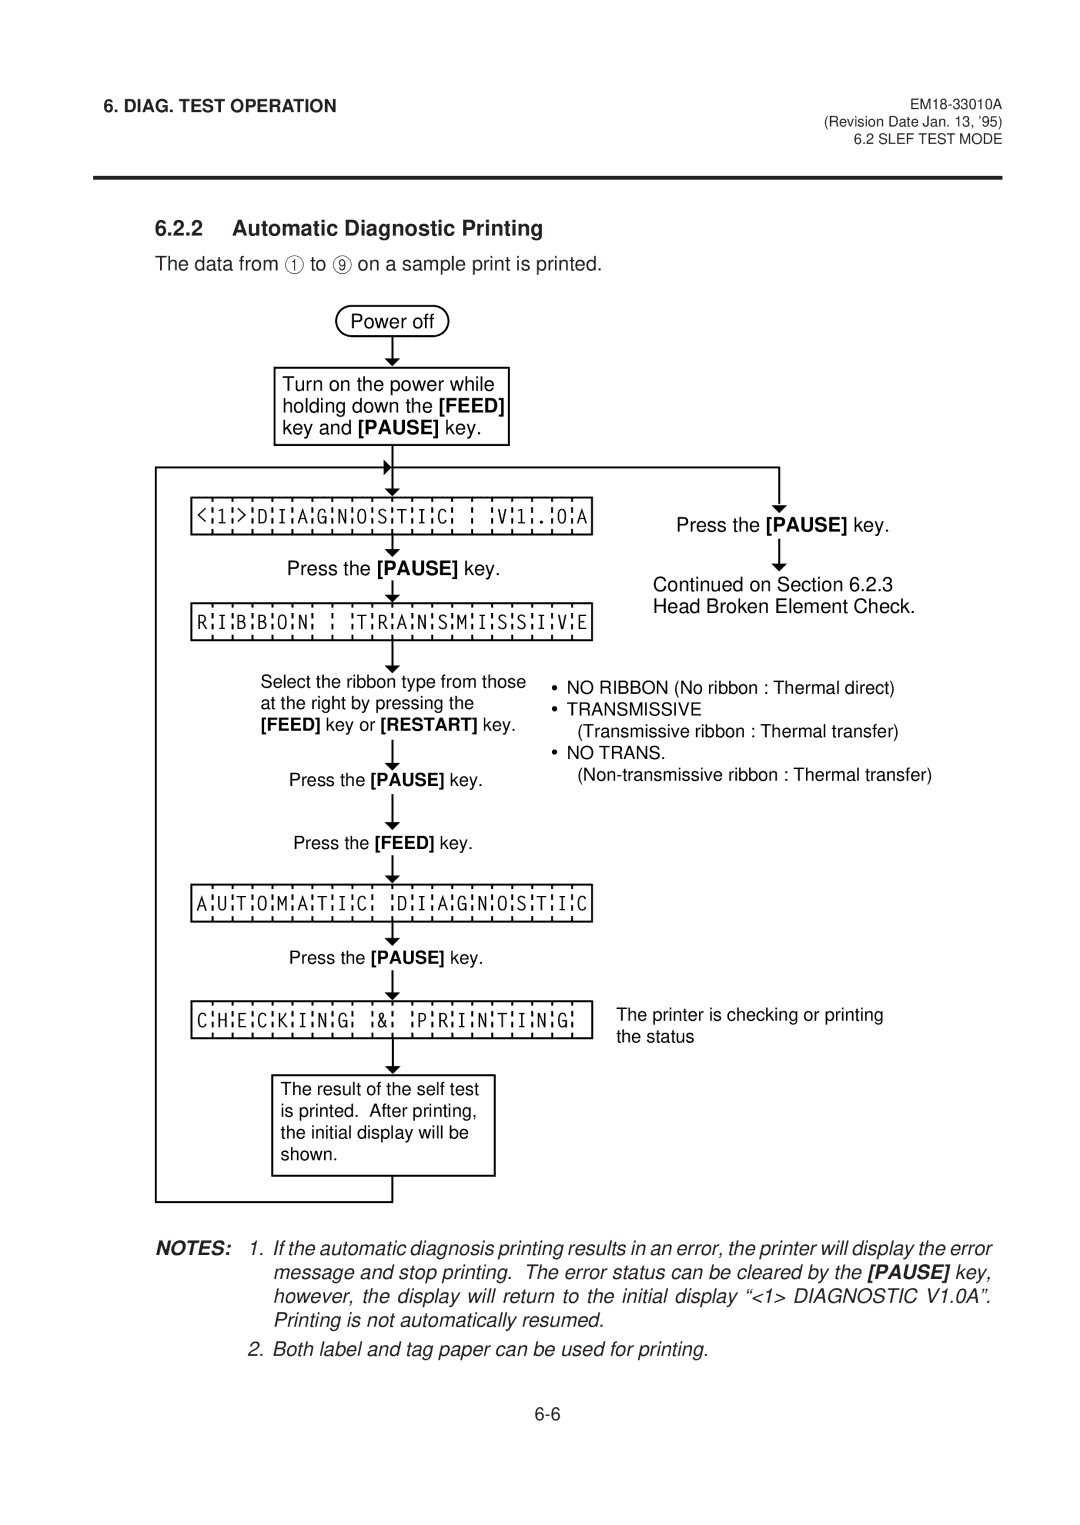
6.2.2Automatic Diagnostic Printing
The data from 1 to 9 on a sample print is printed.
Power off
Turn on the power while holding down the [FEED] key and [PAUSE] key.
< 1 > D I A G N O S T I C | V 1 . 0 A |
Press the [PAUSE] key.
R I B B O N T R A N S M I S S I V E
Press the [PAUSE] key.
Continued on Section 6.2.3 Head Broken Element Check.
Select the ribbon type from those at the right by pressing the [FEED] key or [RESTART] key.
Press the [PAUSE] key.
![]() NO RIBBON (No ribbon : Thermal direct)
NO RIBBON (No ribbon : Thermal direct)
![]() TRANSMISSIVE
TRANSMISSIVE
(Transmissive ribbon : Thermal transfer)
![]() NO TRANS.
NO TRANS.
Press the [FEED] key.
A U T O M A T I C D I A G N O S T I C
Press the [PAUSE] key.
C H E C K I N G & P R I N T I N G
The result of the self test is printed. After printing, the initial display will be shown.
The printer is checking or printing the status
NOTES: 1. If the automatic diagnosis printing results in an error, the printer will display the error message and stop printing. The error status can be cleared by the [PAUSE] key, however, the display will return to the initial display “<1> DIAGNOSTIC V1.0A”. Printing is not automatically resumed.