6. DIAG. TEST OPERATION
6.2 SELF TEST MODE
6.2 SELF TEST MODE
In self test mode the printer status is printed in two types of sample print. The result of the head broken element check is indicated in the display.
6.2.1Maintenance Counter Printing
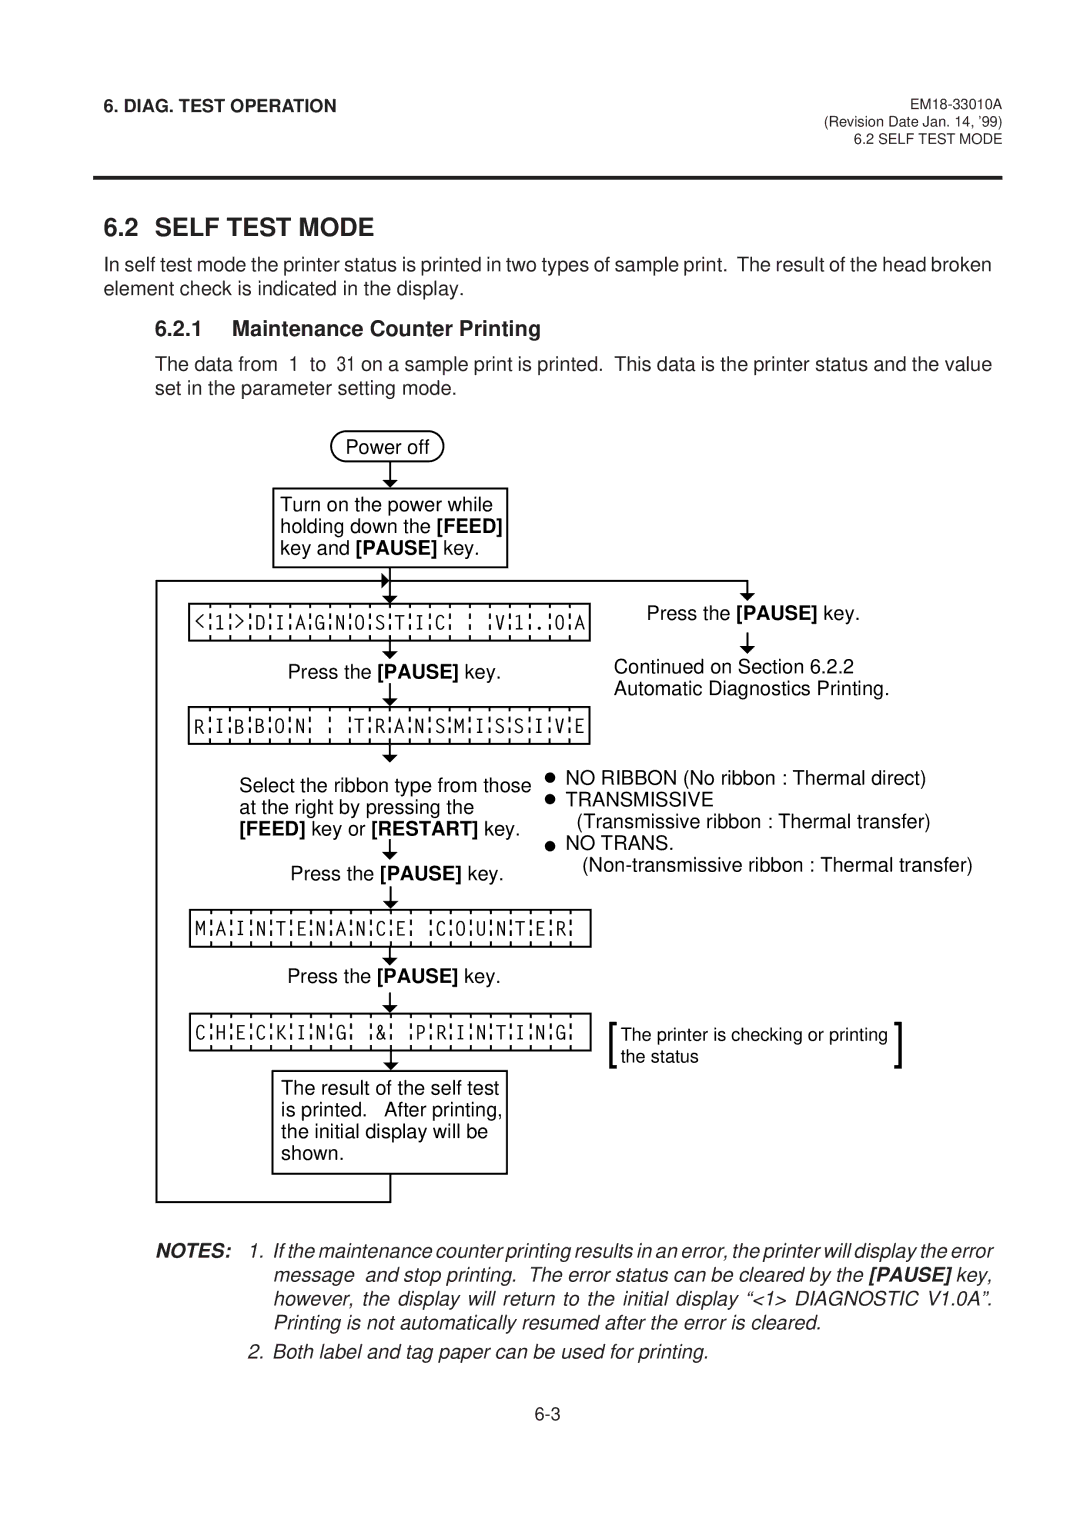
The data from 1 to 31 on a sample print is printed. This data is the printer status and the value set in the parameter setting mode.
Power off
Turn on the power while holding down the [FEED] key and [PAUSE] key.
< 1 > D I A G N O S T I C | V 1 . 0 A |
Press the [PAUSE] key.
Press the [PAUSE] key. | Continued on Section 6.2.2 | ||
|
|
| Automatic Diagnostics Printing. |
|
|
| |
|
|
| |
R I B B O N | T R A N S M I S S I V E |
| |
|
|
|
|
Select the ribbon type from those at the right by pressing the [FEED] key or [RESTART] key.
Press the [PAUSE] key.
![]() NO RIBBON (No ribbon : Thermal direct)
NO RIBBON (No ribbon : Thermal direct)
![]() TRANSMISSIVE
TRANSMISSIVE
(Transmissive ribbon : Thermal transfer)
![]() NO TRANS.
NO TRANS.
M A I N T E N A N C E C O U N T E R
Press the [PAUSE] key.
C H E C K I N G & P R I N T I N G
The result of the self test is printed. After printing, the initial display will be shown.
[Thethe statusprinter is checking or printing ]
NOTES: 1. If the maintenance counter printing results in an error, the printer will display the error message and stop printing. The error status can be cleared by the [PAUSE] key, however, the display will return to the initial display “<1> DIAGNOSTIC V1.0A”. Printing is not automatically resumed after the error is cleared.