6. DIAG. TEST OPERATION
6.4 TEST PRINT MODE
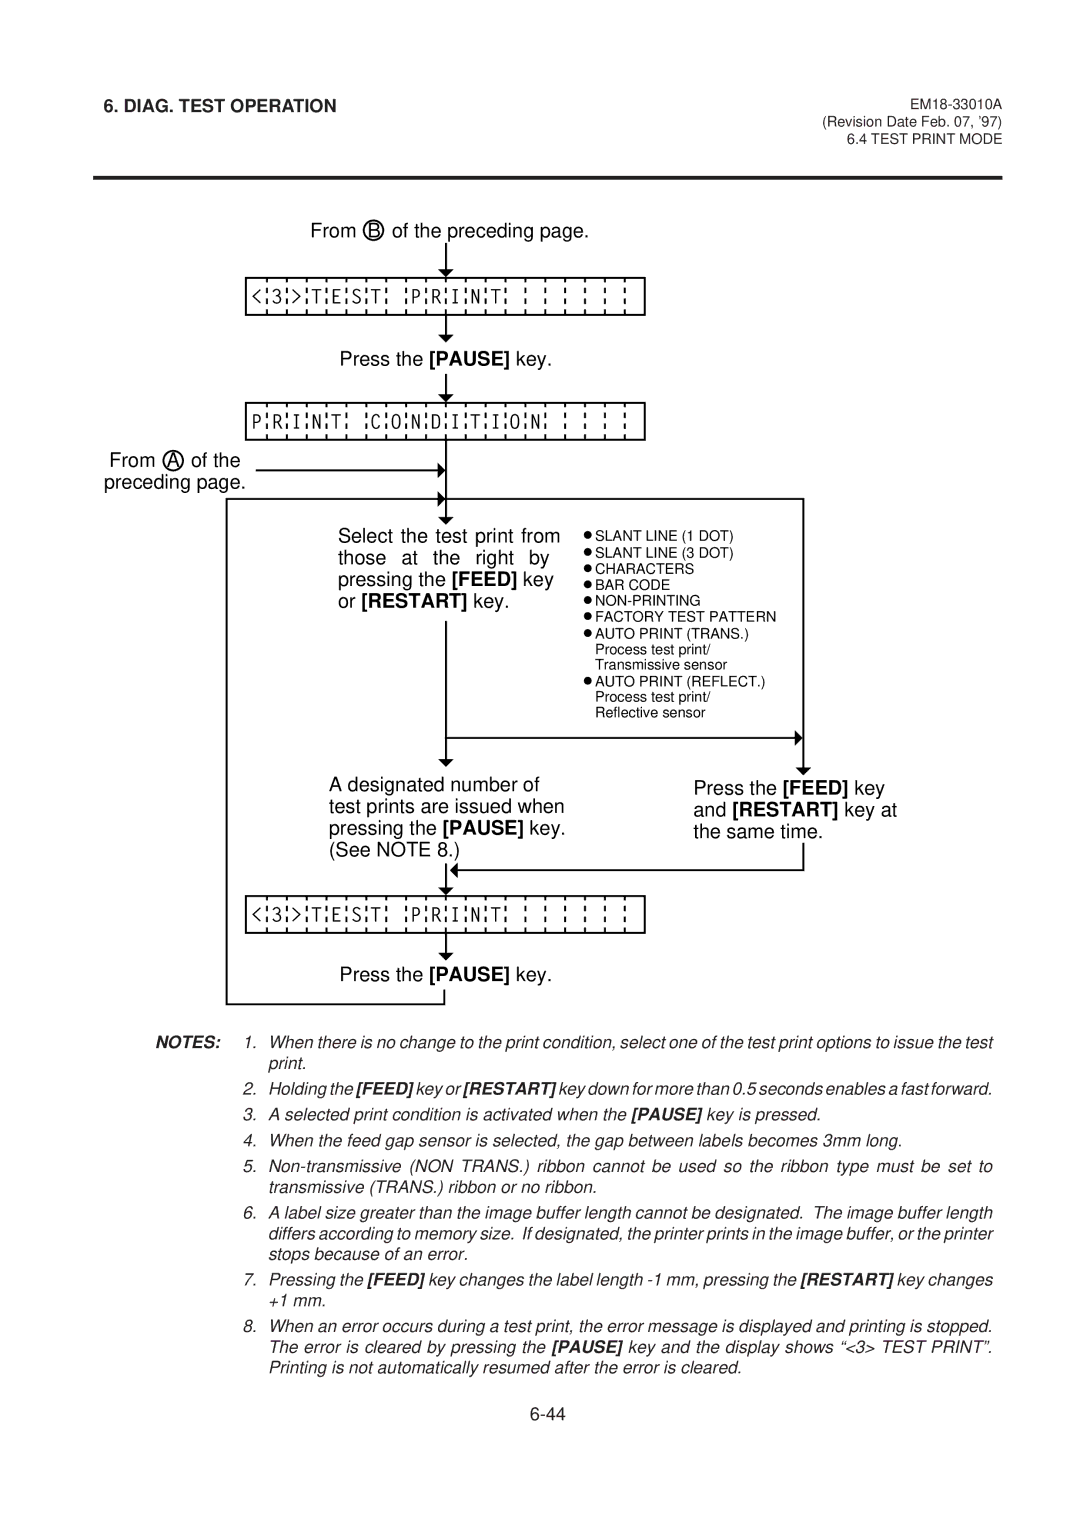
From B of the preceding page.
< 3 > T E S T P R I N T
Press the [PAUSE] key.
P R I N T C O N D I T I O N
From A of the preceding page.
Select the test print from those at the right by pressing the [FEED] key or [RESTART] key.
![]() SLANT LINE (1 DOT)
SLANT LINE (1 DOT)
![]() SLANT LINE (3 DOT)
SLANT LINE (3 DOT)
![]() CHARACTERS
CHARACTERS
![]() BAR CODE
BAR CODE
![]()
![]() FACTORY TEST PATTERN
FACTORY TEST PATTERN ![]() AUTO PRINT (TRANS.) Process test print/ Transmissive sensor
AUTO PRINT (TRANS.) Process test print/ Transmissive sensor
![]() AUTO PRINT (REFLECT.) Process test print/ Reflective sensor
AUTO PRINT (REFLECT.) Process test print/ Reflective sensor
A designated number of test prints are issued when pressing the [PAUSE] key. (See NOTE 8.)
Press the [FEED] key and [RESTART] key at the same time.
< 3 > T E S T P R I N T
Press the [PAUSE] key.
NOTES: 1. When there is no change to the print condition, select one of the test print options to issue the test print.
2.Holding the [FEED] key or [RESTART] key down for more than 0.5 seconds enables a fast forward.
3.A selected print condition is activated when the [PAUSE] key is pressed.
4.When the feed gap sensor is selected, the gap between labels becomes 3mm long.
5.
6.A label size greater than the image buffer length cannot be designated. The image buffer length differs according to memory size. If designated, the printer prints in the image buffer, or the printer stops because of an error.
7.Pressing the [FEED] key changes the label length
8.When an error occurs during a test print, the error message is displayed and printing is stopped. The error is cleared by pressing the [PAUSE] key and the display shows “<3> TEST PRINT”. Printing is not automatically resumed after the error is cleared.
