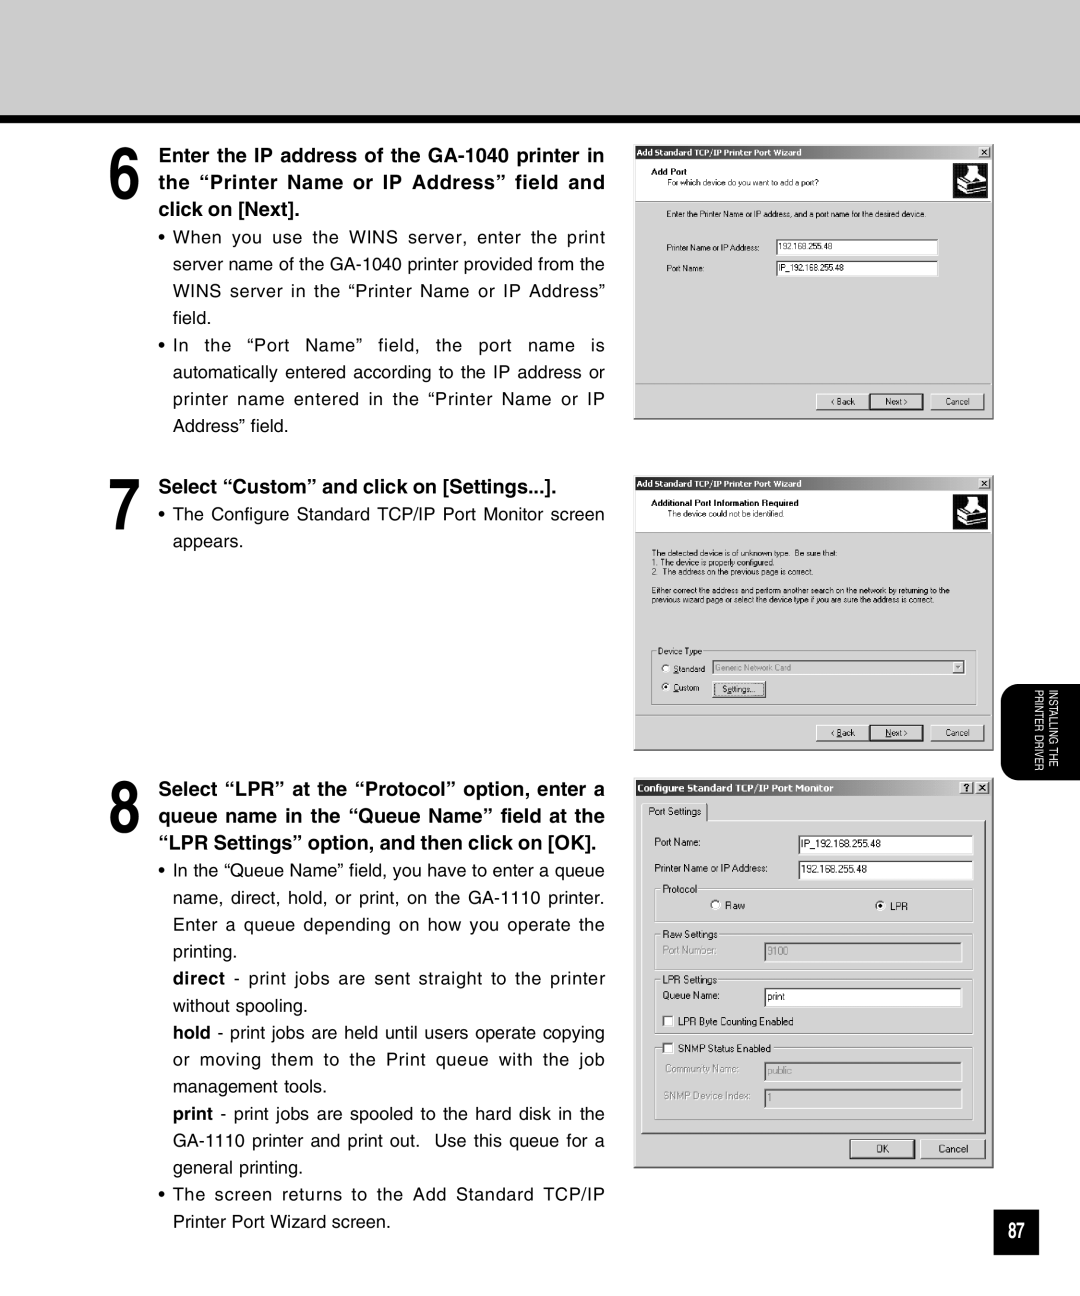
6 Enter the IP address of the
•When you use the WINS server, enter the print server name of the
•In the “Port Name” field, the port name is automatically entered according to the IP address or printer name entered in the “Printer Name or IP Address” field.
7 | Select “Custom” and click on [Settings...]. |
• The Configure Standard TCP/IP Port Monitor screen |
appears.
8 Select “LPR” at the “Protocol” option, enter a queue name in the “Queue Name” field at the “LPR Settings” option, and then click on [OK].
•In the “Queue Name” field, you have to enter a queue name, direct, hold, or print, on the
direct - print jobs are sent straight to the printer without spooling.
hold - print jobs are held until users operate copying or moving them to the Print queue with the job management tools.
print - print jobs are spooled to the hard disk in the
•The screen returns to the Add Standard TCP/IP Printer Port Wizard screen.
INSTALLING THE
PRINTER DRIVER
87