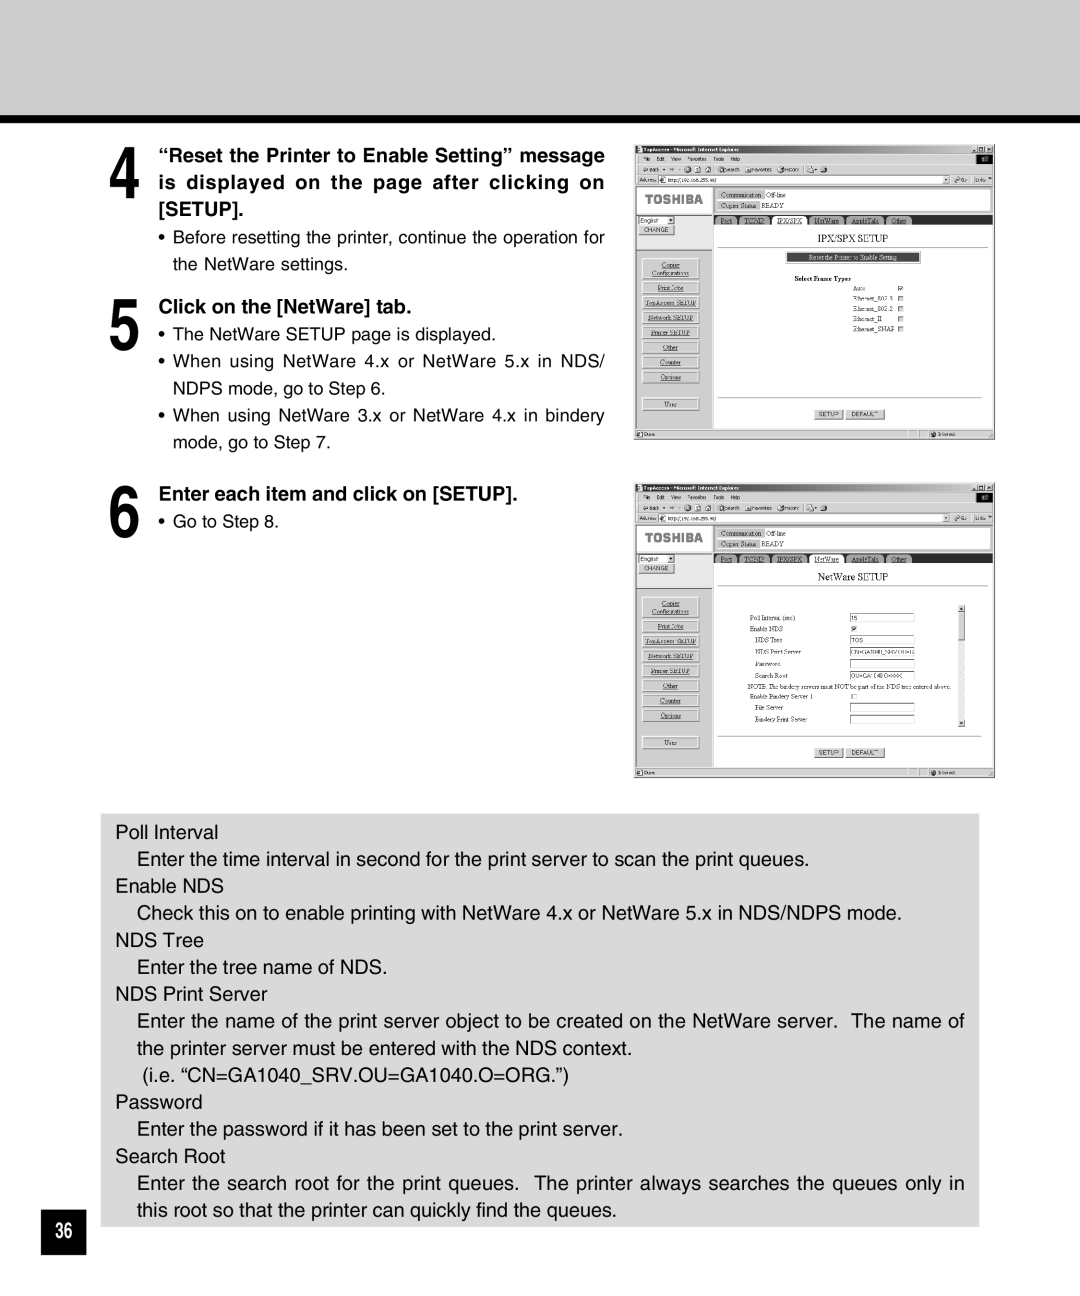
4 “Reset the Printer to Enable Setting” message is displayed on the page after clicking on [SETUP].
•Before resetting the printer, continue the operation for the NetWare settings.
5 | Click on the [NetWare] tab. |
• The NetWare SETUP page is displayed. | |
| • When using NetWare 4.x or NetWare 5.x in NDS/ |
| NDPS mode, go to Step 6. |
| • When using NetWare 3.x or NetWare 4.x in bindery |
| mode, go to Step 7. |
6 | Enter each item and click on [SETUP]. |
• Go to Step 8. |
36
Poll Interval
Enter the time interval in second for the print server to scan the print queues. Enable NDS
Check this on to enable printing with NetWare 4.x or NetWare 5.x in NDS/NDPS mode. NDS Tree
Enter the tree name of NDS. NDS Print Server
Enter the name of the print server object to be created on the NetWare server. The name of the printer server must be entered with the NDS context.
(i.e. “CN=GA1040_SRV.OU=GA1040.O=ORG.”) Password
Enter the password if it has been set to the print server. Search Root
Enter the search root for the print queues. The printer always searches the queues only in this root so that the printer can quickly find the queues.