SETTING UP THE WINDOWS PRINTING
When you print using the SMB printing, you must configure the Windows Printing settings on the GA- 1040 printer correctly. The Windows Printing can be set from the TopAccess.
PREPARATION:
Before setting up the Windows Printing, please make sure the following:
•The TCP/IP has been configured to enable the TopAccess.
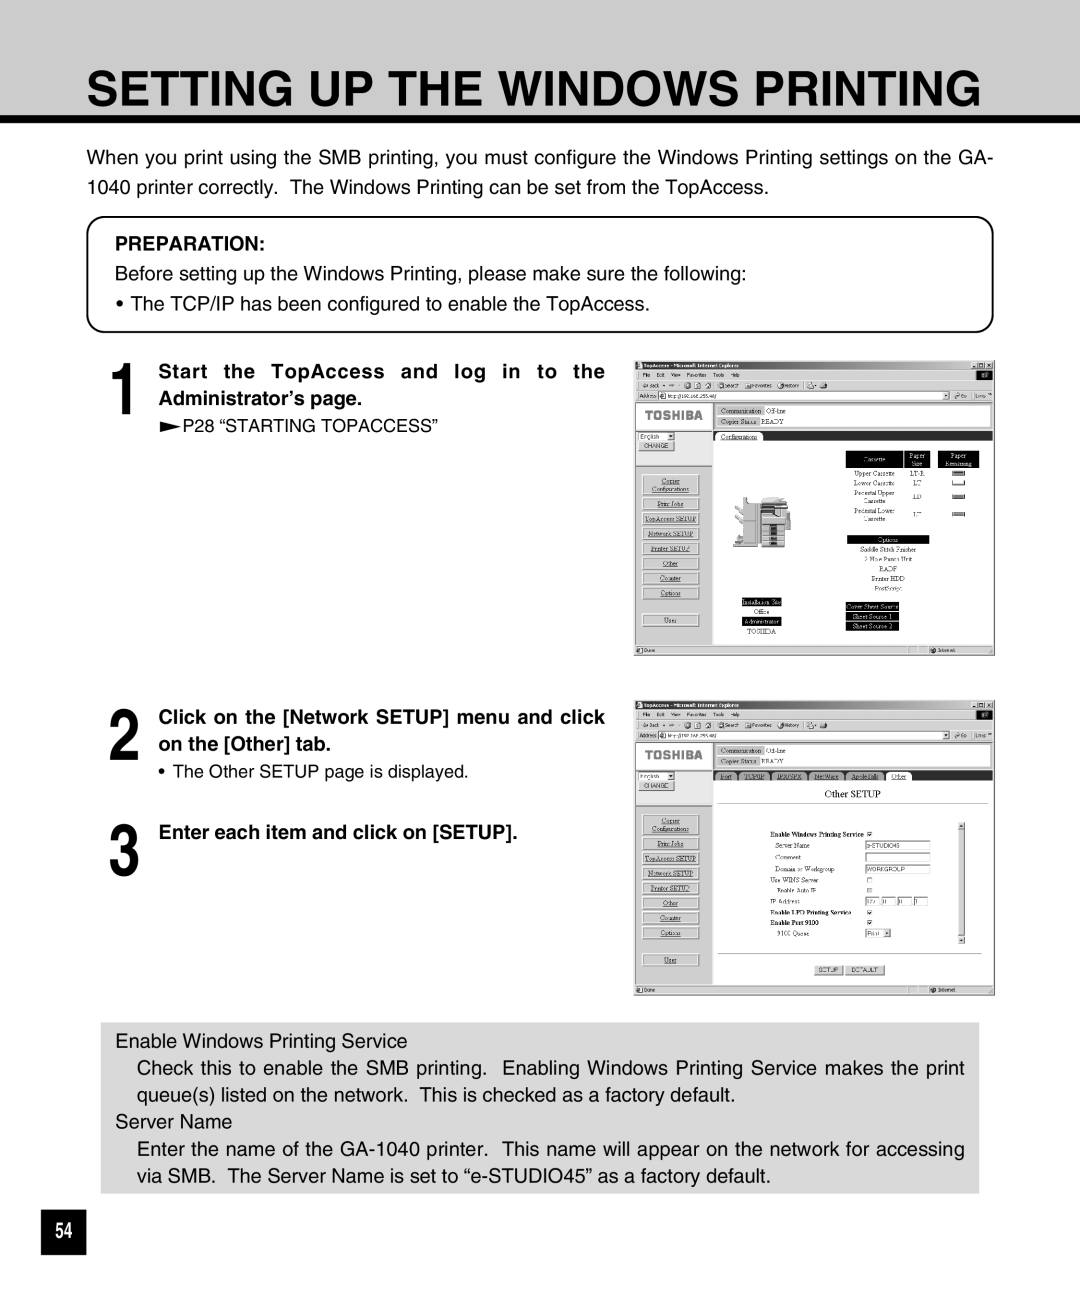
1 Start the TopAccess and log in to the Administrator’s page.
![]() P28 “STARTING TOPACCESS”
P28 “STARTING TOPACCESS”
2
3
Click on the [Network SETUP] menu and click on the [Other] tab.
•The Other SETUP page is displayed.
Enter each item and click on [SETUP].
Enable Windows Printing Service
Check this to enable the SMB printing. Enabling Windows Printing Service makes the print queue(s) listed on the network. This is checked as a factory default.
Server Name
Enter the name of the
54