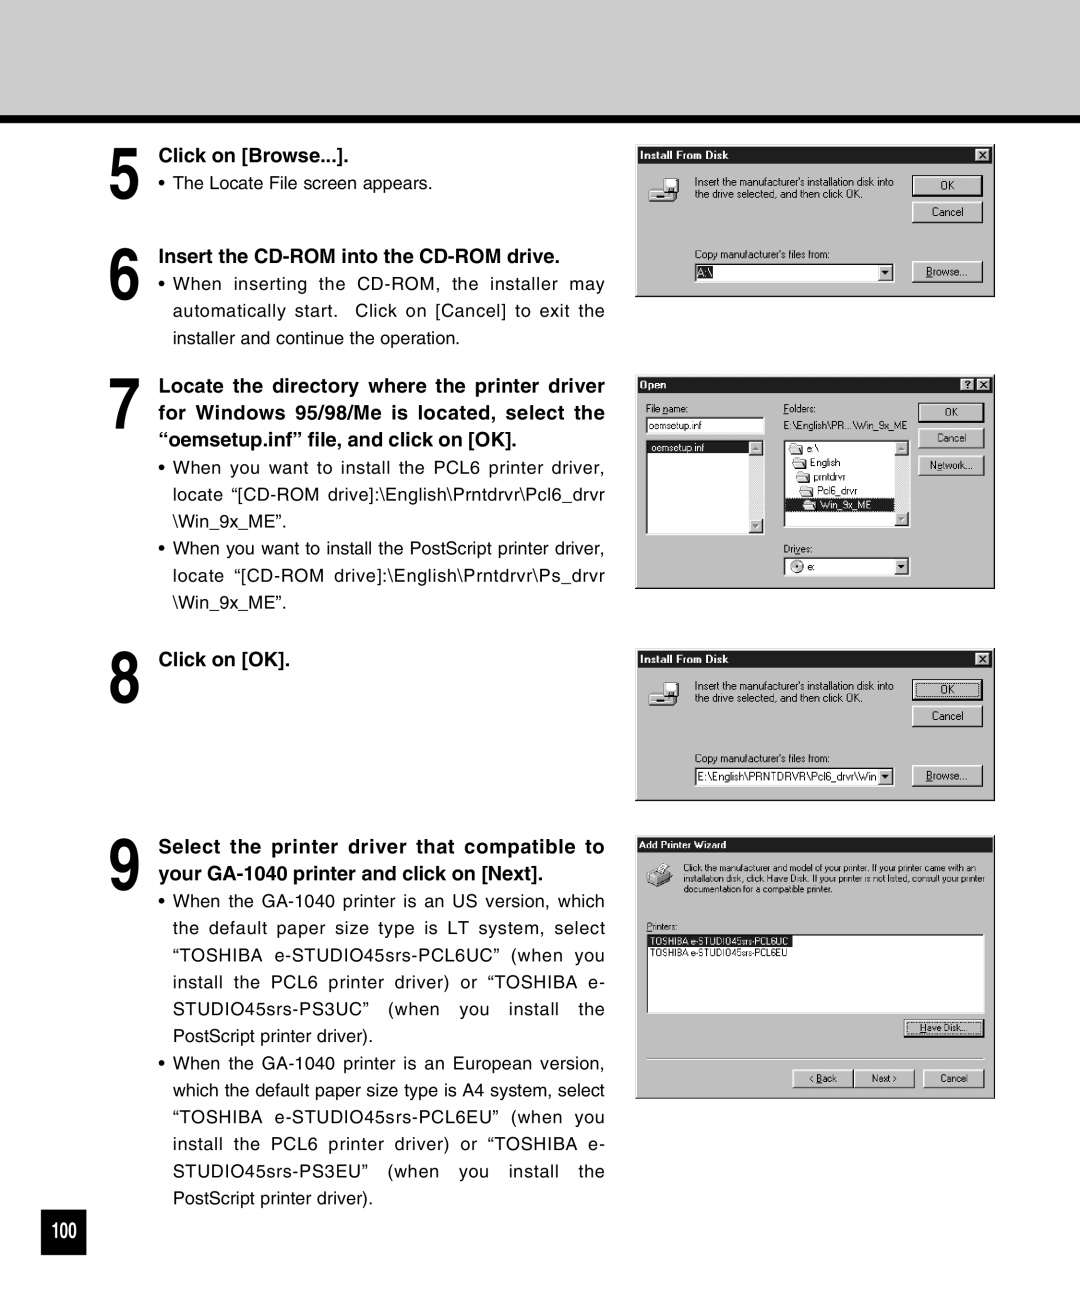
Locate the directory where the printer driver for Windows 95/98/Me is located, select the “oemsetup.inf” file, and click on [OK].
Insert the CD-ROM into the CD-ROM drive.
5 Click on [Browse...].
•The Locate File screen appears.
6 • When inserting the CD-ROM, the installer may automatically start. Click on [Cancel] to exit the installer and continue the operation.
7
•When you want to install the PCL6 printer driver, locate “[CD-ROM drive]:\English\Prntdrvr\Pcl6_drvr \Win_9x_ME”.
•When you want to install the PostScript printer driver, locate “[CD-ROM drive]:\English\Prntdrvr\Ps_drvr \Win_9x_ME”.
Click on [OK].
Select the printer driver that compatible to your GA-1040 printer and click on [Next].
•When the GA-1040 printer is an US version, which the default paper size type is LT system, select “TOSHIBA e-STUDIO45srs-PCL6UC” (when you install the PCL6 printer driver) or “TOSHIBA e- STUDIO45srs-PS3UC” (when you install the PostScript printer driver).
•When the GA-1040 printer is an European version, which the default paper size type is A4 system, select “TOSHIBA e-STUDIO45srs-PCL6EU” (when you install the PCL6 printer driver) or “TOSHIBA e- STUDIO45srs-PS3EU” (when you install the PostScript printer driver).
100