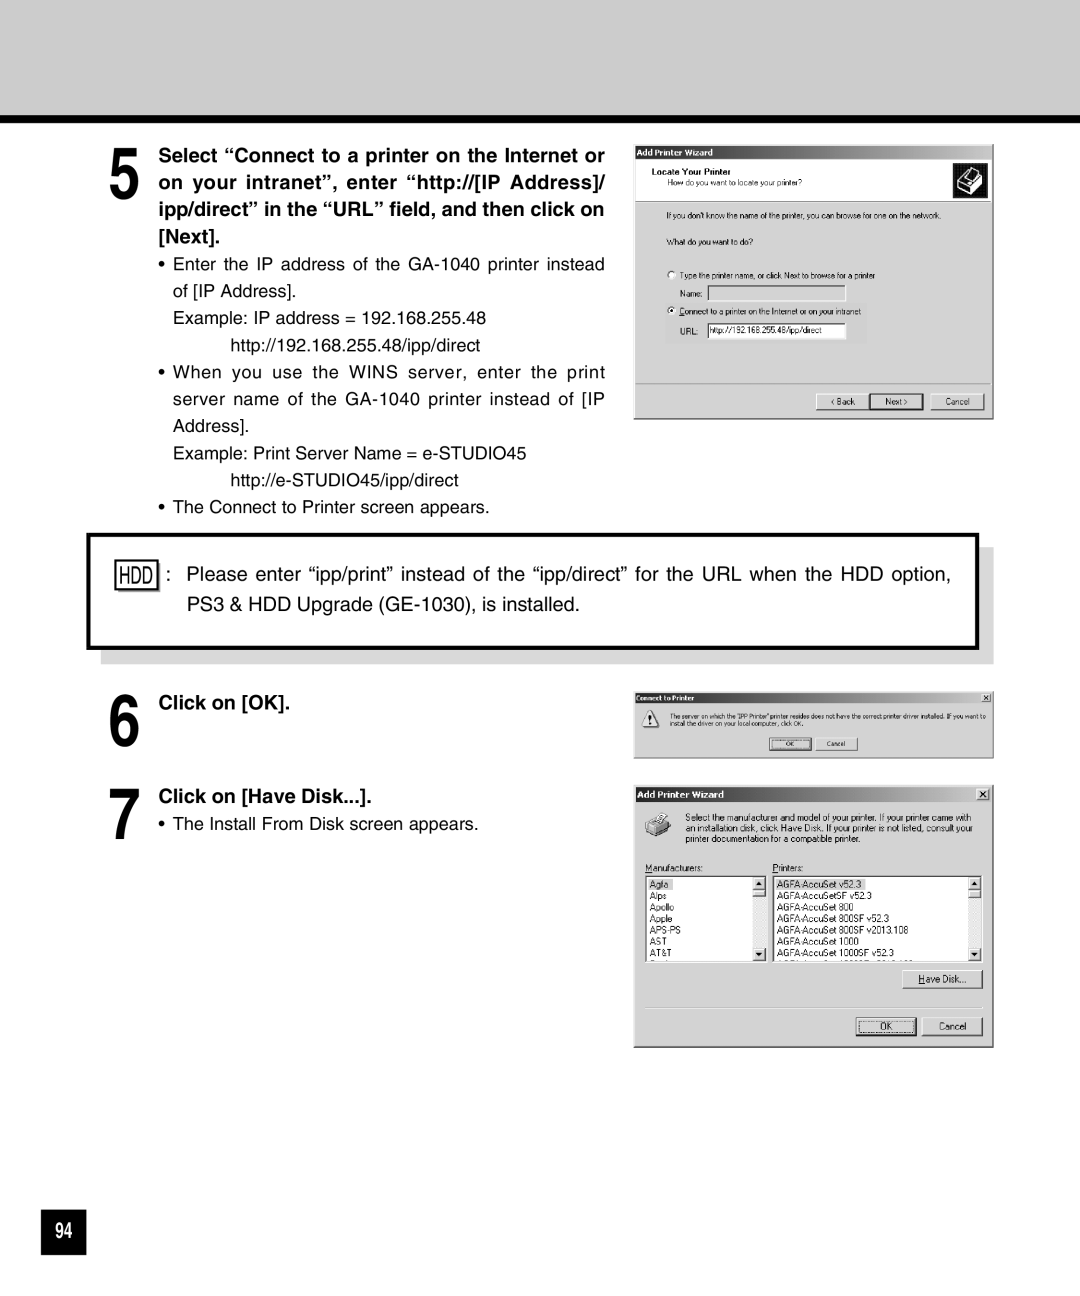
5 Select “Connect to a printer on the Internet or on your intranet”, enter “http://[IP Address]/ ipp/direct” in the “URL” field, and then click on [Next].
•Enter the IP address of the
Example: IP address = 192.168.255.48 http://192.168.255.48/ipp/direct
•When you use the WINS server, enter the print server name of the
Example: Print Server Name =
•The Connect to Printer screen appears.
![]()
![]() : Please enter “ipp/print” instead of the “ipp/direct” for the URL when the HDD option, PS3 & HDD Upgrade
: Please enter “ipp/print” instead of the “ipp/direct” for the URL when the HDD option, PS3 & HDD Upgrade
6
7
Click on [OK].
Click on [Have Disk...].
•The Install From Disk screen appears.
94
