| Creating the AdobePS Printer |
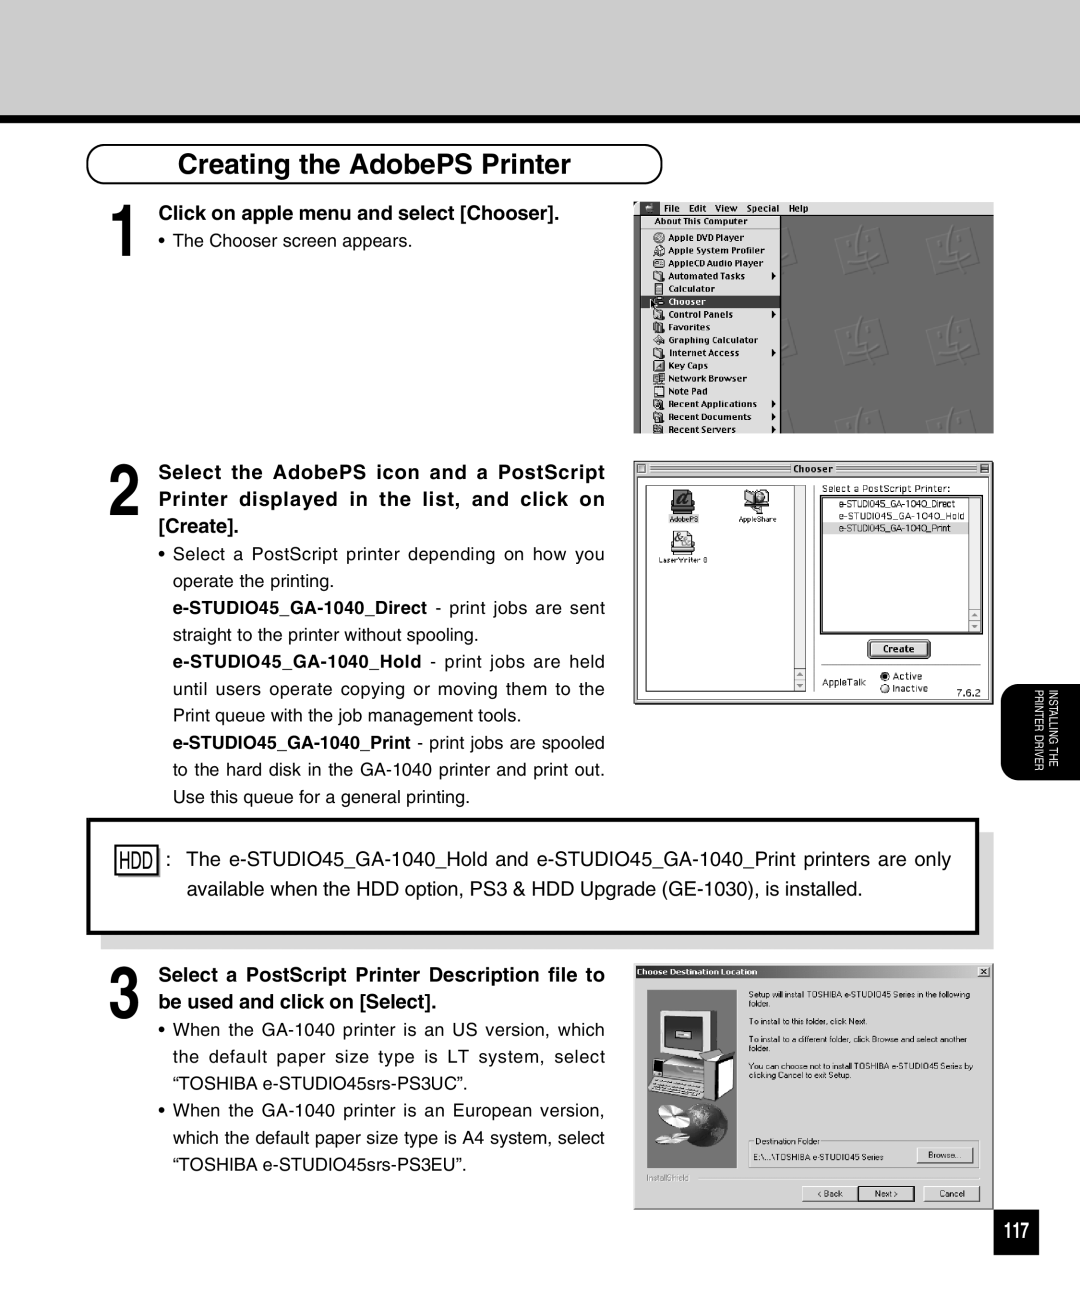
1 | Click on apple menu and select [Chooser]. |
• The Chooser screen appears. |
2 Select the AdobePS icon and a PostScript Printer displayed in the list, and click on [Create].
•Select a PostScript printer depending on how you operate the printing. e-STUDIO45_GA-1040_Direct- print jobs are sent straight to the printer without spooling. e-STUDIO45_GA-1040_Hold- print jobs are held until users operate copying or moving them to the Print queue with the job management tools. e-STUDIO45_GA-1040_Print- print jobs are spooled to the hard disk in the GA-1040 printer and print out. Use this queue for a general printing.

 : The e-STUDIO45_GA-1040_Hold and e-STUDIO45_GA-1040_Print printers are only available when the HDD option, PS3 & HDD Upgrade (GE-1030), is installed.
3 Select a PostScript Printer Description file to be used and click on [Select].
•When the GA-1040 printer is an US version, which the default paper size type is LT system, select “TOSHIBA e-STUDIO45srs-PS3UC”.
•When the GA-1040 printer is an European version, which the default paper size type is A4 system, select “TOSHIBA e-STUDIO45srs-PS3EU”.